The recently announced electric conversion kit looks great.
Pre-supposing that you have deep enough pockets for the £60,000 on top of the price of your bus.
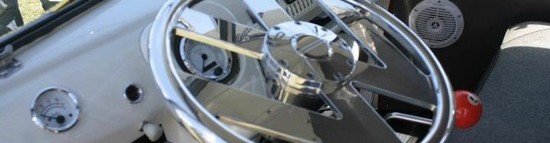
The recently announced electric conversion kit looks great.
Pre-supposing that you have deep enough pockets for the £60,000 on top of the price of your bus.
Virtual Coffee Morning brings people together by Events Manager Lorna Williamson
In these strange times, it’s easy to feel lonely. Even the passion you feel for your VW Campervan is not always enough on its own, let alone the frustration of knowing that the open road is still out there, waiting…
Enter stage right the VW Type 2 Owners Club. This British Club decided to create a feeling of togetherness when people can’t actually get together, with a simple event built around the joy that only a VW Campervan can bring.
Using the Club’s Facebook and Instagram pages plus good old email, the VWT2OC encouraged its members to take their Sunday morning coffee out to their van, and get a picture.
“Nick and I had been joking for weeks about camping out on the driveway,” said Events organiser Lorna, “…we always sleep better in Poppy! Combined with input from a member who wanted to feel connected, and the fact that you can never have too many photos of vans, we came up with the virtual coffee format. We’ll be trying something similar on VE Day!”
Not everyone had access to their van – some being in storage, in the workshop, at home while people were away caring for relatives, or simply not available on the oil rig where the member was based! But people valiantly entered the spirit of the thing, with well over 100 photos shared, and these are some of the results…


The write up for the 2019 event went like this:
When several people tell you they’ve had a great weekend, including some more skeptical folks, you know you’ve got a good formula. Our club’s annual general meeting, BBQ and camp was again this year held at Great Bourton, just a few miles off the M40.

This again seemed to include a willingness to sit, chat, walk to the local pub (5 and 30 minute options), watch the footie or Eurovision, learn a new craft and drink Tea, coffee and more. Club participants on our spacious rally field this year included 21 vans, 33 adults, three dogs, one toddler and one parrot. There were also seven portions of delivered fish ‘n’ chips, 50 burgers and over 100 pieces of cake.
We had visitors from Norwich, Swansea, Sheffield and Maidstone; Four corners indeed! The essential business of the weekend (the Annual General Meeting itself) was conducted smoothly and efficiently… Thank you for supporting your club. This left plenty of time for the other important activities mentioned earlier! Many members walked away with valued, if not highly original, prizes in our Wrapped Up Raffle… I am making fine use of my Outwell bottle, kindly donated with a number of other prizes by member Ian Crawford.
Other attendees also brought along splendid and amusing options to help raise funds. Thank you all for supporting your club!
I think Kevin’s Craft workshop may have created a new sharing tradition. Who ever heard of Flower Pumelling? Not me, for sure… But along with four other ladies and one young man I became quickly addicted to perfecting the arrangement, taping, turning and subsequent bashing of foraged blooms to create something approaching art.
Mine was far from the best offering, but gives you an idea (see photo). Fab idea, Kevin, thank you so much for sharing!

The next edition of the club magazine has been finished by our Editors and looks fantastic. It should be arriving through your door soon!
If you are enjoying the club magazine and have a story about a trip, an upgrade, a restoration or just a tip, send a contribution to our Editor Phil at editor@vwt2oc.co.uk.

Is it March already? I have barely had chance to remember to write the correct year and already we are into March, the clocks “spring” forwards this month and next month was to see our first camp!
April 4-19 – Easter Club Camp, Petruth Paddocks, Cheddar, Somerset (Club camp)
Sadly due to the Coronavirus, this has had to be postponed.
Head over to http://vwt2oc.co/wp/events/ for details of other events happening this year. If you are interested in any camp, contact our lovely Events Manager on events@vwt2oc.co.uk. She doesn’t bite.

Yes, it is that time again. Hurray! Finally, after the long winter in our non-mobile houses, we can get out our beloved vehicles.
Checklist
Hopefully you all followed the article Time for bed/ to help put your vehicle to bed for the winter. Now that spring is in the air and we are starting to think about getting out and communing in nature, this is a key time to get things ready.
Doors locks – there’s nothing more annoying than a failed lock. get it fixed now before the season really gets going. Door lock issues can be very straight forward but a simple lubrication can be key. Pun intended. A non residue lubricant is best to move the dirt away as WD40 can leave enough gunk to create issues. We favour silicon spray. A little into each lock.
Windscreen wipers – did they perish in the cold winter freezing them to the windscreen. Inspect and replace now.
Water – check the radiator if you have one. Ensure that the bottles that you emptied in the Autumn / fall have no mice, carefully hidden Christmas presents or mildew. Clean with a weak Milton solution if it is drinking water or food related.
Batteries – check the charge on each battery with a good meter. A flat battery can indicate an earth leak. A failed battery needs careful investigation.

Carburettor – Or equivalent. Check for good operation, no stuck flaps or other deterioration over winter. If you are a professional, this will be straight forward. If you are an amateur, a test drive very close to home will highlight problems! But only after the other checks.
Brakes – your vehicle should roll easily, otherwise this can indicate jammed brakes. Parking in gear for long periods of time can be better for your brake health than a jammed set of brakes. Check the brakes for operation. Check the brake fluid level. If it has been more than 5 years, change the brake fluid as it is hygroscopic and slurps up water incredibly quickly. Water is not a good fluid for applying the brake pads to the disks.
Seals – inspect all door seals for any signs of damage, water ingress or other problems and sort them out now. Glue any loose bits back down with the correct glue.
Windows – ensure that they all open and close fully. Or at least as fully as they did last year if applicable!
Ignition – Once you are feeling confident, get in to your pride and joy and turn on the ignition to number 2. Look at the lights on the dashboard. Check there ARE lights! Are they what you expect / are used to seeing? Have you got fuel (for those with a working fuel gauge)?
Crank it over – don’t expect it to start immediately but things should kick into life within a few seconds.
A little test drive on your driveway will allow you to test the brakes, maybe the steering and other important parts. Softly, softly.
Stay local, take your phone with you and warm clothing. Just in case!
Once you get home, assuming that you have a big smile on your face, make a list of snags, get indoors, put the kettle on and start planning for your summer.
Check out the events page and come and see us at a meeting soon!
Anyone with a vehicle knows that fuel is really rather flammable. This is why you do not smoke at a fuel station. Anyone owning or driving an old vehicle should be equally careful with the state of the fuel “line”.
From the tank to the engine, the fuel is permanently sitting in metal pipe, plastic pipe and rubber pipe. There is no off switch, so if this ruptures, you are dumping the entire contents onto the ground, so from a financial point of view it is a sensible idea to ensure this is all in good order. From a heartache perspective, it is imperative as well.

You do not want your pride and joy catching fire due to a leaking pipe spraying fuel onto something very hot in the engine bay.
Taking the Type 1 engine as an example, there are multiple systems in place as primitive fuel emissions systems.

The U shaped pipe number 9 is the one that you can see on the roof of the engine bay in a Bay window just above the number plate.
Red pipe numbered 24 needs a long arm and can be reached by putting your left hand up past the rear light cluster up the side of the bus and is quite a tricky little one to replace. If you can smell fuel always, especially if you sniff the air intake on the left side, that is often missing or perished.
The ones next to the fuel tank in the picture by green 24 are all behind the fuel tank firewall and need the engine to be removed.
My local VW mechanic recommends replacing all of the rubber components at least every 3 years and last time , we found that blue 24 in the middle of the picture on the pipe heading to the right was actually disconnected, causing fuel to spill over the top of the tank when turning right with a full tank! We had a clean section of tank and a lucky escape.
In summary. Ensure that your fuel system is inspected regularly by a competent mechanic and relevant parts are changed. The new fuels have either Biodiesel or Ethanol in them, which are not good on modern rubber pipes.
Have you got your BusFest tickets yet? The world’s largest transporter show is on again on 11 to 13 September. Details are at https://www.busfest.org/busfest/
It is also our club’s foremost event with over 70 club vehicles and over a hundred people in our dedicated club field in 2019.
https://www.busfest.org/busfest/ has the details of what to expect at the show. Over and above that, our dedicated club field has a members only marquee with tea and coffee, we normally have cakes, biscuits, a safe environment for the kids to run around together. For those who enjoy, we have a BBQ including vegetarian options too.
Come, see the show, enjoy the funfair rides, buy the auto jumble, eat the chips, then return to the quiet (ish) club field. Don’t forget to click on the club option and use the discount code available from the membership secretary membership@vwt2oc.co.uk.
Please note that the code is for members only.
Compiled by Ian Crawford
Parts (essential)
Accelerator Cable
Brake fluid
Bulbs (Various)
Clutch Cable
Coil
Condenser for Distributor
Distributor cap + (rotor arms x 2)
Distributor Contact Points (although electronic ignition such as Pertronix is highly recommended)
Fan belt
Fuel Hose & Clips Fuses (Various)
Grease
Handbrake cable (2 x needed)
Rocker Cover Gaskets x2
Spark Plugs
Starting Relay + Fuse Tools (various)
WD40
Parts (optional)
Aluminium Tube (to fit INSIDE fuel hose if leaking).
Battery Earth Strap
Brake pedal Return Spring
Clutch Fluid
Cable Ties
Carburettor Return Spring
CV Axle Boot Cap
Distilled Water
Dynamo Carbon Brushes
Voltage Regulator
Tools
Allen Key
Battery Tester (6 x LED’s)
Feeler Gauges
Hacksaw Blades
Insulation Tape
Plastic Wire Ties
Shorting Links + Micro Switch & Croc Clips
Stanley Knives
Tyre Pressure Gauge
Vaseline
Miscellaneous
Magnetic Dish Holder
Magnifying Glass
Multi-Meter + spare PP3 battery
Pill Pot containing
a) Matches,
b) Lighter,
c) Flints,
d) Water Purifying Tablets,
e) Sweeteners,
f) Sewing Kit,
g) Safety Pins,
h) Buttons
Tyre Valve Cores
Walking Boot Laces (waxed)
Wine corks
Website Manager Nick agrees with most of these. However a wine cork is not something he has ever needed.
Step 1 Changing engine oil
Engine oils should be changed at 3000 mile intervals, to ensure that your engine doesn’t suffer from undue wear and tear. Some people even suggest that it should be changed every 2000 miles. If this seems a little extreme just think about how much it will cost to replace your engine should you have a catastrophic failure due to excessive engine wear! The actual oil change interval is up to you, but I wouldn’t recommend that you go more than 3000 miles. Always check you are using the recommended oil for your engine.
Step 2 Tyre pressures
It is important that your tyres are inflated to the right pressure. Your buses ride will be better and its road handling will be much improved, which also means that it will be safer. Check your tyre pressures at least every two weeks and always before a long journey. Make sure you know the correct tyre pressures for your model of VW Bus.
Step 3 Windscreen Washer bottle
The washer bottle on a VW Bus is located behind the front kick panel to the left of the steering column. The peculiar part of the set up is the fact that it needs compressed air to force the water from the bottle to the windscreen. You can attach a normal air line at your local garage and pressurize to 40psi. Warning, do not pressurize it any more than 40psi because you run the risk of blowing the pipes of the washer nozzles. It’s a lot of work to put them back on!
Step 4 Gearbox Oil
Although the gear box should only be changed every 30000 miles it may need topping up from time to time. The fill plug is located on the side of the gear box near to the clutch cable. The official documentation suggests you will need a 17mm Hex spanner, but mine seems to be 18mm! Use Hypoid EP80/90 gear oil and fill so the oil is level with the bottom of the hole. It is essential that you locate your bus on a flat surface when you perform this task.
Step 5 Spark plugs
Cleaning your spark plugs should be undertaken every 5000 miles or so. The electrode gap should be 0.7mm or 0.028in. You can clean the electrode with a little piece of emery cloth or a fine wet and dry. Personally I prefer to completely change my spark plugs every 10000 miles and check them every 5000 miles or so.
Step 6 Distributor Cap
When you replace or check your spark plugs it is necessary to inspect the condition of the distributor electrodes because they can become corroded. If so they can be cleaned or replaced depending on the level of corrosion.
Step 7 Rotor arm
The rotor arm (inside the distributor), should be checked, cleaned or replaced every 5000 miles or when you check the condition of your spark plugs. They are not expensive so I prefer to replace new for old on every service.
Step 8 Ignition points
The Ignition points should be checked every time you undertake the general electrical servicing outline above. The points gap should be 0.4mm or 0.016in and should be clean. If they are pitted or corroded in any way they will need replacing.
Step 9 Fan Belt
Check every time you look in the engine bay! Its easy. 10 – 15mm play is fine, anymore and you should adjust. There are some small shims that can be removed if the fan belt is too loose.
Step 10 Air filter (Oil Bath Type)
The air filter will need to be cleaned and the oil replaced every 5000 miles. Drain the old oil, clean and fill up with new engine oil. Make sure you dispose of your engine oil properly. Your local council will have an oil disposal unit.
Step 11 Fuel lines and hoses
Check the condition of your fuel lines every time you follow this service check list. If they are chapped in anyway replace them. Remember – no smoking! You can get very high quality steel lines if you prefer. Whilst you are doing this you can check the heater pipes for holes or badly fitting joints and repair if necessary. Having holes or bad joints will reduce your buses chance of keeping you warm.
Step 12 Brake fluid
Brake fluid should be checked and topped up periodically. The brake fluid reservoir can be found behind the front kick panel.
Step 13 Brake Pads
The brake pads can be checked very easily on a bus, although you will need to remove the wheels. To do this jack up the vehicle and remember to always use axle stands. You will be able to see if your pads need replacing, they should be at least 7mm thick.
Step 14 Axle
The axle will need to be greased every 5-7000 miles. There are multiple points that need greasing. These are the steering idler that is located in the middle of the axle and the four trailing arm bushes at the ends. So a grease gun will be a great buy!
Step 15 Clutch
Your clutch should be checked for play periodically and should have around 20mm play at the foot peddle. You should also grease the clutch cable periodically to help its ability to work efficiently and to stop it breaking because it gets stuck.