Website Manager and General Committee member of the Owners Club.
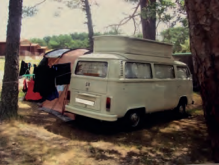
Owner of Eric the Viking (converted panel van with Viking roof) undergoing complete restoration. Tinkerer to Poppy the camper van (1972 Crossover dormobile).
Spring has sprung and those classics will be starting to come out of hibernation. After months in the garage with the occasional start up to keep it ticking over, your engine can suffer. I have personally experienced this after months of an engine sitting during restoration work and being moved from one side of a workshop to another. Once the work was complete, trying to drive away from the workshop, my T2 Bay Campervan wouldn’t accelerate down the road. Reason – fouled spark plugs.
I have also had a spark plug with a closed gap (don’t even ask how that happened, but it involved losing part of the carburettor through the engine… lucky it didn’t do any other damage!) The condition of your spark plugs can make a massive difference to the running of your engine, so it’s worth checking them every so often, especially after a period of time unused. Hopefully the following information will help to make you a spark plug expert. Before starting work on checking your plugs, it is helpful to have the right tools to hand; accessing the rear two spark plugs at cylinders 1 and 3 can be a real fiddle, especially on later twin-port engines where access is further compromised by the inlet manifolds. A short 21mm socket and universal joint may give you a bit more flexibility. When checking the plugs, it can help to remove each lead and plug individually so that you don’t get them mixed up. This will cause an incorrect firing order and your engine will not run. When removing the ignition lead from the plug, be sure to pull it off by the connector, not the lead itself, as you’ll run the risk of pulling the lead off the connector (trust me!) If you notice any damage to a connector or if a lead is a lose fit, it is best to go out and buy a new HT lead set. Make sure you have the socket on the plug properly when you’re undoing them and it’s also best to do all this while the engine is cold to avoid burning yourself! Once the plug is out, take a good look. Is it brown, grey, sooty or oily? If the engine is running right, it should be light brown or grey. If it is sooty but dry, your engine is running rich and not burning all the fuel. If the insulator is white and flaky then your engine is running too lean. Either way, you’ll need to tune your carb to adjust the fuel/air mixture. If the plug is wet and oily, there are a couple of possibilities. The first is that you’re not getting a spark, in which case you may have noticed a misfire. If this is the case, check the HT lead connection at the plug and also where it pushes into the top of the distributor cap. A worse scenario is that your engine has worn piston rings and/or valve guides, which means a rebuild is on the cards. If there is serious carbon build up on the plug, or what looks like molten bits of metal, chances are your ignition timing is out. Whatever their condition, while the plugs are out of the engine they will benefit from a good clean up using a brass wire brush. While you are at it, check the spark plug gaps using a feeler gauge. For most air cooled engines the gap should be 0.024” or 0.6mm, however check your workshop manual because the gap will be different on some engines. If the gap is correct, the gauge should slip in and out without much resistance. If it is too loose, you can adjust it with a gentle squeeze in a vice to close it slightly, or if the gap is too tight, carefully prise open the contact with a flat bladed screwdriver. Spark plugs should be checked every 3000 miles and replaced every 10,000 miles as part of your service routine. If you suspect a poor running engine there is no harm fitting new ones sooner, they are relatively cheap for a set. When refitting, always start screwing the plug back in by hand, only using the socket for the final tightening, otherwise you risk forcing a cross thread. If you feel any resistance early on, unscrew and carefully try again
The mechanic has noticed a recent uplift in questions and concerns surrounding the upcoming introduction of E10 fuels. The following is information provided by the Federation of British Historic Vehicles Clubs that we hope members will find useful. Federation of British Historic Vehicles Clubs – Introduction of E10 petrol After an extensive consultation process, the Department for Transport has announced that they will legislate to introduce E10 petrol as the standard 95-octane petrol grade by 1 September 2021. They will also require the higher-octane 97+ ‘Super’ grades to remain E5 to provide protection for owners of older vehicles. This product will be designated as the ‘Protection’ grade. The introduction of the 95-octane E10 grade and the maintenance of the Super E5 protection grade will be reviewed by the Government after 5 years to ensure they remain appropriate to the needs of the market: In relation to the E5 protection grade, such a review will examine market developments over the period. HM Government have sought to reassure FBHVC members and historic vehicle owners that, without a suitable alternative becoming available, it is highly likely the Super E5 protection grade would continue to be available. Filling stations that stock 2 grades of petrol and supply at least one million litres of fuel in total each year will need to ensure one product is the Super E5 protection grade. While not all filling stations meet these criteria, almost all towns across the UK will have a filling station that supplies the ‘Super’ grade and currently one major retailer, a national supermarket group, has committed to offer the product. The main exception to this is in certain parts of the Highlands, north and west coast of Scotland, which will be covered by an exemption process and allowed to continue to market the 95-octane E5 grade. The Federation therefore recommends that all vehicles produced before 2000 and some vehicles from the early 2000s that are considered non-compatible with E10 – should use the Super E5 Protection grade where the Ethanol content is limited to a maximum of 5%. To check compatibility of vehicles produced since 2000, we recommend using the new online E10 compatibility checker: https:// www.gov.uk/check-vehicle-e10-petrol . It should be noted that some Super E5 Protection grade products do not contain Ethanol as the E5 designation is for fuels containing up to 5% Ethanol. Similarly E10 petrol can contain between 5.5% and 10% ethanol by volume.
Product availability varies by manufacturer and geographical location and enthusiasts should check the situation in their location.
Latest News: The federation’s fuels specialist Nigel Elliott has received some new questions with regards to ethanol and the use of E10 in historic vehicles and his thoughts are as follows: There are three key areas of concern with Ethanol compatibility with historic and classic vehicle fuel systems: Corrosion of metal components Elastomer compatibility – swelling, shrinking and cracking of elastomers (seals and flexible pipes) and other unsuitable gasket materials Air/fuel ratio enleanment Corrosion of metal component Ethanol has increased acidity, conductivity and inorganic chloride content when compared to conventional petrol which can cause corrosion and tarnishing of metal components under certain conditions. These characteristics are controlled in the ethanol used to blend E5 and E10 European and UK petrol by the ethanol fuel specification BS EN15376 in order to help limit corrosion. Corrosion inhibitor additives can be very effective in controlling ethanol derived corrosion and are recommended to be added to ethanol in the BS EN15376 standard. It is not clear if corrosion inhibitors are universally added to ethanol for E5 and E10 blending so as an additional precaution it is recommended that aftermarket corrosion inhibitor additives are added to E5 and E10 petrol. These aftermarket ethanol corrosion inhibitor additives often called ethanol compatibility additives are usually combined with a metallic valve recession additive (VSR) and sometimes an octane booster and have been found to provide good protection against metal corrosion in historic and classic vehicle fuel systems. Elastomer compatibility As the ethanol molecule is smaller and more polar than conventional petrol components, there is a lower energy barrier for ethanol to diffuse into elastomer materials. When exposed to petrol/ethanol blends these materials will swell and soften, resulting in a weakening of the elastomer structure. On drying out they can shrink and crack resulting in fuel leaks. Some aftermarket ethanol compatibility additives claim complete protection for operating historic and classic vehicles on E10 petrol. The FBHVC is not aware of, or has tested any additives that claim complete fuel system protection with respect to elastomer and gasket materials for use with E10 petrol. The FBHVC therefore recommends that elastomer and gasket materials are replaced with ethanol compatible materials before operation on E10 petrol. Air/fuel ratio enleanment Ethanol contains approximately 35% oxygen by weight and will therefore result in fuel mixture enleanment when blended into petrol. Petrol containing 10% ethanol for example, would result in a mixture-leaning effect equivalent to approximately 2.6%, which may be felt as a power loss, driveability issues (hesitations, flat spots, stalling), but also could contribute to slightly hotter running. Adjusting mixture strength (enrichment) to counter this problem is advised to maintain performance, driveability and protect the engine from overheating and knock at high loads. Modern 3-way catalyst equipped vehicles do not require mixture adjustment to operate on E10 petrol because they are equipped with oxygen (lambda) sensors that detect lean operation and the engine management system automatically corrects the fuel mixture for optimum catalyst and vehicle operation. Operating classic and historic vehicles on E10 petrol If you should decide to make the necessary vehicle fuel system modifications together with the addition of an aftermarket additive to operate your classic or historic vehicle on E10 petrol. The FBHVC strongly recommends that you regularly check the condition of the vehicle fuel system for elastomer and gasket material deterioration and metallic components such as fuel tanks, fuel lines and carburettors for corrosion. Some plastic components such as carburettor floats and fuel filter housings may be become discoloured over time. Plastic carburettor float buoyancy can also be affected by ethanol and carburettors should be checked to ensure that float levels are not adversely affected causing flooding and fuel leaks. Ethanol is a good solvent and can remove historic fuel system deposits from fuel tanks and lines and it is advisable to check fuel filters regularly after the switch to E10 petrol as they may become blocked or restricted. If your vehicle is to be laid up for an extended period of time, it is recommended that the E10 petrol be replaced with ethanol free petrol which is available from some fuel suppliers. Do not leave fuel systems dry, as this can result corrosion and the shrinking and cracking of elastomers and gaskets as they dry out.
For this edition of Member’s Motor, we look at Rachel’s Bay, called “Skye”. This is what she had to say about it.
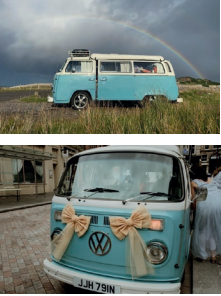
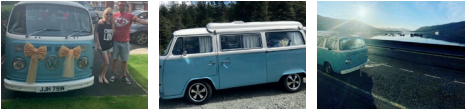
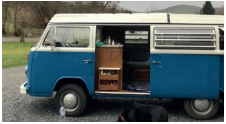
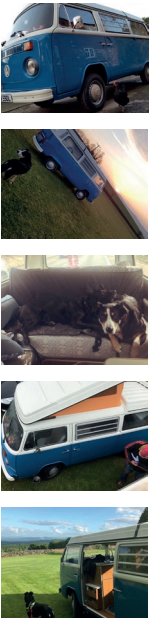
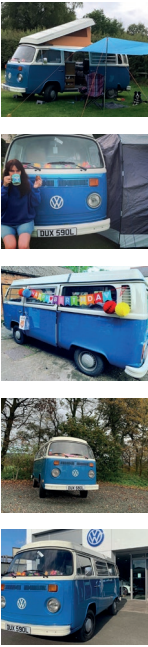
We have a blue T2 called Skye. We originally found her in May 2018 when someone local to us used to hire her out, so we hired her for a trip to Scotland. We took the van around the highlands, including to the Isle of Skye. My husband Kyle (then boyfriend) proposed to me on the trip, which was a total surprise, so that trip and the van had some very special memories for us. In June 2019 we got married and I was waiting for my wedding car to pick me up, instead of the car arriving with my dad in it, Skye the T2 arrived with our friend as the driver! I was shocked as I had not seen Skye since we had got engaged and I thought “How lovely, he’s hired her again as a surprise”. He had decorated her with wedding ribbons and bunting inside etc. When I got in the van (with my dad inside) Keith our friend who was driving, passed me a note which had the typical wedding phrase: Something old: Skye is from 1975. Something blue: Skye is blue. Something borrowed: She is borrowed for the wedding. Something new: actually she’s not borrowed, Skye is yours!
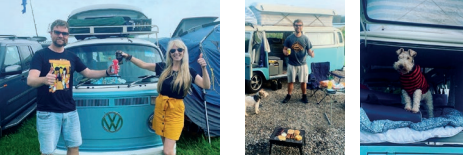
Unbeknown to me, the guy who owned Skye was selling her and Kyle bought her as a surprise for our wedding day, so that’s how we came to get her! What a surprise. Since then we have had a lot of trips away, even in current circumstances. We took her to Glastonbury 2 weeks after our wedding and then managed to do the NC500 in September last year, as well as lots more local weekends to the Lake District and Northumberland where we got married. We have a rescue fox terrier called Delilah who loves van life as much as us 😍
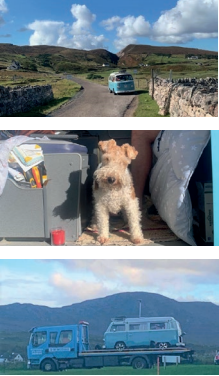
We learnt a valuable lesson in September when doing the nc500; we broke down in one of the most northerly areas of Scotland and had to wait 8 hours for recovery to be towed back to the campsite, which was so embarrassing. The problem was a snapped clutch cable, which we have since learned is quite common and should have carried a spare!
Typically the day we had to wait for 8 hours at the side of the road was also the sunniest, warmest day of our whole NC500 trip and we spent it at the roadside! By the time we had been recovered we were just grateful to get back to the campsite and get it temporarily fixed, celebrating with a big glass of well deserved wine! We have been having problems finding someone decent and reputable in the north east to fix our van, there’s a few things we needed done and ideally wanted it done before this summer. We’ve been trying to find someone since last year, but no one wants to touch it, so it’s getting a bit stressful.
Many people will be away and wish they had something with them – here is a list from club member Ian Crawford on spares he packs in his 1971 Bay window that he bought at 1 year old in 1972. I am not sure about corks – leftover wine is not something I really understand!
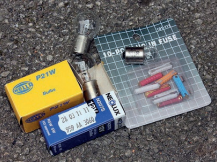
Parts • Accelerator Cable • Aluminium Tube (To Fit Inside Fuel Hose If Leaking) • Battery Earth Strap • Brake and Clutch Fluid • Brake Pedal Return Spring • Spare Bulbs • Cable Ties (Various Lengths) • Carburettor Return Spring • Clutch Cable • Coil • Condenser For Distributor (Make Sure You Have The Correct “Bung”!) • CV Axle Boot Cap and Grease • Distilled Water • Distributor Cap and Rotor Arm x2 • Distributor Contact Points • Dynamo Brushes • Engine Oil (5 litres) • Fan Belt x2 • Fuel Hose and Clips • Various Fuses • Handbrake Cable • Rocker Cover Gaskets x2 • Spark Plug Set • Starting Relay and Fuse • Tyre Valve Cores • Voltage Regulator • Walking Boot Laces
Tools • Allen Keys • Battery Diagnostic Tester • Feeler Gauges • Hacksaw Blades • Insulation Tape • Magnetic Dish Holder • Magnifying Glass (My Eyes Are Dimming!) • Multi Meter and Spare Battery • Plastic Wire Cutters • Pill Pot Containing Matches, Lighter, Flints, Water Purification Tablets, Sweeteners, Sewing Kit, Safety Pins and Buttons. • Shorting Links • Stanley Knife • Tyre Pressure Gauge • Vaseline • Wine Corks • Other Various Tools Ian has provided a pretty extensive list here, very cautious! We would also recommend a timing gun if space allows, a foot pump, warning triangle, decent jack, various sockets and spanners and maybe even a fuel pump! (We even carried a spare carburettor once!) Thanks to Ian for his submission, hopefully this will help members when putting a kit together.
For this instalment of The mechanic, we welcome a submission from the club’s chairman; Malcolm Marchbank. SR PWM MPPT – A question of control
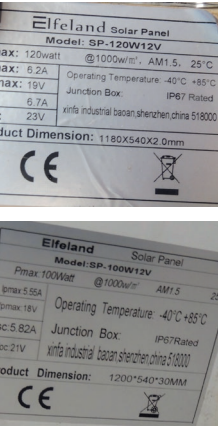
If you have or thinking of getting a PV (photo voltaic) solar panel, then these terms may concern you. There have been several articles about the use of solar panels to provide power in vans when there is no hook up available. The panel(s) will almost certainly be used to charge a battery for use when there is insufficient power available from the sun. The maximum power available from any panel is in a very clear set of circumstances, the sun needs to have an energy at the panel of 1000 watts per square meter, the sun’s rays must strike the panel perpendicularly, the air temperature should be 23 deg C. So, if you set up your panel at noon on a cloud free midsummer’s day carefully angled so the sun strikes it at 90 deg and there is a gentle breeze, a 100w rated panel will give 100w of electrical power. In any other circumstances the power will be substantially less. So, in reality it is better to estimate the average power to be 30 to 60w from a 100w panel. The next thing is how to make the most of the power we do get. If you examine the “rating plate” fitted to almost all solar panels you will see some numbers. Ok you see 100w max power but look at the “ipmax” this is the current at maximum power, ”vpmax” this is the voltage at maximum power. A typical example of a 100w panel ip max =5.55a vp max =18v 185.55 =100w. So we need a control unit to regulate the power sent to the leisure battery. Small panels less than about 30cm square sold as “trickle chargers” to maintain a battery while laying on the dashboard have so little power they are self regulating (SR) as the current is so small as never to damage the vehicle battery. Those for phone or device charging rely on the internal battery controller in the device to regulate the power and prevent overcharging of the internal battery. This leaves the choice of the two types of actual control unit PWM (pulse width modulation) or MPPT (maximum power point tracking). At first the generally available controllers were all PWM and cost from £8 up to around £35. These work by monitoring the battery voltage and sending pulses of power to provide an average voltage to the battery. Initially when the battery is low, the power pulses are very wide, but as the battery voltage rises then the pulse width is reduced. It is important then for the controller to “know” when the battery is at full charge so the pulses can be reduced. Different (lead acid) batteries fall into at least 3 types; Flooded, AGM and GEL. Each has a different charging requirement. So, any controller needs to be set to the correct type. Cheaper controllers may have no settings at all or be described as “automatic detection” and are probably best avoided! When you look at the typical full power voltage and current from a solar panel you will notice the voltage is too high as the maximum needed for the battery is 14v so the best this controller can do is to give 145.5=77w. The rest of the power is wasted due to the effective internal panel resistance.
So around 25% of the power we do get is just wasted, to overcome this a MPPT controller can be used. This is often a combination of PWM control (for trickle charging when full power is not needed) and an inverter which is controlled by a microprocessor. This changes the 18v 5.55a into 14v 7a, this is an example as the controller constantly measures both panel output (change in sun intensity) and battery condition (low, charging, full) and adjusts the inverter to maximise the power to the battery. This results in an efficiency of better than 95%.
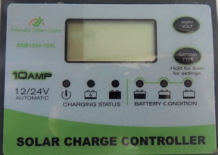
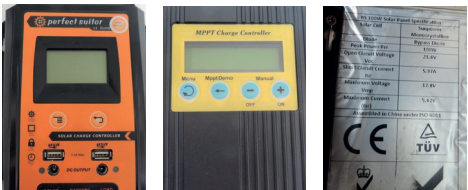
I have tested this and can confirm that just changing the controller increased the current from 5a to 7a. If as I have, you have more than one solar panel (I use 3) and they are all slightly different outputs, the MPPT sorts out the balance even when one is in shade and 2 are in sun. The MPPT controller is as you would expect, more complex and expensive up to around £70. This may mean that some suppliers may claim to be MPPT when they are not. I was fooled by this but claimed back from the seller as the description was clearly false. I have some photographs of the various types; PWM 10 amp, fake MPPT (plenty of usb points on it!) and a real MPPT 10 amp unit. So check that you get the correct item! I have 2 panels on the roof of my Westy and when raised the angle is quite close to optimum. I also have one on the front luggage rack so I can get power even as the sun passes over. I have this arrangement to support not only lights and water pump, but the compressor fridge that is of course run 24/7. I would
not want to run out of ice for our G&T’s after all! Malcolm
This event has proved to be so popular that we are now operating a waiting list as we are over-subscribed! If you are not already on the list, please do not book with the site.
The 30th Anniversary Club Camp (delayed a year), BBQ & AGM will be held at Barnstones Caravan & Camping Park, Main Street, Banbury OX17 1QU.
Please get in touch with our Events Manager Lorna at events@vwt2oc.co.uk, or on our Facebook page with any questions.
The next edition of the club magazine has been finished by our Editors and looks fantastic. It should be arriving through your door soon! If you are enjoying the club magazine and have a story about a trip, an upgrade, a restoration or just a tip, send a contribution to our Editor Phil at editor@vwt2oc.co.uk.
Yes, it is that time again. Hurray! Finally, after the long winter in our non-mobile houses, we can get out our beloved vehicles.
Checklist
Hopefully you all followed the article Time for bed/ to help put your vehicle to bed for the winter. Now that spring is in the air and we are starting to think about getting out and communing in nature, this is a key time to get things ready.
Doors locks – there’s nothing more annoying than a failed lock. get it fixed now before the season really gets going. Door lock issues can be very straight forward but a simple lubrication can be key. Pun intended. A non residue lubricant is best to move the dirt away as WD40 can leave enough gunk to create issues. We favour silicon spray. A little into each lock.
Windscreen wipers – did they perish in the cold winter freezing them to the windscreen. Inspect and replace now.
Water – check the radiator if you have one. Ensure that the bottles that you emptied in the Autumn / fall have no mice, carefully hidden Christmas presents or mildew. Clean with a weak Milton solution if it is drinking water or food related.
Batteries – check the charge on each battery with a good meter. A flat battery can indicate an earth leak. A failed battery needs careful investigation.
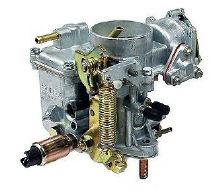
Carburettor – Or equivalent. Check for good operation, no stuck flaps or other deterioration over winter. If you are a professional, this will be straight forward. If you are an amateur, a test drive very close to home will highlight problems! But only after the other checks.
Brakes – your vehicle should roll easily, otherwise this can indicate jammed brakes. Parking in gear for long periods of time can be better for your brake health than a jammed set of brakes. Check the brakes for operation. Check the brake fluid level. If it has been more than 5 years, change the brake fluid as it is hygroscopic and slurps up water incredibly quickly. Water is not a good fluid for applying the brake pads to the disks.
Seals – inspect all door seals for any signs of damage, water ingress or other problems and sort them out now. Glue any loose bits back down with the correct glue.
Windows – ensure that they all open and close fully. Or at least as fully as they did last year if applicable!
Ignition – Once you are feeling confident, get in to your pride and joy and turn on the ignition to number 2. Look at the lights on the dashboard. Check there ARE lights! Are they what you expect / are used to seeing? Have you got fuel (for those with a working fuel gauge)?
Crank it over – don’t expect it to start immediately but things should kick into life within a few seconds.
A little test drive on your driveway will allow you to test the brakes, maybe the steering and other important parts. Softly, softly.
Stay local, take your phone with you and warm clothing. Just in case!
Once you get home, assuming that you have a big smile on your face, make a list of snags, get indoors, put the kettle on and start planning for your summer.
Check out the events page and come and see us at a meeting soon!
For this edition of Member’s Motor, we look at Helen’s Bay, called “Delilah”. This is what she had to say about it. Why would any sane person want to buy, let alone suffer the ongoing trauma of owning a VW T2 camper van? Firstly, as well as the initial hit of buying the thing, they cost a ridiculous amount of money to keep on the road. They simply do not go uphill unless they are in 2nd gear and labouring at 10mph. They break down in the most embarrassing and inconvenient of places and no matter how many gaskets and cables and bits and bobs you carry on board – you never seem to have the part you need to get them going again.
Then there is the small matter of hypothermia, induced as you’re trailing along the road at 22mph. There are indeed two sliding things on the dash for hot air – a red thing and a green thing but what do they do? By the time the warm air gets from the back to the front to warm you up, it’s gone stone cold anyway and you end up chugging down the road in a vintage refrigerator wearing a full ski suit and matching bobble hat. The exception is when it’s a baking hot day. On baking hot days, your air-cooled engine serves as a stifling sauna and even reaching for the air conditioning that exists in the form of a window winder, you definitely still get a good sweat on. Not only that, but on hot days, you have to pause your journey, not for a coffee or even a toilet break, but to let your engine cool down! Generally, this happens about ten miles from your home! Perhaps these monsters were indeed designed for travel on the back of a low loader! The answer is that T2 owners tend to think ‘outside the box’. Perhaps we are slightly insane, but T2s’ tend to be driven by ‘freedom seeking’ folk with such a sense of adventure and love of more simplistic times gone by, that even the hours spent on the side of the motorway waiting for the low loader to arrive are an experience to be cherished.
It’s like owning a grown-up’s Mechano set. Everything on your beloved T2 can be taken apart with a spanner (or some tool or other) and easily bolted back together again. Rusty panels can be cut out, replaced and lovingly repainted to match the original colour. Everything can be restored to original. Who would even want to travel at 70mph and be nice and warm, when you can pootle and be freezing and wave to folk at a top speed of 45mph? And as an added bonus, when you do stop, your gorgeous T2 leaves behind it a gloriously, glossy puddle of oil. Nothing could be better!
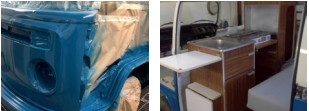
I’ve had the best adventures in Delilah. Delilah is my pride and joy. I can’t even look at her without grinning maniacally. She is a 1973 Westfalia Continental. Everyone has a story about how they ended up owning a T2. I ended up single at the tender age of 50 and rather than trawl through dating websites looking for a new fancy man, I decided to push the boat out, fulfil my pipe dream and get myself a VW camper instead. Delilah was being stored in a garage and although sad and rusty, she was in ok shape for her age and was fitted out with most of what turned out to be a Westfalia Continental interior. The interior did have denim and Barbie pink fluffy fabric glued all over it and it did smell of mould but nothing that couldn’t be sorted out. The basic restoration to get her back on the road took around ten months. I wanted to keep her as original as possible but also needed her to be reasonably practical and reliable. With that in mind, I had a new air-cooled engine fitted with the larger twin Weber carbs, jetted correctly. It gives just that little bit more oomph going uphill and on motorways I can pootle at around 55-60mph. Everything else mechanical wise was cleaned up, checked and put back. A must have, is an oil temperature gauge. It is definitely worth having one. The needle only ever moves on hot days, but it gives peace of mind! The bodywork was stripped back, rusty panels replaced and a full respray and triple Waxoyl underneath had her looking ship shape. The next step was to get the interior restored and put back. I love the look of the 1970’s original interiors. Westfalia literally thought of everything. To have a full-sized double bed, a wardrobe, sofa, cooker, sink, kitchen cupboard, overhead locker, storage cupboards, a “not quite a fridge” and an upstairs bedroom with a double bed in such a tiny space is a remarkable piece of interior design
The interior all got scraped, cleaned up and put back in. New cheerful orange canvas completed the pop top. Sadly, the original mustard upholstery did not survive restoration. My travel companion is a crazy collie called Dobbie. He likes sitting on the furniture with muddy paws. Therefore, I took the furniture to be covered in dog proof pale grey vinyl and I did give strict instructions to keep the mustard fabric on underneath. The poor lady doing the stitching job couldn’t cope with the rancid smell of the mould and removed the mustard fabric….and burned it! I had to agree with her that it did smell awful! Over the course of the following year, I acquired a door for the wardrobe, a primitive hand pump, water tap contraption for the sink and even a table to sit and work at and eat my beans on toast off. (Martin Dorey would be horrified at my campervan cookery.) Original Westfalia Continental items are difficult to find, so I was really chuffed to have been able to source some of the pieces I was missing via the T2 forum on Facebook. Finally, just to get it completed, I actually bought a complete interior and sold on the pieces that I didn’t need.
In 1973 people must have been hardier or perhaps we had warmer weather back then. I could not cope with the cold journeys. It was no fun rolling out of the van in a frozen lump at the end of a long drive. So, after looking at the various options including the diesel heaters, I finally went for what I felt was the safe option and got a Propex heater installed in the cupboard under the buddy seat with a digital thermostat fitted to the back of the wardrobe unit above the driver seat. It is a real game changer. Pricey to buy, but it doesn’t seem to be desperately greedy with the Camping Gaz and having heat when driving and when camping without electric hook up has made it worth every penny. Even on the coldest of days, the van is beautifully toasty in a matter of minutes and it keeps everything onboard dry. Whilst on the subject of comfort, I like my comforts. I can live without hot running water in the van but there were a couple of creature comfort things that I needed to sort out. Sleeping on a bed with gaping cracks in the mattress where the cushions fit together isn’t great. Nor is waking up tied up in an impossibly twisted sleeping bag. The back of my van stores a memory foam mattress topper, decent pillows and a goose down duvet. I slumber in comfort, all nicely tucked up between the dog and the spare wheel!
I learned the hard way not to sit up and crack my head on the overhead locker. I keep my bottle of gin in the wine rack under the driver seat. And as for a toilet, I decided that being on my own, I needed a toilet on board. I very accurately measured the space between the two front seats and after some diligent research found that the smallest chemical toilet that Thetford makes, fits perfectly. It was the final thing I wanted. Imagine my joy at finally having onboard toilet facilities and my despair when I realised that although the toilet fitted in the space between the two seats, my backside would not! Naïve, I was at the beginning. I thought after this wonderful restoration and new engine, there would be no further problems and I’d just sail off into the sunset. This was far from the truth. Delilah had lots of little problems. One of the rocker cover gaskets was loose, resulting in oil dripping onto the exhaust and rancid smoke belching everywhere. Being a newbie, I thought I was on fire! Thankfully not! I eventually limped home and replaced the spring cover with a bolt on one and by tightening everything up every few journeys, the oil leaks are a thing of the past. Then she was pulling to the left. Every little problem takes a bit of investigating and trial and error to sort out, but it turned out that the pulling problem was the brake callipers binding. New brake callipers were fitted to keep her on the straight and narrow and new Spax shock absorbers made the ride more comfortable. Her battery died and no sooner than I replaced it, her starter motor gave up. Fortunately, some kind soul pushed me and her down a hill to bump start and we managed to get home. To be honest, I lost confidence in her. I could never figure out what was wrong with her and I did consider selling her. Then I realised that my VW coping mechanism was relying on the RAC. This was no good! I bought ‘How to Keep Your VW Alive’, navigated the Haynes manual and got a genius mechanic to do the impossible and teach me! To own a T2, you have really got to have some understanding of the mechanical side. Although my knowledge is somewhat limited, it has meant that I now know enough to have confidence in what needs to be done to keep the old dear on the road. I love to hike, so Delilah is a welcome sight for me and Dobby at the end of a long day of walking. Somewhere to sit and chill, cook, eat, watch beautiful sunsets and sleep. You are always guaranteed to meet other VW owners to chat to. Just being able to jump in the van on a Friday night and go on an adventure. What’s not to love about owning a T2? I’ve had so many absolutely wonderful adventures in mine that I could write a book! It keeps me sane.
For this edition, we join John and Ruth and their adventures in Spain.
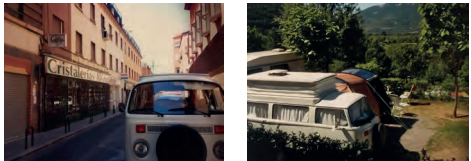
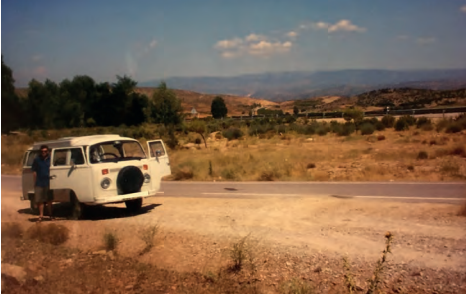
Back in 2007 my Wife Ruth and I embarked on our first major foreign jaunt in our Type 2 that we’d owned since 1993. We had previously visited many parts of the UK but decided that now was the time to be more adventurous. The ‘van had been reliable other than a very occasional hot start problem, but that always resolved itself after a few minutes, but we still felt we needed breakdown cover for this trip abroad. Once arranged, we booked the Portsmouth-Bilbao ferry and in mid-July headed off. We had a fairly loose itinerary but had arranged to be in Madrid to meet up with Spanish friends for a couple of days. Having successfully achieved that, we decided to head to Cuenca, of the famous ‘hanging houses’ and La Ciudad Encantada fame. We had earmarked a site in advance and found it readily enough. It was a scorching hot day and so we parked in the shade of an enormous tree outside reception, while Ruth walked onto the site to have a look at the facilities before we committed to stay. She came back and said it looked good, very good in fact and so she went back to book us in while I fired up the van. It wouldn’t start! “Aha” I thought, I‘ll just leave it for a few minutes and all will be well… It wasn’t. It refused to offer any signs of life. After an hour or so of trying, leaving it and trying again we realised that it was not going to start. What to do now? We decided that we had to call for breakdown assistance.
At that time the breakdown cover was with Europ Assistance, so there was an English speaking number to call. They passed on our difficulty to a local garage and a further hour went by before a flatbed ‘relay’ type truck appeared. Panic. We did not want the van to be taken away. Ruth speaks some Spanish and explained as best she could that we needed the van for our holiday to continue. He seemed to understand so we relaxed a little. His first act was to get under the FRONT of the van before hauling himself out looking a bit sheepish. Under the back he went, fiddled about, presumably looking for the starter motor (I wasn’t sure that he found it) and after several minutes he surfaced and with a faint smile and went to his cab. He started to reverse his truck to the van, at which point much flapping of our arms and shouts of ‘no’ took place. He stopped just short of the front, raised the flatbed of the truck and then proceeded to winch our van onto it. By now we were beside ourselves but, with a shrug of the shoulders he clambered up into our van, put it in gear and let the handbrake off. We looked on in horror as it very quickly rolled backwards down the ramp with the tailpipe missing the pebbly ground by no more than half an inch, before he let up the clutch and it started. He had been oblivious of how close to wrecking the engine it had got, but all was well it seemed. Our van was now running but what if it happened again? A brief discussion took place and the gist of it was that a new starter motor was needed. He couldn’t provide one and all he could offer was ‘to was always park on a slope’. Now us seasoned campers know that flat surfaces are best, but for the rest of that holiday we were the only campers looking for sloping pitches. Did we have any repeat performances? Yes we did, but fortunately not too often. Usually it started when cold without any difficultly, but petrol stations were an issue as that would almost always be a stop when the engine was hot and then it didn’t always want to start. Ruth became very good at pushing after several such occasions, much to the amusement of onlookers. We did however complete our intended holiday and once back home had a new starter motor fitted. At this point the van was 34 years old, had done 100k and had the original engine and ancillaries so I thought I’d write to VW UK and ‘complain’ about the poor quality components. This was firmly tongue in cheek and I expected a humorous reply, but to my disappointment the joke wasn’t spotted. We still have the van and have since taken it on several trips through France and Spain.
Post Covid we hope to be able to do it again, but probably not this year