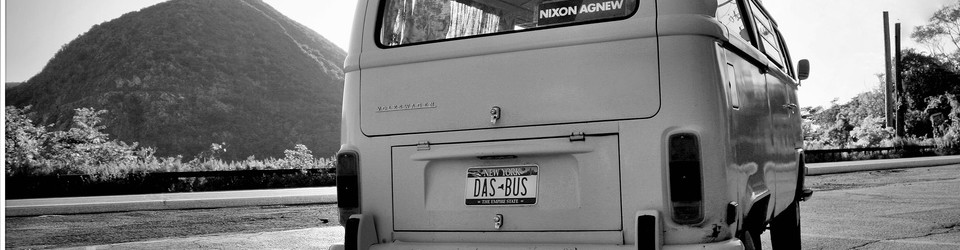
This issue, we have Wilma, Matt Sharrock’s multi year restoration that he purchased in Vancouver.
In his own words:
I bought the van whilst serving in the RAF in Vancouver, Canada. I ran it all over the Rocky mountains for two years before shipping her home at the end of my tour. She limped through her first UK MOT but needed lots of structural work before she could next pass the test.
The bottom foot all round was replaced, along with all of the running gear, fuel system, suspension, brakes and so on. This was a glass out restoration with new rubber all round as well. It took me 4 years of hard work but I received great help, advice and support from Just Kampers who are a few miles from me, especially Shaun and I have a full works and parts list of the restoration. In June 2022, we went to Classics on the Crick at Naphill near High Wycombe and won gold – most fun! Love the Wilma love that we are getting!
Last time, Thomas covered the replacement of the brakes and the chance to use Libertine at the 2012 Olympic Games. He continues:
Before my departure from my family at home, I had a little more work to do on the bus to make it Olympics ready. My previous conversion of two sets of Volvo rear and front seats were changed. Volvo seats remained in the front, but the rear had to accommodate a bed again (I had regretted removing it a few years before) and a kitchen box made in haste. This would be a long box behind the bulkheads of the passenger and drivers seats. Handles, so that it could be removed if necessary, sliding doors, food compartment and cooker on top. This was successful for the time of the Games, but I came to miss the ability to walk from the back into the front without the need to get out of the van. Still, it would do for now.
Pre-Games attendance started with me camping in my Bus in the Portland Olympic village itself, and the restricted car parks there. Accommodation was offered far from site, but I had all I needed in my bus. The site had shower and clothes washing facilities to help my stay be more comfortable. That and a little SPAR shop selling food and wine. My shifts alternated between day and night with my Army colleagues. Working hours were long and I was on-call 24/7. My bus became my sanctuary, a place to get away from the hustle and bustle of the long days and nights. Kick off my boots, put the kettle on and some music. Peace and quiet….until my radio squawks my call sign “attendance urgently required…”
Before the Games began, I had an idea to camp in my bus at the heart of the Olympics on Portland. Why not? I’ll never get the chance to do this again. This I did, near the collections of flag poles with flags of all Nations. The local Naval Commander who was in charge was not happy, but reassured that it was for one night only and then I would be gone before the public ever came near.
As I settled down for the night in my bus by the Flag poles. I became aware of Police vans parking really close to me. Very close. Peeking through the curtains they were the Police dog vans. Yes, complete with dogs within them. The vans parked front, back and sides to me. What’s more, the dogs snarled every time I looked at them. Well, they aren’t pets are they. Although such animals don’t normally snarl except when at ‘work’, no one told them they were off duty. They also howled. I’m sure they don’t normally, but they were not happy with me at all. The next morning, I was asked by the Commander and a Senior Police Officer (both grinning from ear to ear) if I had a restful night. I cannot print my reply. Even so, I thought it was very funny and I took it all in good humour.
The weeks went by, and I moved around the old Naval base at Portland. Alternating my location every few days to change the view from my van, and to meet other working groups there. The van became a familiar sight to other ‘work’ groups there. From Police divers, marines, bomb disposal and G4 Security. We got to know each other well. I gave some Marine divers coffee and bacon sandwiches after an early long dive in cold waters. They were very grateful, but expressed surprise that an Officer no less, had greeted them with such a welcome sight as they came ashore. It’s simply a case of looking after the Troops. I don’t care who they belong to. In turn, they invited me to their accommodation for a social gathering with food. Amazing really, as Marines by nature tend to keep to themselves and I was an outsider. The van helped. It was a talking point. They seemed impressed that an Officer preferred to rough it in a van and not hide away in a fancy hotel. For some reason they all thought Officers did and were surprised when I revealed that this was far from the truth. Still, all was good humoured. My van was also used for early morning breakfast with the Police divers in their fully equipped van with changing area and kitchen. Likewise, I returned the favour. Cooking a full breakfast on my vans little two ring burner and grill.
The time had come for me to live aboard a ship for a while. This was moored at the old Naval dock side. The Royal Fleet Auxiliary (RFA) Mounts Bay. Parking my bus as near as allowed (I had my Golden ticket but I was still subject to Harbour control and common sense) and boarded the Ship with a few of my colleagues to find our cabins. The Officers Galley (Kitchen and dining area to you land lubbers) had copies of VW magazines about. Turned out that the crew were VW enthusiasts. Ship life can be noisy. I was on night duties ashore, but your sleep is disturbed by ships constant noise, fire drills and a contingent of Marines using the gym which was next to my Cabin.
I was very glad when the time came for me to leave the RFA Mounts Bay for the quiet sanctuary of my bus. Not to say that I did not enjoy the time there. The Ships Company were friendly and helpful and it was a wonderful experience which I shall never forget.
A Warship was coming into berth, and my colleagues and I were asked if we would like to stay on board. Another great opportunity, but I thought that particular ship was ‘too flighty’ in my opinion and may take off for other duties at a moment’s notice. My colleagues took the offer. I stayed in my van. One day they returned to the dockside to get some sleep after a long shift. It had sailed on other duties without them. “want a coffee in my van while you all sort some other accommodation?” As I went on duty I left my colleagues my spare keys. The van was now somewhere to rest and sort themselves out.
There was one incident I can recall. I was on Duty in my van but up into Weymouth itself. To get from Portland to Weymouth Town you cross a narrow causeway. The road goes down the middle of it. There were heavy winds blowing. As I was halfway returning to Portland there was a loud BANG!! The pop-top roof had half deployed ! The wind was so strong that the two internal clips had snapped, raising the roof but on one side only. This acted as a sail, catching the wind and making control of the van almost impossible. Making an emergency landing I parked and struggled to get it down. Supports slightly bent but in one piece. Roped down, I made my way to the Control room where I was to be on duty. During The Games, Portland to Weymouth was monitored by hundreds of CCTV cameras. I asked the monitoring crew if they had seen my near disaster on screen. Better still, had they recorded it. But no, they had been distracted by something else. I was disappointed that my brave actions and control of my van had only been seen by me and a few terrified road users.
After a few months my time at The Olympic and Paralympic Games came to an end. A Mobilisation can either be a miserable experience or an interesting one. I decided to make it the latter. Regrettably, I am unable to tell other stories of my time there in my bus. The Official Secrets Act is for Life, not duration of Service!
By now, Libertine’s engine seemed to be a little sluggish. Was the exhaust slightly smoking? Was it making noises I have not heard before? On return home, it was time for a holiday with my family (It may have been the Olympics but it was not a holiday for either myself or my family I can assure you). A treat awaited the van. Parts were being gathered for an engine strip down and rebuild. Libertine deserved it after a few months of hard work.
(Editor: Thanks to Thomas for some greats stories of van life. Time to share reminiscences and restorations from other members, next issue is the turn of Matt Sharrock and Wilma)
Spend since last report: £2,747. Total hours labour since last report: 52.05
As 2022 draws to a close, I am prompted to look back at the progress made this year. Ahead of what happened this episode, here is a summary of the year:
Kitchen pod created.
Bulkheads removed.
Flip / fold front seats made.
Engine case purchased.
Poppy’s old engine dismantled.
Eric’s old engine dismantled.
Brand new engine being built by Stateside Tuning.
In addition to the above, I have also made progress elsewhere.
The front beam has been dismantled, removed from the van and was hanging on a block and tackle for ease of movement for about a month. It is an adjustable beam of unknown origin that came with Eric. The bottoms of the clamshell sections that form the chassis mounts were both rusted, but were by no means unsalvageable – cutting out the minor amounts of rot and replacing it properly with butt welded sections made for a great look. Much easier and more satisfying than the work on the vehicle that has been rather worse hit by rust!
Each component of the front suspension, steering and brakes was removed and either stripped, painted in anti rust treatment, primed and painted or was replaced. The brake calipers have been painted in 3 coats of bright green Kawasaki high temperature paint and all other components were top coated in John Deere tractor paint in gloss black. This was a recommendation some years ago by a VW restorer and the colour and protection are great.
Then with the beam off the van, I was able to tackle the chassis rails in the sections that had been hidden by the beam. As this was only about a foot on each chassis rail, it did not seem like a long job however, the access is only by laying on the ground and understandably, 50 years of water, mud and rust had accumulated to rot out a large chunk of this. New sections in 2mm semi-galvanized steel were fabricated up and welded in place, and with new thick steel onto nicely tidied chassis 2mm steel, this went in smoothly and with minimal grinding required. Once fully smooth, again this was rust proofed and primed but top coat on the chassis / underside is the original L90D pastel white. I am using synthetic enamel for its hard wearing and easy to apply properties.
Once finished (first picture), and with the anti roll bar back in place complete with the new rubbers and mounting brackets, it all got a final check before calling on a neighbour. The recommended way to refit a beam is to get it under the van and jack it up on a trolley jack, keeping it horizontal and continue lifting onto the chassis rails.
I had a brainwave and for once it worked out well. We wheeled the finished beam to underneath Eric, ensured that it was approximately as vertical as needed. Eric was on the block and tackle to get it high enough for the beam to go underneath, then we simply lowered Eric onto the beam, which was therefore completely flat and the sheer weight of the van helped press the chassis rails into the beam. A few little wiggles and we were able to get the first bolt on each side before a little further wiggling could get the remaining bolts into the chassis. From the beam being up on the block and tackle, to moving the beam, lifting the van on the same block and tackle, lowering the van onto it and aligning all bolts took 45 minutes. We felt that was a big result! Picture 2 shows the offside front wheelarch, all painted in white with the beam in place and shiny green calipers.
Picture 3 shows the chassis under the beam, the lumpy underseal was hiding some gremlins but new steel sections have made it all strong again. With the chassis rail opened, I have been able to add rust proofing paint to the insides of the rails in a lot of places and will follow that up with underseal in due course.
Once that was complete, Eric had a beam with which to roll him over. The garage was suitably tidied and emptied, Eric was turned nearly 180 degrees (not easy in a double garage) and the offside wheels removed. The rollover jig was bolted in place of the wheels and Eric was laid onto his off side. This allowed me to get to the underside to work on the sections not easily accessible when he was on his other side a year or so ago. The key section here was the nearside rear chassis rail. Picture 4 shows the remains of the chassis rail – I knew this was bad when I did the other side of the same section. If you have a box that has seen better days, replace one side then the other – more reliable for positioning than replacing it all at once. Just behind the torsion tube was about 30cm / 1 foot that needed a significant section replacing and as it was curved, this was done in 3 sections, again rust proofing the inside as it became accessible. Anything rusty was cut out. The mounting bracket of the bump stop was removed as that was very bad, new sections fabricated for that before welding that back on to fresh steel.
It looks much better with steel instead of holes! Picture 5 was when the rust proofing paint was still wet, once dry it goes purple and then the primer went on twice and several coats of L90D top coat as well.
A similar story on the offside rear wheel arch – remove buckets of underseal, get visibility on the metal, remove the paint unless it is looking great. Remove rust, add new metal if required, rust proof, prime and paint. Once all of that was complete, the majority of the underside is now done – just minor bits that were missed plus the underside of the fuel tank to go then it is build up time. Picture 6 of the offside rear wheelarch and bump stop all clean and white made me feel rather good!
With that section complete, I was able to tackle the offside rear suspension. Nothing major here as it is heavy steel that needed stripping and again rust proof / prime / paint. On investigation of the driveshaft, this was ok but the CV joints were sadly not – I had bought new gaiters for the CV joints and now need to buy CV joints. Which come with gaiters. That outlay will have to wait for a while until I feel happy about paying good money for something that I already own!
Next jobs are – assemble the rear drum brakes, add the brake cables, brake pipes, find which brake servo is which and where they go. Add the brake flexi pipes to the right places, join everything up. Add the steering box, connect that to the beam. Gear selector mechanism. Air heating pipe completion. Finish cleaning the gearbox, prime it and paint it, mount it, add the driveshafts once I buy the CV joints. Around that time I can put Eric back on his wheels for what I hope will be the last time. Perhaps I will manage that for the next issue but it is cold. And that list feels daunting! Until next time.
Last time, Thomas covered the restoration of the underside and windows of Libertine. He continues:
A friend of mine moved down to Cornwall, taking his hightop VW Splitscreen with him. At the time, he used it as his main mode of transport. Trouble was, he used to give it a hard life and drive as fast as he could anywhere. This took its toll on the old reduction boxes. Constantly having to give them attention because the seals kept leaking. Personally, I thought that he drove too fast and there was too much pressure in the reduction boxes. I don’t know how he did it, but he managed to get the old bus to drive at seemingly crazy speeds. Perhaps it wasn’t and it just felt like that.
One day he rang me to say that he had crashed and ended up in a hedge, leaning at an angle. He was unhurt thank goodness. The bus was badly damaged down one side. The brakes had failed while going downhill approaching a bend. His only course of action was to go through the hedge.
I mention it here because of the cause of his brake failure. An insurance assessment revealed that the rear backing plates had corroded. When the brakes were applied going downhill, the rear brake shoes locked against the drums as they are supposed to. The trouble was, the corroded back plates spun, wrenching them from their mountings and parting company with the brake hoses – no brakes!
My friend kept his van mechanically fit and regularly maintained and examined other than the annual MOT inspection required at the time.
Being concerned about my friend’s accident and the near loss of his bus, I went outside to crawl under my bus and examine my bus. Mine is a 1973 T2, so I expected things to be all well in the back plate department. To my horror I could not have been more wrong!
The back plate metal on both sides at the rear had corroded where the back plates bolt to the hub. I did poke it hard with a screwdriver, so perhaps more than would normally be done on an MOT inspection. Something had to be done and quickly. Biting the bullet I ordered a load of parts from a well-known parts supplier (No, not ‘Just Kampers’ at that time). I had now owned the van for some years and never needed to change the rear shoes. Yes, there was so much ‘meat’ left on the brake shoes from careful driving I suppose. Even so, I was going to give Libertine a full overhaul of rear brakes. Stuff it I thought – all the brakes!
I ordered new brake callipers and pads for the front. Proper German parts as well. Full set of flexible brake hoses, full set of brake shoes for the rear, new backing plates, brake cylinders, springs, hand brake cables. Stuff it, may as well order two rear brake drums whilst I’m at it.
This parts list soon adds up in price. However, my life and that of myself and family and friends are worth so much more. The parts arrived in very quick time. Being very pleased with all these shiny parts was a great feeling when spread on the kitchen table – where else!
Noticing that the VW parts supplier has charged me very little for my order I telephoned them to say so. Being passed on to one person then another I eventually spoke to the manager. Telling him of my problem (not enough charged) he asked if he could call me back later. Doing so, he explained that he had never before received a complaint (it wasn’t a complaint I protested) that his Company had not charged a customer enough for their order. This being so, he informed me that as a reward for being an honest customer he wanted me to accept the order with his thanks and compliments. WOW! What a result.
Setting to work, I jacked the bus up on heavy duty axle stands and began cleaning and stripping parts off. The drums looked serviceable, but everything had given good service since 1973. The backing plates were in bad shape. Underseal had hidden their real poor condition. Flexible hoses are expendable items in my view, but were changed anyway. Replacement was a reverse procedure as removal. All went smoothly except the handbrake cables. Although functioning, the outer cable covers were full of rust. I had reached them in time. Assembly of front disc brake callipers went smoothly. Old ones off, new bolted on. A full change of brake fluid followed.
All was now well. A test drive proved that. My friend’s accident had potentially saved me from the same fate. His VW van was eventually fixed and beautifully repaired, and drives around Cornwall to this day. With a different owner now, and perhaps not as fast.
Since the major brake replacement Libertine continued to serve me and the family well. Six trips to France and Ireland as the family grew up. Using it whenever I could.
It was now 2012, and the Olympic Games were being held in the UK. Being an Army Reservist for many years, I was mobilised to do certain work at the Sailing Competitions at Portland, near Weymouth in Dorset. The nature of my work there prevents me from discussing it here, other than to say it was both interesting and informative. If the general public only knew what went on in the preparation, ongoing events and aftermath of something like the Olympic and Paralympic Games you would be amazed. I certainly was, and I was to be in the centre of it all – in my Bus !
My attendance was going to be for some time. Because of the nature of my work I was given a special pass. Calling this my ‘Willy Wonka Golden ticket’, because only a few were given out and it allowed me to go anywhere and park anywhere. Not even the Police (who I worked closely with) could stop me. This was a power that I intended to use to its full extent. Whenever would I get the chance to do this again in my lifetime?
Of course, I had an important role to play, and Libertine would be a part of it.
Last issue, Thomas covered the trials and tribulations of getting an MOT. He continues:
By 1999, the van had been well travelled with the family. We had taken it to France a number of times, and a tour of the Irish Republic. All went well on these trips. The only real problem we had was in County Wexford, Eire.
The generator (it’s an alternator on our bus) light came on while travelling on a very hot summer’s day. Having a look in the engine bay, the alternator was so hot you could not touch it. A local small garage was near, so I asked a mechanic to have a look. There was a campsite near, so if we had a real problem, we could camp in the awning we had with us.
The mechanic said we needed a new alternator-without looking! By then, the engine had cooled down. Turning the key, the engine burst into life without the generator light on. Deciding to drive around a bit (the day was still scorching hot) the light came on again a while later. I was not convinced that the mechanics opinion of needing a new alternator was correct without looking or investigating for other faults first. As the light came on after a while, I had an idea. Taking one of the air tubes off the exhaust heat exchanger I used thick foil to create a funnel and wired it up so that the air from the doghouse blew directly onto the alternator body. We drove around locally in case the problem returned. It didn’t come on again, so we continued our trip.
We continued our tour of Ireland and visited all places I had as a child (my family are from Wexford) and a great trip. The kids loved the beautiful beaches and green places in the local countryside. We returned home without incident.
Later when home (1999) my exhaust system had corroded and needed replacement. I seem to have to replace it by every time the MOT was due. JustKampers started to produce more and more new products for T2 vans. They stocked a full stainless steel exhaust system for £118. I thought that this would be good value for money over time. I had no idea that it will still be working well in 2022. So is the alternator I had a problem with. I would say that was excellent value for money.
Using and enjoying the van into the new Millennium, by 2009 I needed to do some serious work on the body.
The front body panel had been patched at a garage some years before. Another hole appeared there, so a good poke about revealed corrosion requiring a more serious repair. Finding that my ‘repairs’ some years before had been nothing more than filler and spray can paint, it had not been welded. Investing in a MIG welder and other tools, I practiced and practiced.
My articles may give the impression that I don’t like mechanics. This is not so. I know some very good ones. It’s just that I developed some knowledge of mechanics myself and simply hate being ripped off. Working hard for my money I don’t want to give it away – I can bodge things myself for a fraction of the cost of a garage doing it. I also hate bodges!
My first bodywork was the inner and outer sill below the opening side door. This went well, and I was so pleased to have the alignment looking good. Best of all the door gaps were good and nothing dropped off. Getting brave, the window rubbers were, well, no longer rubber. Hard black stuff that oozed water when pushed with a finger.
New window rubbers were purchased at Busfest. All except the front windscreen. I had a great plan for that. A seal for a louvre window was purchased. Only because I found one in a hedge! Yes, it’s true. Camping at a non-VW event, I spotted a familiar shape of such a window hanging in a hedge. Retrieving it, it only needed a careful clean. All the glass was there, and the mechanisms worked.
All the window rubbers were cut out. Being careful to use suction handles to hold the glass to prevent unnecessary breakage. This revealed some corrosion as I feared, but not as much as I had expected. Cutting out the bad and letting in new metal all was soon looking well again. The rear window went in easily. Not so the side window rubbers. Asking a windscreen fitter that I came across in the street, he gave me an impromptu teaching session and a tube of screen rubber sealant if I needed it. Even so, fitting the side windows was the hardest work I have done on my bus to date. That is, until I learnt that I needed to be much more forceful with the glass panes than I was. The rubber around the glass needed to slip over the lip of the window opening. Using silicone spray as lubricant (never use washing up liquid, it contains a massive amount of salt) and cord wrapped around the rubber to pull on, each window rubber would almost get in place only to pop out at the last minute. This was so frustrating. I thumped it hard with my arm. Didn’t know glass could bend, but it does. Perhaps I was lucky not to cut myself to pieces and break all my glass, but it went in.
Next on my list were the two front wheel arches. They were a bit crusty. Schofields provided nice German made replacements. Brazilian ones are ok, but a little on the thin side and poor pressings. Still, this is dependent on your budget. Having two full wheel arch panels with steps stored away a few years earlier, I found them out removed them from my stash of bits to set about fitting them.
It is good practice to remove both doors to start fitting them. Being new to this work I didn’t, wanting to keep the doors on to help with alignment and good gaps.
The old sills were cut out. Drilling holes where they are to be separated. By now I owned a compressor and tools. An air chisel makes short work of separating panels. Great noises too.
Don’t think that my van looks amazing and pristine. It isn’t and doesn’t. It is solid underneath and will not leave a trail of rust in the road.
Owning a van is not all about repairs, although a part of it. More fun was to be had in the van before more serious work. There is nothing better than a meal in the evening air, the smell of a BBQ (or six) warming yourself by a campfire and putting the world to rights.
Next time I’ll write how I replaced the vans entire braking system, working at the 2012 Olympic Games in my van, front panel and windscreen replacement and a full engine build on my kitchen table.
Spend since last report: £274. Total hours labour since last report: 72.66
In the 2 months since I last wrote an update about Eric there has been a lot of change. Fortunately, I note what I do each trip to the garage, how long I spend in there and I also document every purchase, just don’t tell Lorna the total! This makes it easier to write it up as I have clear “notes”.
The serpentines arrived – wavy bits of metal that provide the suspension for the seat backs. Initially I used the clips that came with them, but it was all very loose, so each serpentine was welded to the next one. At the sides, I used shortened sections of the serpentines bent to 90 degrees and welded in place as that seems to be how original seats are done – I was able to use the crème brulee torch that I bought about 15 years ago and had never used except for lighting the fire! It all looked fab and received rust proofing paint, primer, and black topcoat. Then I added some plungers purchased online to allow the seat back to lock in place for either driving or camping, sadly I put them in the wrong place and had to do it again the next day!
With the base almost complete, I spent more time on the seat tubs as they have some extra strengthening added for the arms of the seat back. It is starting to look good. I suspect that there will need to be some minor fettling when I get to upholster the base and back, but for now I am calling that section complete.
Following an email chat with a race engine builder in Warwickshire, I put restoration on hold and stripped an engine for the first time. My wife’s 1972 crossover Poppy had an engine replacement in 2015 when the case was found to be split, tipping oil everywhere and the engine had sat in the corner of the garage ever since. I bought a 1776 Mexican case online that was drilled for full flow (external oil cooler ability), but I did not really know what that meant. It took me just over 5 hours to strip the engine from the rockers inwards. From a “long block” and down past the barrels and pistons to piles of engine bits!
Don’t they all look pretty? I set a date with the engineer and toddled off in the rain for 90 minutes to see him, armed with a car full of engine parts from Poppy’s engine and the new case. All he needs to do is build them up into a fabulous engine once I buy the new, larger barrels and pistons. Unfortunately, as with most bits of this restoration, the theory was better than the practice.
The case that I had purchased online was a “good Mexican case” which turned out to have case saver studs, corrosion, had already been align bored and signs of very bad treatment. The drilling for full flow / external oil cooler had been done badly and is for a Beetle – the mounting bar (aka moustache bar) for a Bay window means that those holes cannot be used. Sadly, this is becoming increasingly regular as the cases are old and have not been made since 2014. Never mind he said, I will see what I can do once it is fully cleaned, tested, and measured. Which costs money and might end up as unusable anyway.
Next, we turned to the crankshaft. It has been ground several times and is very worn. He will polish rather than grind and see if it allows it to be used. Which costs money and might end up as unusable anyway.
He looked at the heads and gave them back to me. Totally shot, not even worth trying to resurrect. New heads required. Which costs money.
Finally, he looked at the flywheel. It needs to be 21mm deep between the inner and outer levels and was 20.34mm and the milling to that height had been done badly. New flywheel required. Which costs money.
In summary, I spent 5 hours dismantling an engine and nothing from it is usable. I spent £150 buying a case that is potentially no use either.
More work was done that that, but I will save that for next time. Enjoy your winter whatever you are doing, and I hope to see you at a club event in a field.
Last issue, Thomas covered getting into the scene and enthusing his children with the camper van bug. He continues:
It is always easy to devote time in club magazines such as this, to repairs and breakdown advice, and why not. Being part of the VW ‘community’ has shown me that VW owners are usually so willing to help other VW owners. Much kindness, help and assistance has been offered to me in the past. I was always so grateful, that I now offer the same whenever I can. Part of owning an older vehicle is to resolve problems (I won’t say the word ‘issue’, I hate it, it’s a PROBLEM!), in order to keep using your old vehicle. Having said that, I will talk of problems with my bus, and how they have been resolved. Not forgetting to enjoy them!
My first known mechanical difficulty was when driving from Honiton to Axminster. No sooner had I arrived in the small market town, I noticed the red generator light come on. By this time, I had been made aware that a loud BANG, followed by the ‘Red light of doom’ (the oil light) and the red light of…nearly doom (generator) require immediate action. That is, STOP THE ENGINE ASAP!
As luck would have it, I was right outside a local garage and MOT station, ong gone now to make way for a well-known supermarket chain. Coasting in, I came to a halt at the front door of the garage workshop. Looking in the rear engine bay, the fan belt was on and seemed tight, but when turning the pulley by the fanbelt (careful not to trap your hand) a grinding, crunching noise could be heard. Having worked from the local Hospital for some years and getting to know the local shops and trades, I was unaware of this garage, or if they were good with aircooled VW’s. Not able to move my van and rather stuck, I was forced to seek their help. Luckily for me, I could get to work and take the train home later, leaving the van in the hands of the garage “I’ll get the lad on it”. A worrying sight, as the poor lad looked so new and bewildered by an old aircooled van. He searched for the bonnet. There was none I informed him. “Where is the engine then?” He stares into the rear engine bay in disbelief. Clearly he was lost on this one. I queried the managers wisdom in setting the task of diagnosing my vans problem when he can’t even find the engine. If only my van could be transported home. This was not an option at that time.
The next day I was informed that the fan at the rear of the alternator had disintegrated. I trotted down on foot to visit and see for myself. Pieces of ‘doghouse’ and other components were everywhere. Even though I had not taken my engine apart myself before then (I have since) it looked a mess. The centre part of the fan was missing!
A new replacement fan was required. The garage mechanics were telling me that I needed a new engine. In my view, I had stopped the engine at the moment I heard an unusual noise (the BANG!) and when my warning lights came on. The engine did not stop, I stopped it. Still they insisted. From my early learnings of my van’s inner workings, I was not satisfied with their logic, even though I fully understand I am a self taught mechanic and not a professional. Even fanless, the engine turned and compression felt good. The search was on for a fan. At that time, the supply of VW components was OK, but not as plentiful as available now. A member of Hospital staff knew someone in the town who loved VW’s and ran around in Beetles. Only a nickname and name of a road near the Hospital. Walking up this road I soon found a VW Beetle parked in a driveway next to another under cover. Knocking on the door, it was answered by a young chap. Amused to find an unknown stranger at his door I explained my trouble. What followed was a quick tutorial on his Beetle engine, and a mucky spare fan shoved into my hand with spare nut and shims. This was my first real memory of other VW owners’ kindness. Heading back to the garage I handed the fan to the apprentice mechanic and offered advice where I could. I also carried a Haynes manual in my van which I gave him. My instructions to him and his manager were NOT to order a new engine. Fit the new fan, put it all back together and we will see what happens. Only if it all goes wrong will I consider this option.
A day or so later I called into the garage to see what progress had been made. Just in time to see it fire up and run sweetly. Success! Whilst at home, I looked at my paperwork and found that an MOT was due. Contacting the garage, I asked if they could do this as my van was with them.
The next day I was informed that my van engine was working and an MOT was passed, but my radiator needed urgent replacement. Thinking that this the manager was talking about the oil cooler, I visited the garage again. To my utter disbelief, he insisted that a new radiator was urgently needed, and explained the perils of keeping the cooling system of my engine in good order. I asked the Manager (Snr Mechanic) to show me exactly where on my van the radiator and water-cooling system were located. What’s more, if he can’t find it, I want my MOT fee waived. Not long after I left the garage, only paying for the replacement of fan and work done to expose it and put it all back. I only got outside onto the main road when my light came on again-the fan had undone itself! Leaving it with them AGAIN. On collecting it the next day I was told “To stop it happening again we put a spot of weld on the van to the shaft of the alternator”!!! (Editor – they had failed to install the woodruff key from the sound of it).
From then, I vowed to do whatever I can myself if able.
More trips and camping and diving holidays followed. Great fun. What’s more, I got to sit next to Falmouth bay, after a dive, in the doorway of my VW van supping a coffee and eating a mars bar. A realised dream at last.
In about 1988, my wife Susan and I moved from the Midlands to Devon. At that time, we had travelled to Devon and Cornwall many times for camping trips or other short holidays. My brother and I, being familiar with Falmouth, as we were keen amateur divers at the time, borrowing our parents Bedford CF Campervan or driving down for a long weekend in a mini Clubman with our diving gear.
Somewhere near and around Falmouth we used to wild camp a little. Not much fun sharing sleeping space with smelly wetsuits back then, but it was still an adventure. No-one bothered us as we always parked out of the way and never ever left rubbish about, or blocked others enjoyment with our dive gear. Being students at the time, we were quite short of money, sometimes with only enough petrol money and always made our own food. Always praying that we would never break down or need to spend any money other than for our diving cylinders to be filled with air at the local dive shop in Penryn.
Falmouth is a popular spot for offshore diving. Whilst there, I always liked the VW campervans parked near us, jealous of other divers sat in the sliding door areas having a coffee and a mars bar after a dive, the doors wide open to take in the fantastic views across Falmouth bay – I wanted one !
It was now 1994, and I was researching VW campers. A splitscreen van was really desirable, but even then, the prices of them were rising beyond my reach. We had two children by then. Daughter Catherine (about 3yrs old) and son Patrick about one and a half. A camper would provide good family transport and holiday opportunities – this was not going to be our only transport, but a fun vehicle!
The search began for a Bay window van. Many could be found quite cheaply back then. Even so, their prices began to rise steadily. For those who could not afford a splitscreen, you bought a Bay window!
It is no exaggeration to say that I visited about twenty Baywindow buses. Being no stranger to owning older cars (I cut my teeth on restoring Standard 8 cars of the 1950’s, and always kept a fleet of cars running on a shoestring to get to and from work), so I knew roughly what to look for and what to avoid. Many were bodged vans, rotten bodywork and structural areas poorly welded.
Then I found one. A 1974 (later found to be an error and made in 1973. Important as you will find later). It was white and Sumatra green paintwork, a Devon pop-top conversion, two spotlights on the front bumper and the spare wheel carried on the front. Original Devon furniture within with tiny sink and cool box. The engine was a 1600 cc Vege unit and there was a tow bar. The roof went up, and two bunks came out on sturdy bars while the seating converted to a double bed space below. The original front seats had gone, and in their place were two small seats. Think they were from a Renault.
The van had already had six owners. The last being a young couple from Exmouth. They had been made redundant from work, and their van had to go. We bought it for £2,000.
Sounds a small amount now, but even then this was the best van I had seen and most original. My wife and I paid the money and drove it away with the former owners in tears. Before we left, they made us promise to offer it to them first if ever we were to sell it in the future. They were not to know that we still own it today in 2022, with no intention of selling just yet. We simply have too many great memories in the van, and places to which we have travelled.
We later found that our ‘new’ van was converted to a ‘Devon’ at the works in Sidmouth, just nine miles from where we live in Honiton.
Why ‘Libertine’ as a name for the van? Well, even before there was a Band called ‘The Libertines’, we were travelling around the Republic of Ireland. We met an elderly lady who, when talking of our travels in the van, said “Oh, you’re Libertines then?” The name stuck.
When first taking ownership, we decided that we would pack the van with our young children and head off into the unknown. The plan was simple. Head off from Devon up one side of the country and get as far as we can go with two small children, a simple map book and a bit of petrol money. No mobile phones, Internet bookings and satnavs back then!
Our adventures took us up to Lake Windemere, onward through to Scotland. Beautiful Oban and Fort William. Occasionally wild camping for the adventure of it, but really because we had no money for camp sites. One night we camped in a field, and much noise was coming from the fields behind where we were camped. Small huts occupied the hillside. We later found that this was a film set village for ‘Rob Roy’ with Liam Neeson. The noise was from the end of filming party.
We even got to attend the Edinburgh Festival by accident more than design. Our journeys took us south again, then home. In all that time (two weeks) I am not aware of the van letting us down. It rained almost constantly, only stopping when we did. Then blue sky, see the sights and back into the van for more rain to fall. We were all so wet once, and all our dry clothes used up we had to find a laundrette to dry some.
The van had proved itself, the kids enjoyed themselves and it was a great first adventure. In fact, our children (now 31 and 29) have campers of their own and love wild camping – so something has rubbed off!
For this Member’s Motor, we look at Andrew Snowden’s ’71 Early Bay and his quest to give her a name.
What’s in a name?
As I write this, our van has been in our ownership for exactly ten years.
She is ‘the van’. We have never found another name that suits her – and she definitely is a ‘her’ – despite trying a number of names over the years.
We initially tried ‘Sydney’/’Cyd’ and then ‘Adelaide’ in recognition of the van’s roots. She is a ‘71 Australian Early Bay. But neither name stuck. ‘Sheila’ certainly didn’t fit. ‘Bluey’ didn’t work despite her colour.
We tried ‘Roxy’ for a while, as a homage to Rocinante, the horse ridden by Don Quixote as he roamed across Spain in the Middle Ages, madly trying to hold on to a chivalric world that was being overtaken by modernity. A bit like me, or any classic VW driver, I thought! But the name ‘Roxy’ didn’t catch on.
More recently, we tried ‘Scooby’ to reflect the new heart in our van – a two litre Subaru engine. That didn’t stick. An unkind friend now refers to her as the ‘Sub-dub’, a lesser being in his view. But, understandably, not our name for her.
In the end, says Jane, my patient wife, if the van had a name, she’d have let us know by now. So the van remains ‘the van’. And over the last ten years ‘the van’ has taken us across Spain, to France on numerous occasions, and to many festivals and campsites across the UK.
In the early years of ownership, she wasn’t a reliable traveller, to say the least, and we became adept at keeping calm when she broke down badly, enjoying a glass of wine once she was on a low-loader and talking about how we were saving on petrol costs and getting to our destination far quicker!
The scariest moment was in Spain, coming down the long descent from Puerto de Somosierra, when the brakes started making a terrible noise that even turning up the stereo didn’t hide! We nursed the van to the nearest campsite and decided to take advantage of our breakdown insurance. The next day a mechanic checked out the braking system, used my WD40 and mallet, and suggested that we just take it easy for the rest of our trip and use the brakes more sparingly on steep descents. At least I hoped that’s what he said! He couldn’t speak any English and couldn’t understand our basic Spanish. He probably said, ‘it’s a death trap and I’ll report you to the police if you try to leave the campsite’! But we had no further problems.
These days, after much fettling and a great new engine, she’s an absolute joy which can be relied on to get us to our destination and, more importantly, get us home again. The last pre-lockdown French trip covered 2000 miles, taking in Classic Le Mans and the Cahors Jazz and Blues Festival without a hiccup. This year, we have toured North Yorkshire and Cornwall without a hitch. Not bad for a 50 year old vehicle.
I’m not sure why she is a ‘she’. The colour? Her mannerisms? It’s a strange thing given that our previous Bay Westie was, within minutes of ownership, a ‘he’ and within hours named ‘Greg’. In a recent fit of nostalgia, I googled Greg’s registration number – PPH 138L – to see what had become of him. I came across an old request on Volkszone from more recent owners of ‘Bertha’ (Bertha??) who had just had her restored and were searching for her previous history! If there are any magazine readers who know of Bertha (aka Greg), we had her/him from 1999 until 2005. Given the registration number, I can’t understand why we and subsequent owners didn’t name the campervan ‘Phil’ or, if she really is a female, ‘Phyllis’. Strange things, campervan names.
I guess a name gives a van greater personality or individuality or even humanity. But there are limits. In the late 90s, we were looking for a late bay in our price range and one seller invited us to view ‘Poppy’ which was parked in his back garden. ‘Please call out to her as you go past the garage’, he said. ‘Poppy doesn’t like people sneaking up on her’! Giving a van a name is one thing. It may even have a personality. Giving it psychological issues is a step too far. In my view.
OK, our van may not have a name. But at least she has no hang-ups! And she’s given us 10 years of great enjoyment.
Spend since last report: £160. Total hours labour since last report: 25.5
In February 2022, I worked a lot of hours and managed to do 21 hours on Eric. In March 2022, I worked a lot of hours and managed to do 15 hours on Eric. Then I retired and had no time to get in the garage again until August! They say that you wonder how on earth you managed to find time to work and for sure, I am keeping busy. From April to July, my first four months of retirement included 36 nights away in Poppy, my wife Lorna’s 1972 Crossover, including club camps at Cheddar, Great Bourton, Odiham and RAF Odiham! I also reupholstered 2 sofas, built a large timber deck for a friend, a car port, and numerous other projects.
Finally in August, I felt that I had enough items complete to venture back into the garage to see Eric. For anyone new, forgetful or just venturing into the magazine – I bought Eric in August 2015 as a blind purchase on eBay, he had been rotting outside for many years and was in a terrible state. The previous ten years of MOTs were a litany of corrosion, underseal, advisories and decay, spend on him was minimal and the mileage shows he did not get used. I am now at 862 man-hours of labour on Eric. Yes, 862. The project plan lists another 300 hours to go and total outlay excluding my labour is projected to be £17,000, just don’t tell my wife!
The first job after time away from his restoration was also the reason for not getting back to it – the scary piece of chopping the bulkheads from behind the seats. Given that some Bay window vehicles have no bulkheads, I was happy to do this from a strength perspective as I was putting in further metal to brace the B posts. Out they came! Then some 20mm box section steel was cut up and welded to make a rectangular back rest for a bench seat going the full width of the van. Then I repeated it to make a rectangular seat base for the bench seat. The bench seat is inclined very slightly to match the original seats and is mounted to the floor on welded brackets. These brackets effectively make hinges that are about 6 inches from the front of the seat mounted on the tubs approximately where the original seats were mounted.
Two bulkheadsNo bulkheadsBench seat frameCardboard back rests to assist the arm placementSerpentines, coils and outer in place
“14 Eric 01” caption is “Two bulkheads”
“14 Eric 02” caption is “No bulkheads”
“14 Eric 03” caption is “Bench seat frame”
“14 Eric 04” caption is “Cardboard back rests to assist the arm placement”
“14 Eric 05” captions is “Serpentines, coils and outer in place”
>
But why go to that length? The base is hinged, and I then made some blocks to go at the rear of the base. This makes the base inclined slightly the opposite way. Then I made “arms” for the back rest and after much mocking up with corrugated cardboard, the offside and nearside arms and their brackets were fabricated from 2mm steel plate. These arms support the back of the seat allowing you to drive in comfort. Once you get to your destination, the arms can be repositioned allowing the seat back to face the opposite direction. With the base also inclined in the opposite direction, Eric should end up with a sofa facing backwards. That cannot quite be finished yet as the back rest height is determined by the height of the seat base. Following the standard seat design, I welded some coil springs to the base frame down the sides of driver and passenger. Then I welded some serpentine zig zag springs front to back in between them. These sit on little bits of serpentine spring blow torched to bend to the right height. This now looks very like the original seat, and I added a steel string of 3mm diameter all around the outside to help the fabric sit correctly. Two front seats with metal as per the original for long distance comfort. Hopefully.
Next up, I need to add serpentine springs to the back rests for driver and passenger per the original design and work out exactly where the back rest will sit, then attach it to the arm.
Malcolm and Val joined us for my birthday weekend and the demo of the seat and the slide out pod (see previous issues) went well. As ever, Malcolm offered his thoughts and ideas which greatly helped refine the rough edges ready for implementation. Welding new steel is so much easier and more fun than blowing holes in rotten metal!