Category Archives: T2

How to improve on a classic!. The best selling version of the Transporter

Member’s Motor – Bex Randall – Florence

I have always dreamed of owning a T2 VW
Campervan, but until last year (2016) I had
never been in a position to do so. Being a
complete novice when it comes to anything
mechanical (I can just about do the tyres and oil
on my car), I soon realised that buying a T2 was
a complete minefield, for which I was woefully
ill equipped. I wanted one that I could drive
and enjoy straight away and not a renovation
project, so it had to be in very good condition,
both mechanically and bodywork wise.
This meant I needed help; Hubbie is not
mechanical either, so luckily my help
came in the shape of a friend’s husband,
who not only is a trained mechanic but owns
his own racing car business (featured on
Dragons’ Den), AB performance Ltd.
So in 2016, the hunt began in earnest and after
several failed missions with Andy telling me
“NO!!” because of rotten bodywork or needing
too much interior work, I spotted Florence. She
was for sale in Gloucestershire, a long way from
home and too far to extend the good will of
Andy to help inspect her.
From the advert and pictures, Florence looked
perfect.
She was born on 01/09/1974 in Australia and
only had one owner whilst over there. She was
originally an 8 seat micro bus, with an 1800
petrol engine but when imported to the UK
in 2005, she had been extensively refurbished
with fresh paintwork and an engine re-build
with new twin Solex carbs. Florence has a no
fuss camping set up, with sink, gas cooker, rock
‘n’ roll bed and 12v leisure battery. There were
only two previous owners in the UK, making me
her fourth proud owner.
In the interest of not wanting to buy a duffer I
decided to use the services of Type 2 Detectives
in Burwell. They acted on my behalf and went
to inspect Florence, carrying out a full external
and internal examination. Paul’s words to me on
the phone were “I’ve never seen such a good
example of a T2 and if you don’t buy her, we
will”. There was some work that needed doing
and bearing that in mind, Paul negotiated a
price at £21,500, £3,500 off the asking price
of £25,000. The owner was very reluctant and
sad to sell her, keeping her in a garage with a
dehumidifier, but needs must. So Florence was
brought back to Suffolk by Type 2 Detectives
on a trailer, where they then did some work on
her. They completed full rust proofing as her
under carriage was perfect, rewired the choke,
fitted new shifter couplings, new front discs and
brake hoses, new clutch conduits and a few
other bits and pieces. Florence has the added

bonus of a roll out canopy, which has proved
invaluable for doggy events!

So on 29th June 2016 I became the very
proud owner of Florence, a dream come true!
I purchased her with 54,772 on the clock and
she has averaged 120 miles a month from her
importation date to the UK in 2005. So what do
I use Florence for? I run a Doodle club with two
friends called “Doodles Do Splashes N Dashes”
(any poodle cross). We currently have 345
members and me and my chocolate doodle
PERCI have so much fun! We organise doodle
dashes (walks) and splashes (swims) and also
fundraise at our events for our local hospice “St
Nicholas Hospice” with an aim to raise £1000
this year. Florence is used as our base camp at
these events and we use her as a stall on our
fundraisers. This year we are going to Doodlefest
for 3 nights – a kind of Glastonbury for Doodles!
I just love every minute we spend in her, making
us and lots of other people happy. I have now
finally got her interior exactly as I want her. A
lady in our club Christine Winkless who owns
the Doggy Cookie Company has made all the
doggy accessories, campervan designed dog
bed, leads, collars etc. I feel privileged to be
able to own and thoroughly enjoy a piece of
history. Florence has clearly been cherished for
43/44 years and I will continue to do so. She is
currently having her winter health check with
Mark at M&J servicing and repairs. Mark is a
VW fanatic and air cooled specialist who will
continue to cater for Florence’s needs in my
mechanical ignorance!
Member’s motor – Phil and Sophie Aldridge – Bluebell – Part 1

For this edition of Member’s Motor, we look at how our Editors’ Bay “Bluebell” played a key role in their wedding day. On December 21st 2018 Phil proposed to Sophie at Chatsworth House, somewhere they had been visiting traditionally at Christmas for most of their relationship. So when they were looking for a
wedding venue, it’s no surprise that Chatsworth won the day and began to plan for their wedding in August 2020.


With almost two years to plan, they had most major parts of the day organised by early 2020 and then in March, the world was turned upside down. The Coronavirus Pandemic hit the UK and just like that, all social gatherings were off, including Weddings. As the year progressed, it became clear that the wedding would need to be postponed until 2021. With April set as the new date, 2020 passed and with the situation still unimproved in January 2021, the date was postponed again to August 2021. With plans now underway, it was only right that Bluebell would be used as the main wedding car on the day and on 21st August this year, that is exactly what happened. The wedding successfully took place.


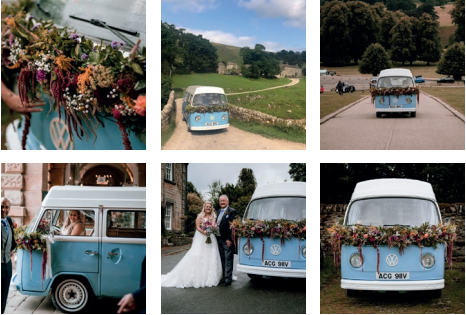
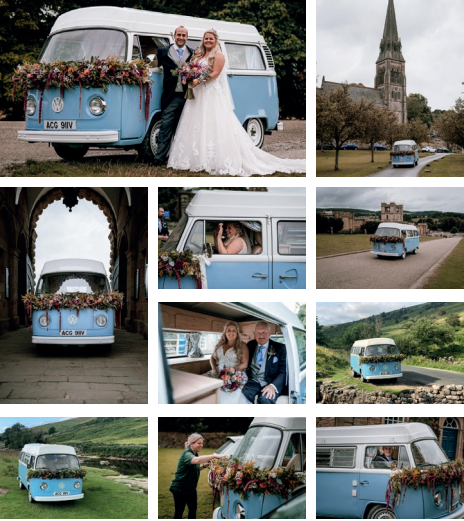
Bluebell was decorated with flowers from the Chatsworth estate by the Chatsworth house florist and then used to drive Sophie and her Father to the church (on time), driven by one of Phil’s best men and then Phil and Sophie drove themselves from the church to their reception. On arrival Bluebell then took pride of place in the middle of the courtyard at the Chatsworth House Stable Block.
Bluebell did Sophie and Phil proud on the day and they then had a week away after the wedding camping together in some of their favourite spots in the UK, still decorated with the flowers!

Another one in the bag! Club camp completed – BusFest

The Club on tour – Three Counties Showground, Malvern, Worcestershire

September 9 to 11 2022

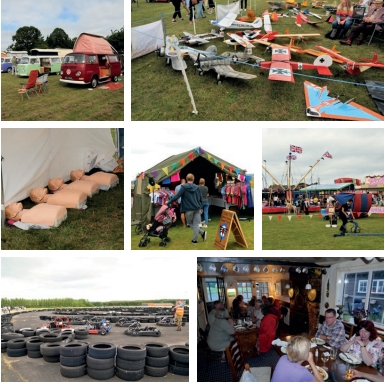
Well, we did it! Over 100 club members and their families were in the club field plus a few elsewhere. Burgers, bacon butties, teas, coffees, biscuits.

Over 40 new members and a lot of renewals down at the membership stand.

6 new people onto the newly renamed Management Team.

Everyone seems to have a fabulous time and we handed out bubbly prizes to the winners of “Best van”, “Best van interior” and “Best van story” to club members as voted by club members.

Ask The Mechanic – Gas use

There were no questions for The Mechanic
this issue, but with the weather tuning cold
and some members continuing to use their
campervan through the seasons, that means
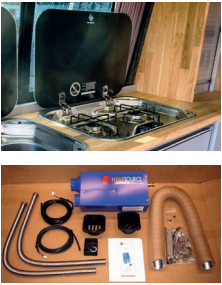
heating. There are gas heaters on the market
and these are becoming more affordable. Gas
is also used for cooking in many campervans,
so it’s time to talk gas safety!

Types of Gas
Let’s start by looking at the different types of gas
available in the UK and beyond.
All European countries have their
own gas bottle suppliers and each
of these have their own regulators
and adaptors. Campingaz is
available all through Europe in
small bottles which is great for
quick trips or for solo travellers. We (Editors) use
campingaz 907 bottles as they’re fairly readily
available in the UK and abroad and they fit nicely
in the cupboard under our storage trunk!
LPG (or Liquid Petroleum Gas) is the most
common kind used in campervans and motor
homes and it comes in two types; Propane
and Butane. Without going into the differences
between them in chemical structure, here are the
main differences:
Propane
‹ Usually used in vehicles where multiple
appliances will be running off it.
‹ Ideal for cold climates as it operates down
to -40°C!
‹ It’s much lighter and less dense than Butane.
Butane
‹ Operates more efficiently than Propane.
‹ It’s denser than propane, so a bottle of the
same size will hold more gas.
‹ Butane can’t be used at temperatures below
0°C (It cools down to a liquid state).
Different appliances may need one or the other of
the main LPGs to operate effectively, so it’s always
worth checking that before you buy.
Gas Safety Rules
‹ The standard that applies to campervans is
BS EN 1949: 2001 + A1:2013. If you ever want
more information, it is worth looking that up.
‹ There isn’t the same level of regulations
for fitting gas and gas appliances to motor
homes and campervans as there is to houses,
but would still recommend that anyone
installing an appliance is registered.
‹ If you’re installing gas appliances into
your campervan, the British Standard isn’t
mandatory, unless you’re going to be hiring
that vehicle out.
‹ If you are going to be hiring, ensuring that
everything is compliant with the law is down
to you, just as it would be if you owned a
house or flat that you were renting out.
‹ You’re allowed to undertake work yourself
if you’re not a registered gas engineer, as
long as you’re competent. (The definition
of competence is vague, but you’ve got
to ask yourself whether you’d be happy
to undertake the work and have the
responsibility on your shoulders).
‹ There’s a lot that could potentially go wrong,
and the stakes are certainly
high, so it may well
be worth getting a
registered engineer
to fit it.
‹ Registered gas engineers can charge
anywhere between £30 and £100 an hour,
but it’s worth looking around in your area if
and when you need one.

Top Tips for Gas Safety
‹ Ensure the gas is turned off before you travel.
‹ If you’re using your vehicle for work purposes
and carrying compressed gas, you must show
a sticker to alert people.
‹ If you’re not using your vehicle for work, but
still carry compressed gas, it is advised to have
a warning sticker displayed whilst carrying
the gas.
‹ Unless your campervan or motor home has
a rotating rooftop device, you’re limited to
carrying two 10 litre bottles of gas in the UK.
‹ All flammable gasses must be carried upright
at all times.
‹ Make sure you’ve got a Carbon Monoxide
alarm. They might not be stylish, but they’re
potentially lifesaving.
‹ Note that LPG gasses are heavier than air, so
will form a ‘puddle’ on the ground in the event
of a leak.
‹ Floor vents must be kept clear.
‹ If parked up in snow/mud/etc then ensure
that the vents aren’t blocked.
‹ Changing the bottle is the most dangerous
time, always make sure that you know how to
remove and fit the regulator and keep
well away from naked flames when
changing the bottle.
‹ Don’t use a naked flame to look for a leak
(sounds obvious!) and check for pipe leaks by
using water and washing up liquid solution,
bubbles will appear at a leak.
‹ Make sure you have a fire blanket and/or fire
extinguisher, as well as a fire alarm.
‹ If you’ve got an older VW it is recommended
to carry an extinguisher any way, in case of a
dreaded engine fire. Can you really have too
many extinguishers in an old VW?
The rules and tips for gas safety aren’t
complicated and if you keep to them, the use of
gas in your campervan is perfectly safe and an
excellent resource.

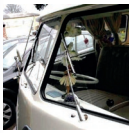
Ask The Mechanic – Windscreen wiper condition

This issue, The Mechanic takes a look at
an often overlooked but important issue,
windscreen wiper condition.


Windscreen wipers are an invaluable part of any vehicle, providing the driver with a clear,
unobstructed view of the road when it is needed most. Whether it is rain, sleet, snow or
leaves covering your windscreen, the wiper blades will quickly and efficiently clear the obstruction,
meaning you can continue your journey in safety.
However, of all the parts of a car which are subject to wear and tear, windscreen wipers are perhaps
the most fragile. Manufactured from thin rubber, they are designed to operate smoothly on the windscreen without damaging the surface of the glass, yet despite their fragility they are often required on a daily basis, possibly for long periods of time during wet weather. In winter they become frozen to the glass and in summer they are used to help to clean the windscreen, while being subjected to high temperatures. It is hardly surprising then, that windscreen wipers do not last indefinitely and require regular replacement. Often the need to replace wipers is overlooked, although regular servicing and MOT testing should identify if they are becoming worn.
However, rather than relying on these tests to assess the condition of the blades, car owners should be aware of the common signs that the windscreen wipers are failing, especially with autumn upon us. So what are they?
Streaking: blades that are in good condition should clear the rainwater from the windscreen effortlessly, in one complete action. This means there should be no streaks of water where the blade has failed to make contact with the glass.

Unusual noises: windscreen wipers should operate with minimal noise or ideally should be silent. Sounds such as squeaks, screeches or scrapes could indicate that the blades have become worn.

Irregular movement: wiper blades which are in good condition will move smoothly across the windscreen. As they become worn over time, you may notice that the blades judder on operation which is an indication that replacement may be necessary.

Ragged or distorted blades: visually inspecting the condition of the windscreen wipers should be a weekly task for all vehicle owners. By lifting the arms of the wipers away from the windscreen, you can quickly assess the condition of the rubber. Ragged, jagged or distorted edges, where the blade makes contact with the glass, should prompt you to replace them immediately.

Worn blades may not only hinder your vision, but can also damage your windscreen, which will in turn not only cost you dearly in a replacement screen, but also hinder your vision even more, making it dangerous to drive with the vehicle in such a condition.

Replacement blades can be picked up very cheaply for all types of van, so there is no excuse not to check yours and change if required, but remember… “Buy Nice or Buy Twice”.

Member’s motor – Paul and Vicki McManus – Beryl

For this edition of Member’s Motor, we look
at Paul and Vikki McManus’ recent purchase
of Beryl, their 1973 Early Bay Window.
I’m Paul, I work as a designer in the civil service
and Vikki works in HR with the NHS. We have 3
children: Ella 20, Dylan 18, Jonah 15 and Buxton,
our 3 year old Cockapoo.
I have always wanted to own a classic vehicle.
My dad was an engineering fitter by trade and
a talented mechanic. I have fond memories of
watching him work on the family cars and he took
myself and my siblings to the annual Steam Rally
at Shanes Castle in my native Northern Ireland.
My love of classic cars was nurtured there and a
favourite family photograph shows me sitting on
my Dads Citroen DS Safari! Vikki’s first car was a
VW Beetle which her mum christened, Baldrick!
We decided that we wanted to buy a VW camper
whilst we were walking Buxton in the grounds of
the local cricket club, when a gentleman pulled
up in his late bay.
The brief conversation we had with him
continued as we walked, and a seed was planted.
I tend to research things fairly thoroughly before
committing. It was important the van suited our
lifestyle and it was something we were both
keen on. My research led me to Westfalias, which
I understand were one of the few companies
that purchased mini buses to convert, others
opting to buy panel vans and cut their own
windows. I particularly liked the interior styling of
the Westfalias. It was then the question anyone
who’s bought a classic vehicle has to answer
what condition and how much?! We did consider
a project, but as we looked further, we came to
the conclusion that a fully restored Westfalia Bay
was what we wanted.
Our search criteria was fairly specific and I
was able to locate a few options online and
discovered our van on Facebook; it’s a 1973
Westfalia Continental, first registered in 1974.


I contacted Adam, who had restored the van and
was very impressed by his knowledge and the
work he’d done. I asked if it was possible for him
to send me a video and he and his partner Alex
kindly did so a few days later.
I kept Vikki fully informed on the vans I’d found
and we both agreed Adams van was one we
wanted to go and view ourselves. We set off
to Doncaster in August 2021 and met up with
Adam, one of the pictures shows Vikki standing
next to the driver’s door and her smile says it all.
It was love at first sight!
I had a slight concern that Vikki might find driving
a classic off putting, but it brought back lovely
memories of her Beetle and she was hooked.
The van looked even better in real life too, Alex,
Adam’s partner, had chosen the upholstery and
we loved the nod to the plaid interiors of the late
70’s bays and how it toned with the overall colour
scheme. The interior is completely original aside
from the upholstery, the floor and the fridge.
I agreed a price with Adam subject to an
independent review, but was somewhat
embarrassed to get a second opinion, as to
my untrained eye it appeared to be a stunning
restoration. Adam was more than happy to have
someone review his work however and Nick, an
aircooled specialist in Doncaster, put the van on
the ramp and inspected it thoroughly.
Nick was so impressed by the van that he refused
to take any payment for the review, saying he
was delighted to find someone with Adam’s
expertise locally and reviewing such a van had
been an absolute pleasure. This was my first taste
of the special bunch of people that VW owners
are. Nick runs a Splitty and his mate has a show
winning bay. Nick said Adam’s van would provide
stiff competition for his mate’s van, so I was more
than happy!

Some of the work carried out during the restoration includes:
‹ Paintwork taken back to a bare shell.
‹ Welding repairs to body and chassis.
‹ Running gear and steering overhauled with
new parts where necessary.
‹ Braking system has had a full replacement of
all hydraulic and friction components.
‹ Engine stripped down to bare casings,
cleaned, inspected, and rebuilt with all new
bearings, seals, refurbished cylinders and
pistons, reconditioned genuine cylinder
heads and finished off with a genuine
Ernst exhaust.
‹ The original Solex carburettor has benefited
from a strip, clean, and rebuild.
‹ The fuel pump has been upgraded to an
electric version with safety cut off.
‹ The ignition has been replaced with an
electric item to eliminate the constant and
often problematic maintenance of the
points and condenser.
‹ A large, fully functioning fridge is in place of
the old cool box.
‹ Underslung fresh water storage tank twice
the size of the original has been fitted.
‹ 240v mains hook up with the addition of a
leisure battery for off-site camping.
‹ All seating has been recovered and the
rear bench seat has been fitted with three
seat belts.
‹ 12v socket for charging of phones etc
and an iPod compatible stereo.
‹ New pop top canvas with side
opening windows

As soon as Nick confirmed the van was indeed
the superb restoration we believed it was, we
paid the deposit and I began clearing the garage
to ensure she had a new home. We drove over to
Doncaster again in late August 2021 and I drove
the van home over the M62, which I understand
is the highest motorway in England.
I have to admit, I was slightly nervous, having
only had a brief test drive up to that point, but
she never missed a beat and coped with the hills
without issue!
Strangely enough, I saw 3 other cars at the
roadside that day with overheated engines and
another on fire!
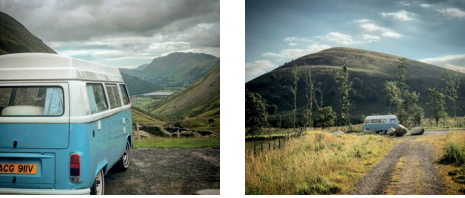
Since getting her home we have named
her Beryl. She is painted Beryl Green and Lotus
White, so ‘Beryl’ seemed like a good fit. I have
installed a period VW Stereo and the batteries
are linked to a Noco Genius 2 x 2 to keep them
in tip top condition.
We bought Beryl at the end of the season but
have managed a day trip to see Vikki’s parents
in Thornton Cleveleys and an overnight stay
with Buxton our Cockapoo at Bolton Abbey in
Yorkshire. We loved staying in Beryl and look
forward to many more trips and shows in the
coming years, perhaps we will meet a few of you
along the way.
Paul and Vikki

Club Event – RAF Odiham Family Day 2021

Can it be a year already?

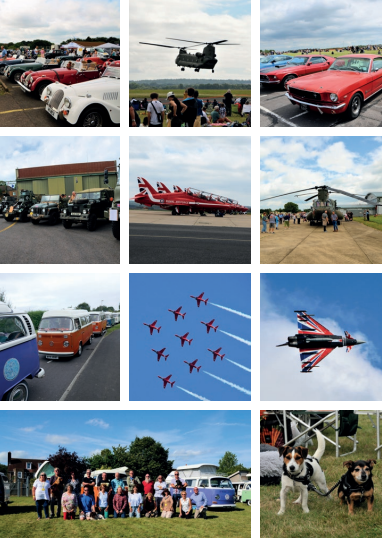
August 14th 2021 saw the return of RAF Odiham’s Family Day. The club had several vans in attendance as part of the show’s classic car event and members camped for the weekend at a nearby pub. The day involved displays from resident Chinooks, Typhoons and also the Red Arrows, who put on an excellent 40 minute display. This event is getting better and better each year and we are privileged as a club to be invited to attend.
Photo credit to David Eaton.

Tales from the driving seat – Wonderful Wales Part 3

Continuing our 2020 Social Distance Summer Road Trip, we left Wales and headed north to
Scotland, but we had to reach the border first and decided to spend a night in the Lake District
on our way north to break up the journey. The journey from Wales to the Lake District was long and uneventful. 200 miles in a VW Camper at 55mph is quite a slog, but we are used to long durations on the road and somehow in the camper it never seems as bad as being in a car. Maybe that’s because the camper feels like being at home? At least you can pull over pretty much whenever you like and make a cuppa!
On arrival at the Lake District, we hit Windermere. We aren’t staying here, but it’s the starting point for a road through the mountains that I have wanted to drive ever since coming to this location by accident four years ago; the Kirkstone Pass! For those who know the Lake District well enough, you may know there are two places called Troutbeck.
One of them is close to Penrith and has a campsite, the other is near to Windermere and doesn’t! Four years ago I drove to the wrong Troutbeck and haven’t been able to live it down. The Kirkstone pass pretty much runs between the two, but we weren’t brave enough to take on the pass last time we visited (first time towing the camping trailer and didn’t know if we would make it!… bearing in mind one of the roads on the pass is called “The Struggle!” and so we took the long way round instead.
From the Windermere side of the pass in the south, it’s a long uphill jaunt along harsh mountain roads with tall, threatening, exposed rock faces, narrow sections and tight bends. After what seems like a lifetime with my foot flat on the throttle (I don’t dare back off in case we can’t get going again!) we make it up to the summit of the road, which is surrounded by even taller mountain peaks and rocky landscape

The area is partly submerged in cloud, but there is a cafe at the top and there are bikers gathered
(cars too) who have been enjoying the twisty black stuff. The road back down the other side towards the
North is very similar; steep, twisty and narrow! One main difference now is the pedal choice. Instead of the right one being hard to the floor, I am covering and pumping the middle one in the hope that we don’t get brake fade! (That’s a story for another day!) The route down treats you to magnificent views over Ullswater in the distance and when you do eventually reach it, the road follows the undulating contours of the shoreline, providing a few places along the way where you can stop and enjoy the views over the water, maybe even have a paddle.
We don’t stop as we are keen to get a decent pitch secured for the night and head to our campsite at Troutbeck Head. To get to the site from Ullswater you have to climb the hill at Aira Force waterfall, which is understated at steep. Don’t forget to look in your mirrors to appreciate the stunning views!
We have visited Aira Force waterfall in the past. It’s a very popular National Trust attraction and has a sizeable car park, but on a day with decent weather it gets extremely busy.


Here’s a top tip: Visit the waterfall on a really rainy day. It will be virtually empty and the falls will be even more spectacular! Just make sure you pack your waterproofs as you will get wet!

After checking into the site and enjoying a cuppa, we head back out down to Ullswater and see if we can find a spot to stop on the shoreline to let Ruby (our springer spaniel) have a paddle. It’s rammed. It’s summer, it’s the school holidays and people have been in a covid lockdown for 4 months!
We follow the road around Ullswater and up to Penrith to get some supplies. If you’re in the area, this is a great spot to pick up essentials before heading off into the wilderness for a few nights. Within 5 minutes of each other, there is a Morrisons, an Aldi and a Booths! There’s also a Pets At Home and a Go Outdoors. So everyone, including travelling pets, should be well catered for.
With stocks of essential supplies and the fridge filled with dog food (should really be cold alcoholic beverages in there), we head back down to Ullswater again and Bingo!.. The crowds and families have now left as it’s tea time, so we park up and head down to the shore. I pack a towel and my swim shorts… just in case.

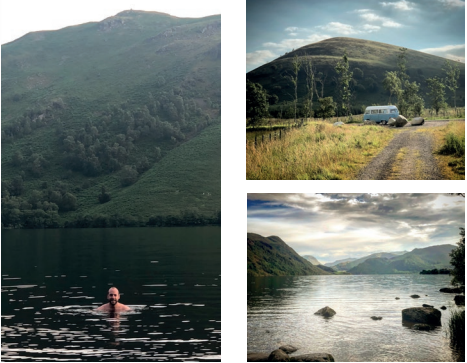
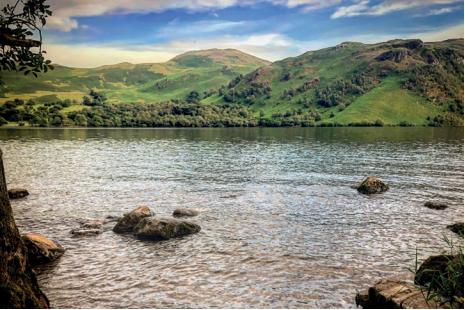
When we get down there, the views are simply stunning. There are some beautiful and picturesque places in the UK, but this has got to be up there. It is hard to believe that we are still in England, this could easily be the Italian lakes! The sun is shining on the mountains on the other side of Ullswater, which is flat calm and quiet. Ruby needs no persuasion and is straight in the water. I follow in my flip flops… wow! That is seriously cold!!
Feeling brave, or possibly just delirious from driving all day, I don my swim shorts and head in. After 5 mins of walking up and down up to my waist with excuses about how it’s too cold and how I will develop hypothermia, I go for the dunk. I’m in. It’s freezing! As I paddle I start to loosen up and feel the refreshing water washing over me. After 5 minutes or so I realise that the water is so cold it is making my skin tingle and I feel bits of me going numb. I carry on a while before making the decision to get out whilst I am not shivering with teeth chattering together like one of those wind up toys!
I dried myself off and we headed back to the camper. Ruby got to have her favourite towel dry and we head back to base at the campsite for dinner. We have a short walk in some nearby footpaths before the sun goes down and head to bed in preparation of another long day that will take us further north and across the border into Scotland!
Phil Aldridge
“Tales From The Driving Seat” is on Instagram
@talesfromthedrivingseat and blogspot
www.talesfromthedrivingseat.blogspot.com

Ask The Mechanic – Fitting a hot start relay

If you have an air-cooled van and experience
the dreaded “click” when trying to start your van,
it could be that the original wiring and ignition
switch now has a higher resistance than it did
back in the 70’s and cannot cope with the current
required to turn the engine over using the starter
motor.
One way to counteract this is to fit a relay that
takes the current load and the ignition switch
activates the relay.
A relay sourced for this application can be
purchased from Just Kampers; JK part number
J12928.
Parts required
‹ Suitable cable for wiring the relay – suggest
Halfords 12v 17A cable sold in 4m reels
‹ Several crimp connectors
‹ The relay itself – JK part number J12928
Method
It is advisable to always disconnect the vehicle’s
battery before carrying out any work on the
electrical system.

  1. Mount the relay in a safe place as close to the
    starter motor as possible.
  2. Take the existing wire from terminal 50 on
    the solenoid and extend it to reach the relay
    position.
  3. Connect this extension from terminal 50 on
    the solenoid to terminal 86 on the relay.
  4. Now connect terminal 85 on the relay to a
    good earth on the vehicle body/chassis.
  5. Connect terminal 87 of the relay to the live
    terminal of the vehicle’s battery.
  6. Now connect terminal 30 on the relay back
    to terminal 50 on the starter solenoid.

Whilst every attempt is made to ensure that
these instructions are as accurate and clear as
possible, the author or club itself cannot be
held responsible for misinterpretation of these
instructions or for any subsequent accident or
damage caused through mis-fitted parts.

Eric the Viking – a restoration in many parts – October 2021

Spend since last report: £427. Total hours labour since last report: 52

Last time I had finished the offside suspension and the brakes were in progress. This time I’ve managed to do rather a lot!

In order: The front suspension and front brake is back together on the offside, the gearbox is out, the underside of the fuel tank was then accessible to get its rust removed.


The steering box has mostly been cleaned up, so has the gearbox and Eric is back on his wheels.

A large chunk of the current work was the cab floor. The driver’s side was pretty ropey and the outer half needed replacing. I chose to remove more good metal than was really necessary to give a straight line of seam weld to reduce the visible change. I was also able to rust proof the tops of the chassis rails at the same time. The passenger side was less rotten and was a smaller patch plus a final rectangle in the middle just behind the handbrake and we have good strong metal all welded in.

Then primer time but my spray gun had a fault and it looked rubbish and will need smoothing before top coat. Nonetheless rather improved!

The next part of the project is going to be interesting! The offside middle panel opposite the sliding door is a fixed panel. Several years ago I replaced the lower part of that panel and the outer sill with a cheat panel that is all joined together. It looks ok but the top of the original panel had been damaged in an accident many years ago and there was a lot of filler. I also cut the edge off the lower replacement panel as it was slightly too large but welding that cut in looked rubbish.

I had bought a replacement lower sliding door panel which is the same on both sides and I picked up a new outer sill at Busfest because otherwise it was £17 for the sill and £7 postage!

Outer sill joins the middle sill which is new metal, so it was quite a quick win. More on this next time as I have a plan so cunning that it could be a fox who has just been made Professor of Cunning at Cambridge University.

Finally, I was on Facebook one evening and someone that I did not know called Jon was asking for more information about this picture. He and I got chatting, and that’s Eric in the picture with Jon’s Grandad at some point in the 80s. That roof was changed to the Paris roof that arrived with Eric, the paintwork had mostly been replaced with primer and rust, and the front grill was missing. The louvre windows I have and the rust hole from the aerial on the roof was quite extensive! I am not currently looking to sell Eric as I want to finish him and then use him, but Jon has first dibs if that day should ever arrive. Talk about a small world – only 15 more owners to find and I will know the whole history.