Category Archives: Technical

Items of a technical nature relating to mechanical, electrical or bodywork issues

Ask The Mechanic – Indicator and Wiper Switch

Indicator and Wiper Switch Assemblies Removal and Repair

The first step is to remove the steering wheel
from the steering column. Before you start,
it’s worth straitening the steering wheel/front
wheels so that when the steering wheel goes
back on, you know where to line it up.
The steering wheel is fitted to a splined shaft
within the column and is fixed with a single
24mm nut.
To access the nut, the horn push in the centre
of the steering wheel has to be removed. The
horn push is usually made of plastic and is often
brittle, so prizing off with a screw driver or metal
scraper is not the best idea. I found that using
a finger nail was sufficient, working my way
round the horn push and lifting upwards (see
pic 1).
With the horn push removed, the 24mm nut
should be revealed and there will also me a
lead and crimp connected to a spade terminal.
Remove this crimp to disconnect the lead and
move to one side to create some space for a
spanner.
Using a 24mm ring spanner or socket and
ratchet (an open ended spanner can slip easily),
loosen the nut but do not remove at this point
(see pic 2).
Mark the position of the wheel in relation to the
shaft using chalk, pencil or paint pen to assist in
lining the wheel back up on fitment.
Now, with the nut still fitted, give the steering
wheel a tug upwards to free it from the splined
shaft. It should become loose but the fitted nut
will prevent you from smashing your face with
the steering wheel (believe me!).
With the wheel loose, remove the 24mm nut and
lift the steering wheel off too. This will expose
the indicator and wiper switch assemblies fitted
to the top of the column (see pic 3).
At this point, you want to remove the cap from
your windscreen washer bottle to depressurise
it (otherwise you will create a drinking fountain
later on!) if you have pressure in your tank,
you’re the exception

Now you can begin to remove the switch
assemblies. Undo and remove the 4 small
screws that hold switch assemblies inside the
steering column and keep them safe with the
24mm nut from earlier.
Now it’s time to disconnect the electrical
connectors from the switch assemblies. Around
halfway down the steering column, the plastic
shroud ends. Underneath this shroud is three
electrical connectors. The two nearest the
driver seat are the two plugs for the wiper and
indicator switches. Give these a gentle tug to
disconnect them and tuck them to one side,
they can’t be mixed up so don’t worry.
With the electrical connectors removed, you
can now begin to pull the switch assemblies up
and out of the steering column. Do this slowly
though as there are two pipes connected
to the back of the wiper switch assembly
for the windscreen washers. These can be
disconnected at this stage and should have
been depressurised earlier (see poic 4).
Now you should be able to remove the switch
assemblies, but be careful not to break the
plastic wiring sleeves as these tend to quite
brittle with age.
With the assemblies removed, I could now see
what had happened with my indictor lever,
the bottom part of the lever mechanism that
operates the switch had snapped ( see pic 5).
The indicator and wiper switch assemblies are
joined to form one piece but are easily split.
They are held together with four metal sleeves
and the two parts can be split easily using a
screw driver (see pic 6).
Once they are split, you can replace either the
indicator or wiper switch assembly (or both)
and fit the two back together using the four
metal sleeves.
Once back in one piece, fitment is the reverse
of the removal. The hardest part of the fitment
for me was locating the wiring plugs under the
plastic shrouding into the correct location to
push the connectors home. This picture helped
me to locate the plugs and they are shaped
in such a way that they can be guided into
position (see pic 7).
Once reconnected, I would recommend that
you test all of the functions of the switches
before refitting the screws and steering wheel,
in case you have to take it all apart again!
Don’t forget that you have marked the steering
wheel to line it up when you refit it too.
The last test should be the horn and don’t forget
to re-pressurise the washer bottle!

Ask The Mechanic – Dinitrol for T4, T5, T6

Dinitrol Guide For Modern
Transporter Types
12345
In the last issue, The Mechanic looked at
Dinitrol products and how to use it with classic
transporter models. For those of you that own
a modern Transporter, here is a guide for T4, T5
and T6 models.
Dinitrol is an oil based product that contains
rust inhibiting ingredients to treat and stop rust
after it has been applied. It also forms a barrier
that prevents further corrosion occurring.
Dinitrol is supplied in several different forms,
a cavity wax for use in inner sills etc. and an
under body wax that dries to a flexible tough
film to withstand rain and salt.

Due to modern manufacturing techniques,
the later range of Transporter is less prone
to rusting, but like all Volkswagens they will
eventually fall prey to the dreaded rust bug.
Although treated with rust protection from
new, it is recommended that this is maintained
and renewed after several years of use. As with
the earlier Vans, converting these into Campers
creates the added problem of moisture
generated by cooking etc. Again, removal of
the interior and inner trim is the only way to
get a comprehensive finish. Treating a newer
Van will help preserve it for the future and can
add to the resale value at a later date.

Member’s Hack – Ian Crawford’s starting issues

Long time member Ian Crawford had issues with his van that he bought in 1972 at a year old. He still drives it! I should point out the van was a year old, not Ian.

Ian says:

An unusual problem solved the other day. My van would only turn over 2-3 times when
ignition switched on, then it just refused to do anything! I connected my battery charger to the terminals (before switching on) and the lights showed the battery was 20% efficient.
I then switched the charger on and literally within 15 seconds it said 100% charged. I
disconnected and switched off the charger and attempted to start the van.
As before, it only turned over 2-3 times then it wouldn’t do anything. Reconnecting the
charger it again showed only 20%! Once again, charging for around 15 seconds showed the battery 100% charged. Time to retreat and think hard as to what the problem really was and how to solve it. I slept on it and the next day I had a brainwave!
I decided to remove the battery earth strap from where it is bolted to the chassis. Using a steel wool pan scourer, I gave the bare metal a thorough good scrub as well as the underside of the fixing lug of the earth strap. I also smeared Vaseline over both surfaces.
I then refitted the earth strap into the chassis fixing hole and went to start it up. Surprise surprise, it started first time!!
So if you have experienced problems with starting, maybe removing and cleaning the metal around the fixing of the earth strap will solve it.
Hope this gives members some useful tips.

Cold air in the cab? Here’s a quick fix!

Phil Jones asked:
After some suggestions please – with colder
weather on the horizon has anyone got any
ideas to heat the cab whilst driving. We have
a heater in the back for when hooked up, but
warm airflow into the cab is non existent…
Thanks in advance!


Andy Carter answered
Standard set up on my T2 will pump hot air into
the cab but it doesn’t seem to have an effect on
the temperature! I think it leaks cold air too much
from various places. Making sure the fresh air vent
is fully closed helps, as does stuffing socks into the
dashboard directional vents!
Other than that, gloves and a woolly hat are
all i have, so interested in what other responses
you get…

Graham Sims answered
We have taped over the windscreen vents with black electrical tape, stops a considerable cold draft.
Also socks in the circular dash vent pipe works a dream. Simply pull out vent cover, stuff in sock, replace
cover. Takes less than 5 seconds! Our cab sometimes gets too warm!

Wakey Wakey!

This image has an empty alt attribute; its file name is vw-winter1.jpg

Yes, it is that time again. Hurray! Finally, after the long winter in our non-mobile houses, we can get out our beloved vehicles.

Checklist

Hopefully you all followed the article Time for bed/ to help put your vehicle to bed for the winter. Now that spring is in the air and we are starting to think about getting out and communing in nature, this is a key time to get things ready.

Doors locks – there’s nothing more annoying than a failed lock. get it fixed now before the season really gets going. Door lock issues can be very straight forward but a simple lubrication can be key. Pun intended. A non residue lubricant is best to move the dirt away as WD40 can leave enough gunk to create issues. We favour silicon spray. A little into each lock.

Windscreen wipers – did they perish in the cold winter freezing them to the windscreen. Inspect and replace now.

Water – check the radiator if you have one. Ensure that the bottles that you emptied in the Autumn / fall have no mice, carefully hidden Christmas presents or mildew. Clean with a weak Milton solution if it is drinking water or food related.

Batteries – check the charge on each battery with a good meter. A flat battery can indicate an earth leak. A failed battery needs careful investigation.

Carburettor – Or equivalent. Check for good operation, no stuck flaps or other deterioration over winter. If you are a professional, this will be straight forward. If you are an amateur, a test drive very close to home will highlight problems! But only after the other checks.

Brakes – your vehicle should roll easily, otherwise this can indicate jammed brakes. Parking in gear for long periods of time can be better for your brake health than a jammed set of brakes. Check the brakes for operation. Check the brake fluid level. If it has been more than 5 years, change the brake fluid as it is hygroscopic and slurps up water incredibly quickly. Water is not a good fluid for applying the brake pads to the disks.

Seals – inspect all door seals for any signs of damage, water ingress or other problems and sort them out now. Glue any loose bits back down with the correct glue.

Windows – ensure that they all open and close fully. Or at least as fully as they did last year if applicable!

Ignition – Once you are feeling confident, get in to your pride and joy and turn on the ignition to number 2. Look at the lights on the dashboard. Check there ARE lights! Are they what you expect / are used to seeing? Have you got fuel (for those with a working fuel gauge)?

Crank it over – don’t expect it to start immediately but things should kick into life within a few seconds.

A little test drive on your driveway will allow you to test the brakes, maybe the steering and other important parts. Softly, softly.

Stay local, take your phone with you and warm clothing. Just in case!

Once you get home, assuming that you have a big smile on your face, make a list of snags, get indoors, put the kettle on and start planning for your summer.

Check out the events page and come and see us at a meeting soon!

Ask The Mechanic – Fitting reversing sensors

The Mechanic then received a question from Club Member,
Peter Rogers, who asked:
I have a T2 Bay 1978 model, and want to fit reversing parking sensors. I was planning on fitting the sensors to the rear bumper, but the installation instructions state that they should not be fitted to metal.
Is it possible to fit the sensors in the metal bumper with insulation around the sensor unit, or will the sensors still not work?

With no previous experience of fitting parking
sensors, this one got The Mechanic thinking.
From research, it would seem that parking
sensors work more effectively when mounted
into plastic bumpers and most retro-fit
instructions seem to state this also, however due
to the age of the vehicle, there is a lack of plastic
to mount the sensors on the rear of the vehicle
(or anywhere!), but there may be some possible
solutions, although they have not been tested
and are advice only.
A late bay rear bumper has a centre depressed
section for an optional rubber centre strip. The
sensors could be mounted into this strip and
that may stop any interference from the metal
bumper, they would also be virtually invisible
due to the black strip and black sensors.
These strips are available from Just Kampers for
£45 or you can buy the pair for the front and rear
so the bumpers still match for £85.
Another idea could be to make holes in the
bumper with larger diameters than the diameter
of the sensors. Then fit rubber grommets
into these holes and then fit the sensors into
the grommets, thus providing an insulated
mounting point for the sensors that should be
minimally distorted by the metal bumper.
Grommets are available cheaply in most DIY
stores or online

The Mechanic – Dinitrol for T1, T2, T25

This instalment of The Mechanic looks at how you can protect your VW for years to come using Dinitrol products.
The biggest threat to any classic vehicle is rust and unfortunately our beloved Volkswagens
seem to suffer badly. Rust is an iron oxide that forms by a reaction between iron and oxygen
in the presence of water. With the British climate being renowned for its rainfall we need all the help we can to keep rust at bay. There are numerous products on the market to help combat rust, if you do your research there are various opinions on the most suitable solution. Waxoyl and Dinitrol seem to offer the best results and the choice of which product to use comes down to personal choice or ease of application.
WAXOYL is a long established and proven method for combating rust. It is a petroleum based wax product with self-healing properties that contains oxidation inhibitors that slow down the growth of rust. It works by covering the treated area, thus preventing water and air contacting the treated area.
DINITROL is an oil based product that contains rust inhibiting ingredients to treat and stop rust after it has been applied. It also forms a barrier that prevents further corrosion occurring. Dinitrol is supplied in several different forms, a cavity wax for use in inner sills etc. and an under body wax that dries to a flexible tough film to withstand rain and salt. Waxoyl is generally suitable for use on vehicles that have been restored and have fresh metal welded into them, whereas Dinitrol is
designed for vehicles with existing surface rust due to its rust killing abilities.

Guide For a Split, Bay or T25
The range of rear engine transporters are all unique in their own way, but all suffer from corrosion in the same way. One problem that is particular to a Camper is that we create more moisture due to us living inside, just boiling a kettle will produce large amounts of rust inducing steam, sleeping in the van presents its own problems as we sweat and breathe out moisture. The underside of any
Van is straight forward to protect. The usual suspect areas such as inner sill, front valance etc are easy to access from underneath, but the inside structure is more challenging. The front and side door cards are easy enough to remove but the rear will require removal of the interior furnishings and panels to gain access, a time consuming exercise but worthwhile!

The Mechanic – Engine Bay Fire Suppressors

With the summer holidays looming and
everybody planning their travels and holidays,
have you planned your maintenance and
checks of your VW in as much detail? It is
very important to keep your van maintained
properly, but with the hotter weather and
longer than usual journeys; even the most
well maintained engines can suffer problems,
such as perished or split fuel hoses. Something
such as a split fuel hose could mean really
bad news for classic (or even modern)
VW camper owners.
Every summer there are reports on social media
of at least one classic VW that has caught fire
and been lost. Although good maintenance
and preparation should prevent this, there is
always that small chance and a fire suppression
system will provide extra insurance against
losing your van to a fire.


Fire suppression systems are now readily
available and vary in function and cost.
There are manual systems that operate using a
lever and cable to activate the suppressor and
there are also automatic systems. Automatic
systems are preferential as they require no
input from the driver to activate.
Within the automatic suppressor range there
are two main systems that prove to be the
most popular.


The first one is a cylinder (much like a fire
extinguisher) that is mounted in the centre
of the engine bay over the engine and if a
fire occurs in the engine bay, the vial over the
nozzle melts, releasing a gas agent at 240 psi.
The nozzle is designed to ensure 360° dispersal,
meaning that the gas will completely fill the
engine bay. The gas is released at -19°C so will
cool down the engine bay helping to prevent
any re-ignition of petrol vapour. This system is a
small scale version of what is used within oil rigs.

The second automatic system is also a cylinder,
but rather than mounting the cylinder directly
over the engine, the cylinder is mounted
within the engine bay (usually) but out of the
way, (usually the left rear side of the engine
bay is most spacious). This system uses a linear
detection tubing which is installed throughout
the engine compartment. This tubing can not
only quickly and accurately detect a fire but
also extinguish it before it can damage adjacent
components. The tubing is connected to the
cylinder valve and charged with nitrogen or
compressed air. This pressure is utilised to hold
back the extinguishing powder in the cylinder.
Should a high temperature or fire occur, the
pressurised tubing will burst and the powder
will be deployed from the burst hole directly
onto the fire.
Both systems are fully automatic and come
with a full fitting kit.
Fitting is relatively simple and requires no
wiring or electrical input.
The first system with the 360° dispersal nozzle
can be purchased for approximately £60-
£100 and the second system that utilizes the
linear detection tubing can be purchased for
approximately £180-£250.
The design is personal choice and we would
not merit one over the other, but The Mechanic
has had experience of fitting the second system
and found it simple

Type 2 T1 Split Screen Buying Guide

We appreciate that most of our members already own a VW Camper, but not all of our members have taken the plunge just yet and some may be looking for an additional project or a change of scenery.
Over the coming issues, we will take a look at the Volkswagen T2 in its various forms and provide some information as a buying guide. This issue, we start with the Split Screen.

Driving
An early VW such as a split will not be the best motorway vehicle, but if you don’t mind taking it easy there’s no reason why it shouldn’t be enjoyable. They can be like an “old bus” with their huge thin rimmed steering wheel and like a bus, don’t expect it to handle like a modern vehicle. It will be slow, use lots of fuel and will more than likely break down one day, but that’s the fun of VW Camper ownership (or so they say!).
Remember also that the split screen buses have smaller engines than the later models and will be less powerful than what you may be used to.

Bodywork
This is probably the most important part of any potential purchase. All classic VWs suffer terribly with rust and splits are no exception. If you can find one that is pretty original and rust free, you’re onto a winner!
But this is highly unlikely due to the age of the vehicles and that previously there wasn’t as much interest in these vans, meaning that a lot of them have been repaired badly. If possible, you want to avoid putting someone else’s shortcuts right, but chances are that most out there for sale has at least one questionable repair.
Rust can and will affect most areas of bodywork, especially the bottom 6 inches. This includes the lower front panel, outer sills, rear corners and wheel arches. Other hotspots are inner sills, chassis rails, outriggers and jacking points. It’s worth having a look at the floor, tailgate, bottom of doors and areas around window rubbers.
If you come across a van that you decide to take on, repair panels and sections are readily available from many specialists, but before handing over the cash, ask yourself whether you are ready for the commitment that project will require.

Engines
Air cooled engines can be reliable when properly looked after, but the stress put on them by the extra weight of a van, especially a fully fitted out camper, can eventually have an effect. As discussed in the last issue’s “Don’t Panic, Ask The Mechanic!” feature on oil temperature, oil is one of the most important
components of the engine, so it is good to see evidence that the oil has changed regularly.
Oil leaks are common, but some are trickier than others to repair and may require engine removal, something worth thinking about with any potential purchase.
Blue smoke when revved can indicate worn valve guides, lack of power could be a number of things but could be a compression problem. When the engine isn’t running, give the lower pulley a tug as excessive movement/end float could mean main bearing wear, resulting in an engine rebuild.

Running gear
Lots of Split Screen vans have been lowered. If done sympathetically it can improve handling. This is commonly done using adjusters on the front beam. If this has been carried out it is worth checking the quality of the welding and the adjuster itself. The rear is usually adjusted by turning the rear spring plates on the torsion beam or by using adjustable plates, these should also be checked for condition.
With regards to brakes, there’s not too much to worry about as everything can be replaced inexpensively, but to check things are set up ok, make sure the van pulls up in a straight line on a test drive.

Interior
There have been various companies offering camper conversions over the years and generally there’s little to choose between the different conversions. It’s worth viewing as many different vans as you can to see which internal layout works best for you. If you’re a purist, original condition will be important.
Otherwise, as long as items such as the sink and cooker are working, the rest of the interior cabinets and upholstery can be easily refurbished. Watch out for home conversions, items such as fridges need to have proper external ventilation, so make sure these are in place.

What to Pay
As you’re no doubt aware, all bus prices have gone through the roof in the last few years which is good news for owners, and rubbish for anyone interested in buying. Realistically, you are unlikely to find a split screen bus in any shape or form for anything less than £10,000 with the cheapest kombis likely to be
£15k-£20k. Half decent bona fide split campers that are ready to roll will be anything from £20,000 right up to £60,000-£70,000. Buying an import from the US or Australia might be the best option to avoid bodywork issues. The key will be to swot up on where they rust and go into the buying process with your eyes wide open. If you do buy a rusty project, rest assured if you are able to do the work yourself you’ll be sitting on a great investment. If you propose to pay someone else, bargain accordingly and bear in mind
there’s always going to be more rust than you first envisaged!

The opinions expressed here are the personal opinions of the author and do not necessarily represent the views and opinions of The Volkswagen Type 2 Owners Club.

Ask The Mechanic – Oil

Oil is one of the most important components of your engine. Without oil, an engine will overheat and fail. Many Dubbers keep a close eye on oil levels and top up as required, but is this enough? Keeping the oil in your engine at optimum temperature is as important as maintaining the correct level. Monitoring the oil temperature in your classic VW has always been tricky and normally requires the fitment of an aftermarket system that can look out of place, be challenging to install and leave a large dent in your wallet.
However, there is a simple yet very clever product called “Save My Bug” that can help you to monitor the oil temperature without breaking the bank.

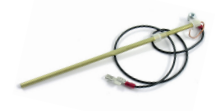
“Save My Bug” is an oil temperature dipstick that replaces your original dipstick and connects to the oil pressure switch with an 18” wire included in the kit, allowing you to monitor the engine oil temperature without the use of an aftermarket gauge. The oil light on your dash will now not only operate as an oil pressure warning light, but will also become an oil temperature warning. In normal conditions the light will remain off, if the engine oil temperature starts to get too hot it will flash, if the light comes on steady, the engine temperature is excessively hot (or there is an oil pressure problem) and you should pull over and stop the engine immediately.
This has made keeping an eye on oil temperature whilst driving a doddle and the installation takes less than 10 minutes for all levels of ability.
It is available for both the Type-1 engine and Type-4 engine from most well known air-cooled VW specialists for around £30-£40 depending on application.