Category Archives: Technical

Items of a technical nature relating to mechanical, electrical or bodywork issues

The Mechanic – Brakes

This issue takes a look at a submission from club
member Ian Crawford, who had a problem
with his brakes at MOT time, something we all
want to avoid!
Having owned my Type 2 for 43 years, I have
never had an MOT failure, until September
2015.
If failed on the brakes being “unequal” from the
N/S readings compared to the O/S readings
when tested on the rolling road.


The tester said I had 10 days in which to get
the problem sorted and return for a free retest.
I immediately drove to the garage I have used
for 43 years (Francis Tuthill), to see if he could
resolve the problem for me within the 10 day
window.
I showed Francis the above figures and his
immediate response was to say “you probably
don’t use your brakes all that much. I’ve come
across this situation before”.
His response was to jump into my van and
drive it around the village for about 5 minutes
doing numerous “emergency stops” in order to
get the brake linings warmed up. On returning
he said I should go back to the MOT garage
now and get it retested as he couldn’t find
anything wrong with them.
This I did and when retested the brake figures
obtained were now:


My van now passed its MOT. Panic over! So
the moral of all this is if, like me, you don’t drive
all that many miles a year and you tend to
hardly use the brakes “in anger”, make sure you
warm them up before going for your MOT as
you might end up like I did, with a (temporary)
MOT failure.

Ask The Mechanic – Vehicle Security

With classic car vehicle theft on the rise classic car security systems are more important than ever.
The Mechanic has noticed some members asking some questions on the Club Facebook page about van security and what different people use, so has decided to cover some options for security to help members understand what products and services are available to keep your van as safe as possible.
Starting with the basics, your vans already has some built in security features from the factory that you should utilise and ensure are working effectively before even worrying about additional security measures.
Firstly check that all of the doors lock securely, including the tailgate or rear doors in later transporters. Full lock sets can be inexpensive and a doddle to fit, depending on the model. If the doors aren’t locking as expected, there is plenty of adjustability with the striker plates and latches, don’t be afraid to give it a go. All van windows, whether they are manual windup, electric windup, louver or sliding, should close fully and latch where possible. Anything short of this is an invite to an opportunistic thief.
All types of Transporter have a standard steering lock fitted which is activated by turning the steering wheel with the ignition key removed. This stops anyone from being able to turn the steering wheel and drive off without the ignition key. The ignition key and barrel is another standard security feature that should be present, older vehicles can be modified over the years to work in several ways depending on whether there have been problems in the past, but the ignition lock is something extremely basic that
you want to ensure is working.


Some other very basic things to consider are where you keep your van parked when not in use. Do you have a secure location such as a garage or a lockup? Do you use a driveway or park on the road? If you have a safer place available to you, use it. Now we have covered the basics, we can move on to additional security devices. There are various additional security devices available for vehicles and they can be mechanical or electrical and very affordable or expensive, depending on the product and the application.
A basic additional security device that many will have used at some point is the steering wheel lock/clamp. These are a mechanical device that fits to the steering wheel to prevent the wheel from being turned in the event of you vehicle being stolen. They vary heavily in application and price and the choice is a personal decision, but whatever you choose, a steering lock is a visual deterrent for potential thieves as well as a physical mechanical hindrance. I personally always use a steering lock, even if only leaving my van for a short period of time, it gives me peace of mind that it would take longer for someone to
steal my van with it fitted than it would without it, which should help to put off the opportunistic types. There are many different types of steering lock on the market, but “Stoplock” has been a well known name for years.


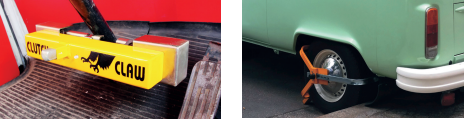
Another basic, internal fitting mechanical device is a pedal lock. These are not as common as steering locks as some people find them fiddly to fit and not as quick as simply fitting a steering lock. These are more common when leaving a van for a longer period of time and work by locking the three driving pedals together. These are more expensive than steering locks and obviously need to be tailored to the application.
There are several available on the market such as the “Safe-T Pedal” and “Clutch Claw” that we looked at in the last issue of Transporter Talk. These are less visual than a steering lock, but if someone gets into your van and sees one of these fitted, there’s a good chance they will decide to leave it or will need to make noise and spend time removing it in order to get your van easily.

That’s not all for internal mechanical locks as you can also buy devices that lock the gearstick to prevent any gear changes. On some VW models you can buy gear sticks and surrounds that have locks built in. Or you can find devices that lock the gearstick into position using a part of the interior, such as seats or steering wheels. Much like the steering wheel lock and pedal locks, these are a visual deterrent and will also slow down any thieves if they’re intent on taking your van.
Use of these mechanical devices may be time consuming, but can prove to be a very effective and wallet friendly means of adding security to your pride and joy. Another simple mechanical locking device is the
use of an external wheel clamp. If you use your van on a daily basis then this could prove to be an annoyance, but if you use the van on the odd occasion then using a wheel clamp is a cheap and effective means of additional security. There are various designs and styles of clamp available and they vary in price, but the main thing is that this extra security device is another problem that any would be thieves need to break through in order to get what they want.
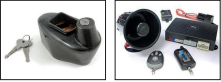
With mechanical devices covered, we can now move on to the electronic advancements that can help to keep your van in your hands. Some more modern vehicles already have electronic devices fitted as standard, but those with older transporter models will be lacking in this area. Immobilisers are fitted to modern vehicles as standard and are fitted to prevent the engine of a vehicle from running unless the correct key or chip is present. Those who have ever owned a car that has an aftermarket immobiliser with
problems will tell you how effective they are! Immobiliser kits can be purchased and DIY fitted fairly cheaply these days and there are companies out there that offer fitting and after sales services too.
As well as immobilisers, alarms are also now fitted to most modern vehicles and these can now be added to older vehicles as an additional security measure. Alarms can be much more complicated than immobiliser kits as there are more areas for problems, such as doors and movement sensors.
It is highly recommended that alarms are fitted by a qualified alarm fitter and ensure that you get some kind of warranty too.
Another excellent and worthy purchase in the category of electronic security devices is a GPS tracker.
A GPS tracker is a location device that will track your vehicle if it’s taken without your permission. This is the best way of locating your vehicle quickly to have it recovered and so reducing the chance of damage or loss. There are several types of GPS Tracker on the market, some are standalone devices that are
completely user operated and some utilise a subscription service where a company will monitor the tracker and can offer different levels of service. One such GPS Tracker service is Skytag, which has been covered elsewhere in this issue and now offers VWT2OC member’s a discount on their tracker service.
Other methods of additional security could include kill switches or battery isolators, these are cheap to acquire and simple to fit for most. These are best used when leaving the vehicle for longer periods and can be operated with a key. One problem with this is that if you have a vehicle tracker fitted, the battery isolator will likely disable the tracker.
Some other different and interesting ideas include fitting an electronic fuel pump that has a hidden switch somewhere inside the van, no fuel, no running engine! Or you could go very extreme and remove the steering wheel from your vehicle for longer periods of storage and would be much easier on earlier transporter models.
Others have suggested removing the rotor arm from the distributor as this disables the engines ignition system, but again is probably best used for longer periods of storage. To aid with tracking, some also suggest fitting a number plate to the roof so that the vehicle can be identified from above in the event of it being stolen. Hopefully some of these hints are useful to members for helping to think about security options, but remember that the most important thing is to keep the basics working. Without these, any other additional security device loses effectiveness.

Time for bed!

As the long season comes to an end and following on from last week’s winterizing, some owners may elect to cover their pride and joy with a cover.

Please. Pretty please. Pretty please with little chrome covers on. Don’t cover your expensive paint work with a tarpaulin that will get condensation inside it, press that moisture onto your bodywork and accelerate the attack on the paint and the metal underneath.

If you don’t have access to a garage or a car port that will keep most of the weather off, try to invest in a good breathable cover. Get the right one for your vehicle and make sure that the material is not flapping around, abrading where it touches.

Ideally park on hard ground that will not have standing water. Parking on grass at the bottom of the field will collect water underneath which will evaporate upwards into your van and its little cover. A breathable cover will let some or most of that collected moisture out but ideally you should remove the cover over winter every month to let things properly dry out and then put it all back to bed once more.

If possible, get a cover with straps that go under the vehicle from side to side, so that the wind cannot lift the cover off the vehicle. It is disheartening to get home from work in the dark and find your expensive van exposed to the elements and a wet cover wrapped across your hedge.

For those of you lucky enough to have a garage, a dust cover is optional but again, think about the possibility of trapped moisture pressing against the bodywork. Does a quick dusting or a nice spring time wash and wax give more benefit than the winter cover?

Yes, it is that time again, winter is very much heading our way. For anyone with a vehicle, VW or not (apparently other vehicles are available!), winter in the UK is the worst time for metal on the roads.

Some suggestions:

Inside

Water

If you have anything containing water, drain it all out. Water tanks, boilers, kettles. Don’t just empty the tank, drain the whole system including the pipes. Remember that water in pipes still expands when it freezes, not just in the tank. It also goes stale after a period of standing. If possible take the tank indoors to keep it above freezing and/or clean it thoroughly.

We use a mild Milton solution to thoroughly clean ours including the impeller that sits in our tank and its associated pipe and electric cable. Then we rinse everything and air dry it all. Other options are available too!

Power

Leisure batteries like ambient temperatures and extreme cold will reduce their operational life. Keep them above freezing by removing them and keeping them in the garage or similar. Remember to keep the electrical contacts in the van safely insulated if applicable.

Keep those batteries charged using a trickle charger that is fit for purpose, which will also prolong their life.

Gas

Butane or propane tanks and bottles should be removed from your vehicle and stored safely with their openings closed properly – don’t leave the regulator open relying on the gas tap on the cooker as these can fail. Now is a good time to weigh them against their empty counterparts to know when you need to change them!

Boring cleaning

Now that you have opened up your van, removed the relevant tanks and bottles, you can get all misty eyed and miss the peace and tranquility of your van by getting in there and cleaning it all. It gives you a great sense of personal achievement as well as going into the winter with a nicely clean kitchen area, the fridge has been bleached and rinsed, and if applicable the bathroom, the shower and maybe the hot tub are all clean. Leave internal doors slightly ajar to keep mould and mildew at bay.

Soft furnishings

If possible, remove curtains, bedding, that emergency woollen blanket from Granny and take them indoors for a good wash or airing.

Ingress

Don’t be tempted to leave doors open or windows more than cracked open. All sorts of miscreants can get in and eat your lovely interior.

Outside

If possible store your vehicle in a garage. If that is not possible, a car port will do a similar job. A breathable cover can be good but make sure it is listed as fully breathable otherwise moist air gets under the cover, rises when things warm up and the vehicle will get wet, holding that wet against the bodywork. Avoid a heavy cover for sure!

Tyres

Tyres degrade from extreme temperatures and long periods of standing still. Winter does that very well! Inspect the tyres, check the pressures and consider putting the van on axle stands if you are not using it for a very long time, taking the wheels into the garage or shed. It also makes theft more difficult!

Moving parts

Lubricate everything. Hinges, moving parts, sliders, mechanical parts. Check the oil level. Use the right lubricant for the part in question. It will pay dividends next year and will keep water away, which is good for the life of the part.

Boring cleaning

Again, give the outside of your vehicle a proper clean, ideally by hand. Dry fully including the fiddly bits inside doors and between panels. Give it all a good quality wax polish. This also keeps water away and prolongs the panels and parts. It also makes you happy as you pass over the cold season when you don’t want to be away.

Underneath

If you are an advocate of underseal and waxoil, get the old visible stuff removed and apply new underseal to dry clean parts. The jury seems out on the benefits of underseal against the downside of it trapping moisture but waxoil or similar applied hot into cavities must be better than not applying it?

Engine

Some texts state to start your engine once a month and run it on idle for 30 minutes. More than that is not necessary and I don’t touch our air cooled engine at all.

An oil change just before the winter alongside a fuel-storage additive in the fuel tank if you like that sort of thing.

Main battery

We leave the main battery connected and the solar panel bolted to the roof of a van in a car port for the leisure battery. If that was not the case, we would trickle charge the main battery once a month over the winter. Again, this just makes sure that you don’t degrade the battery and end up having to replace it all of the time.

Got to dash, I think my van might be snoring.

Ask The Mechanic – Stay Safe During The Winter

How to Keep You and Your Van Safe During The Winter


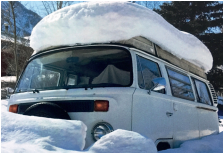
Those who are brave enough will “carry on camping” through the winter, here are some handy tips to keep you and your van safe and warm this winter.

Insulation
An important step to keeping your camper warm is to stop the heat escaping from the inside. This can be done by insulating the van as best you can. The windows are one of the first areas to look at when insulating as they will lose a substantial amount of heat and will also create condensation when sleeping and cooking inside the van.
To insulate the windows, there are ready made thermo-screens that can be purchased as a set for most variants of the T2. These are very effective and not too much hassle to fit and remove. The other (cheaper) option is to make your own thermo-screens, although these may not be as effective, depending on how far you go with them. I had planned to trial this using radiator foil insulation between the glass and curtains on the side windows, but unfortunately haven’t had a chance yet. If a member has successfully managed to make their own window insulation and wants to share this, please let us know!
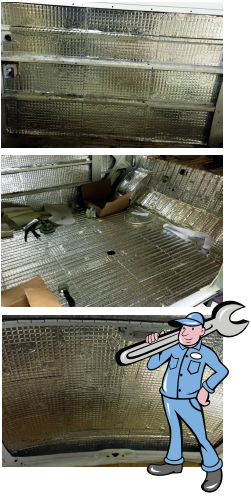
Other vital areas to insulate are the side panels, floor and roof. These are best done at anytime you may have the interior removed. There are several forms of insulation on the market and some can be used as sound deadening too, helping to stop panels from resonating and reducing road noise.

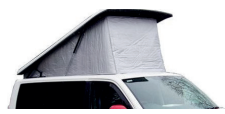
If you have a pop top roof, there are now pop top wraps available that insulate the material on the outside to stop heat escaping from this obvious weak spot. If you are able to, an easy way to keep the heat in is to keep your roof closed overnight!

Heating
Now you have insulated the van to keep the heat inside it, what ways are there to heat your van? VW campers are small spaces to heat so do not require systems such as those in larger motorhomes.
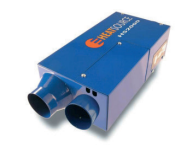
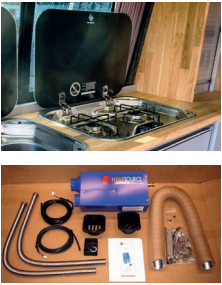
When camping, most people will have at least one fuel supply available to them, whether mains 230v from campsite hookups, or a gas supply for cooking. The gas can be used to supply a heater called
a Propex HeatSource. These can be fitted to all variants of T2, as long as you have a 12v supply. It is recommended that they are fitted by a professional. The Propex is very popular, offering high efficiency and flexibility with fitment location. The Propex HeatSource tends to retail between £450-£800 depending on the vehicle and the model.
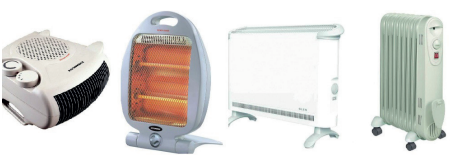
Cheaper alternatives are available, but these will require a 230v mains supply. Heating appliances such as fan heaters, halogen heaters, convector heaters and oil filled radiators are very good for heating the
small space inside your camper and are readily available at very competitive prices. Personally we have observed that fan heaters are good for a quick blast of heat, but the heat inside the camper tends to drop very quickly once turned off and we wouldn’t recommend using them overnight whilst asleep as they are
noisy (and we wouldn’t trust it!). Halogen heaters are good for heating awnings as they don’t physically get hot, but you need to be directly in front of these heaters to benefit from them, they don’t actually heat
the space around you, therefore again not recommended for overnight use.
Convector heaters are very efficient and cheap to buy. They will heat a small space effectively and can be set up with a thermostat, making these good for overnight use. However, if anything is placed on them,
there is a risk that the item will get incredibly hot, causing a fire risk. Oil filled radiators are essentially a convector heater, but they store heat in the oil making them very efficient and can also be used with a
thermostat. They can be used safely overnight and the other advantage of these heaters is that items of clothing such as socks can be left on them to warm up

The disadvantage of these heaters is that they are standalone and will take up additional space.


Driving
The following are some winter driving tips, however if in doubt, don’t go out! Watch weather reports prior to a long distance drive or before driving in isolated areas. Make sure your vehicle is in good operating condition. Keep at least half a tank of fuel in your vehicle at all times. Take a mobile phone in case of a
breakdown or becoming stranded. If you become stranded, stay with your vehicle as it provides temporary shelter and makes it easier for rescuers to locate you. Accelerate and decelerate slowly.
Accelerating slowly is the best method for regaining traction and avoiding skids. Don’t try to get moving in a hurry and take time to slow down.
Drive slowly. Everything takes longer on snow-covered roads, accelerating, stopping and turning!
Don’t stop if you can avoid it. There’s a big difference in the amount of inertia it takes to start moving from a full stop versus how much it takes to get moving while still rolling. If you can slow down enough to keep rolling until a traffic light changes, do it.
Don’t power up hills as this can start your wheels spinning. Try to get a little inertia going before you reach the hill and let that inertia carry you to the top.


Storing Your Camper
Those who prefer to store their camper through the winter can take extra measures to ensure their camper is hibernating well and is snuggly tucked away to keep it in a tip-top, reliable condition.


Those who prefer to store their camper through the winter can take extra measures to ensure their camper is hibernating well and is snuggly tucked away to keep it in a tip-top, reliable condition.

Inside:
All water should be drained from any storage tanks. If it freezes, it will expand and could split the tanks and/or any associated pipe work.
Any propane and butane gas tanks should be removed and stored in a safe location, such as a garage or workshop.
It’s a good idea to thoroughly clean the inside of your vehicle, paying particular attention to the kitchen or cooking area, food storage cupboards and fridge. Mould can grow, creating all manner of problems and rats and mice could be attracted to forgotten food items.
If possible, remove bedding or bedding covers for cleaning and then store indoors until next required.
Consider the use of mousetraps during the winter to stop vermin in their tracks. While your van hibernates, rats and mice can ruin that lovely interior of your camper van.
If you store your van inside, leave the windows open an inch to allow for air circulation, this should prevent damp and mould from developing.
If you store your van outside, when possible on those dry days, open the windows or leave the side door open for the same reasons. (Don’t forget to close them again and lock up!)

Outside:
Generally, it is advisable not to store your vehicle under a tarpaulin. They can stop the air from circulating around and can cause mould to develop inside the camper.

If you are desperate to use a tarpaulin, maybe create a frame to stretch it over to prevent it touching your camper and allowing air to circulate underneath.
The ideal place to leave your camper van is inside a covered building. However, this isn’t always practical or possible! Could you rent a building or borrow a friend’s garage for the winter?
Check the tyre pressures before storing and consider placing your camper van on axle stands to stop the tyres from deteriorating. This is pretty extreme though and would generally be for storage over long durations.
Moving parts such as door hinges and mechanical parts should be lubricated which will keep them moving and repel water.
Make sure your camper van is clean before you store it away as dirt retains moisture that can lead to rust.
Don’t be tempted to regularly start your engine which can deposit moisture in the engine oil and exhaust system. Start it at least once a month and ensure the engine runs for 30 minutes on idle and rev the
engine periodically.
Consider changing the oil just before you store your camper and if leaving the vehicle for an extended period of time, try and keep the main vehicle battery charged.

Ask The Mechanic – Gas use

There were no questions for The Mechanic
this issue, but with the weather tuning cold
and some members continuing to use their
campervan through the seasons, that means
heating. There are gas heaters on the market
and these are becoming more affordable. Gas
is also used for cooking in many campervans,
so it’s time to talk gas safety!

Types of Gas
Let’s start by looking at the different types of gas
available in the UK and beyond.
All European countries have their
own gas bottle suppliers and each
of these have their own regulators
and adaptors. Campingaz is
available all through Europe in
small bottles which is great for
quick trips or for solo travellers. We (Editors) use
campingaz 907 bottles as they’re fairly readily
available in the UK and abroad and they fit nicely
in the cupboard under our storage trunk!
LPG (or Liquid Petroleum Gas) is the most
common kind used in campervans and motor
homes and it comes in two types; Propane
and Butane. Without going into the differences
between them in chemical structure, here are the
main differences:
Propane
‹ Usually used in vehicles where multiple
appliances will be running off it.
‹ Ideal for cold climates as it operates down
to -40°C!
‹ It’s much lighter and less dense than Butane.
Butane
‹ Operates more efficiently than Propane.
‹ It’s denser than propane, so a bottle of the
same size will hold more gas.
‹ Butane can’t be used at temperatures below
0°C (It cools down to a liquid state).
Different appliances may need one or the other of
the main LPGs to operate effectively, so it’s always
worth checking that before you buy.
Gas Safety Rules
‹ The standard that applies to campervans is
BS EN 1949: 2001 + A1:2013. If you ever want
more information, it is worth looking that up.
‹ There isn’t the same level of regulations
for fitting gas and gas appliances to motor
homes and campervans as there is to houses,
but would still recommend that anyone
installing an appliance is registered.
‹ If you’re installing gas appliances into
your campervan, the British Standard isn’t
mandatory, unless you’re going to be hiring
that vehicle out.
‹ If you are going to be hiring, ensuring that
everything is compliant with the law is down
to you, just as it would be if you owned a
house or flat that you were renting out.
‹ You’re allowed to undertake work yourself
if you’re not a registered gas engineer, as
long as you’re competent. (The definition
of competence is vague, but you’ve got
to ask yourself whether you’d be happy
to undertake the work and have the
responsibility on your shoulders).
‹ There’s a lot that could potentially go wrong,
and the stakes are certainly
high, so it may well
be worth getting a
registered engineer
to fit it.
‹ Registered gas engineers can charge
anywhere between £30 and £100 an hour,
but it’s worth looking around in your area if
and when you need one.

Top Tips for Gas Safety
‹ Ensure the gas is turned off before you travel.
‹ If you’re using your vehicle for work purposes
and carrying compressed gas, you must show
a sticker to alert people.
‹ If you’re not using your vehicle for work, but
still carry compressed gas, it is advised to have
a warning sticker displayed whilst carrying
the gas.
‹ Unless your campervan or motor home has
a rotating rooftop device, you’re limited to
carrying two 10 litre bottles of gas in the UK.
‹ All flammable gasses must be carried upright
at all times.
‹ Make sure you’ve got a Carbon Monoxide
alarm. They might not be stylish, but they’re
potentially lifesaving.
‹ Note that LPG gasses are heavier than air, so
will form a ‘puddle’ on the ground in the event
of a leak.
‹ Floor vents must be kept clear.
‹ If parked up in snow/mud/etc then ensure
that the vents aren’t blocked.
‹ Changing the bottle is the most dangerous
time, always make sure that you know how to
remove and fit the regulator and keep
well away from naked flames when
changing the bottle.
‹ Don’t use a naked flame to look for a leak
(sounds obvious!) and check for pipe leaks by
using water and washing up liquid solution,
bubbles will appear at a leak.
‹ Make sure you have a fire blanket and/or fire
extinguisher, as well as a fire alarm.
‹ If you’ve got an older VW it is recommended
to carry an extinguisher any way, in case of a
dreaded engine fire. Can you really have too
many extinguishers in an old VW?
The rules and tips for gas safety aren’t
complicated and if you keep to them, the use of
gas in your campervan is perfectly safe and an
excellent resource.

Ask The Mechanic – Windscreen wiper condition

This issue, The Mechanic takes a look at
an often overlooked but important issue,
windscreen wiper condition.


Windscreen wipers are an invaluable part of any vehicle, providing the driver with a clear,
unobstructed view of the road when it is needed most. Whether it is rain, sleet, snow or
leaves covering your windscreen, the wiper blades will quickly and efficiently clear the obstruction,
meaning you can continue your journey in safety.
However, of all the parts of a car which are subject to wear and tear, windscreen wipers are perhaps
the most fragile. Manufactured from thin rubber, they are designed to operate smoothly on the windscreen without damaging the surface of the glass, yet despite their fragility they are often required on a daily basis, possibly for long periods of time during wet weather. In winter they become frozen to the glass and in summer they are used to help to clean the windscreen, while being subjected to high temperatures. It is hardly surprising then, that windscreen wipers do not last indefinitely and require regular replacement. Often the need to replace wipers is overlooked, although regular servicing and MOT testing should identify if they are becoming worn.
However, rather than relying on these tests to assess the condition of the blades, car owners should be aware of the common signs that the windscreen wipers are failing, especially with autumn upon us. So what are they?
Streaking: blades that are in good condition should clear the rainwater from the windscreen effortlessly, in one complete action. This means there should be no streaks of water where the blade has failed to make contact with the glass.

Unusual noises: windscreen wipers should operate with minimal noise or ideally should be silent. Sounds such as squeaks, screeches or scrapes could indicate that the blades have become worn.

Irregular movement: wiper blades which are in good condition will move smoothly across the windscreen. As they become worn over time, you may notice that the blades judder on operation which is an indication that replacement may be necessary.

Ragged or distorted blades: visually inspecting the condition of the windscreen wipers should be a weekly task for all vehicle owners. By lifting the arms of the wipers away from the windscreen, you can quickly assess the condition of the rubber. Ragged, jagged or distorted edges, where the blade makes contact with the glass, should prompt you to replace them immediately.

Worn blades may not only hinder your vision, but can also damage your windscreen, which will in turn not only cost you dearly in a replacement screen, but also hinder your vision even more, making it dangerous to drive with the vehicle in such a condition.

Replacement blades can be picked up very cheaply for all types of van, so there is no excuse not to check yours and change if required, but remember… “Buy Nice or Buy Twice”.

Ask The Mechanic – T4 CLUTCH PEDAL SUPPORT BRACKET

The Mechanic features some technical talk every issue and welcomes member submissions.
This issue, The Mechanic takes a look at a very common problem for the T4 Transporter and how to fix or prevent it from occurring.

A common problem that T4’s and their owners’ suffer from is the clutch pedal mounting bracket cracking.
This in turn then causes the clutch master cylinder to become loose and move. This may not be a huge problem in the beginning, but it will eventually break away completely, leaving you without a working clutch in your T4 van. As well as the damaged pedal, it can also damage the master cylinder beyond repair and/or crack the pipe work, covering your foot well and footwear in corrosive brake/clutch fluid.

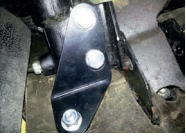
There is a quick and affordable repair/prevention method by fitting an additional angled bracket that strengthens the existing pedal bracket. The kits are readily available online and can be found with a quick
search. The kits contain an angled bracket, three M8 bolts (one longer than the other two), an M8 nyloc nut and four washers (one larger than the other three).


Fitting Guide
1 Start off under the bonnet and locate your brake servo unit. It is the big round unit below the brake master cylinder and brake fluid reservoir.
2 Remove the M8 bolt (13mm head) from the lower right side of your brake servo and replace it with the longest of the three M8 bolts supplied in the kit, along with the largest M8 washer.
3 Now move inside the car and into the driver’s foot well. Locate your clutch master cylinder, located between the clutch and brake pedals and remove the two M8 mounting bolts (13mm heads).
4 Place the new clutch pedal support bracket into position, ensuring that it goes over the protruding bulkhead bolt you first fitted. Now loosely fit the bracket to the clutch master cylinder using the two remaining M8 bolts and small M8 washers supplied in the kit with your support bracket.
5 Now fit the other small M8 washer and M8 nyloc nut to the longer bulkhead bolt you fitted earlier and tighten.
6 Now tighten the two clutch master cylinder bolts you fitted loosely earlier.
7 Job complete. Enjoy a strong clutch pedal and relax knowing that this failure has been repaired or prevented.

Ask The Mechanic – Fitting a hot start relay

If you have an air-cooled van and experience
the dreaded “click” when trying to start your van,
it could be that the original wiring and ignition
switch now has a higher resistance than it did
back in the 70’s and cannot cope with the current
required to turn the engine over using the starter
motor.
One way to counteract this is to fit a relay that
takes the current load and the ignition switch
activates the relay.
A relay sourced for this application can be
purchased from Just Kampers; JK part number
J12928.
Parts required
‹ Suitable cable for wiring the relay – suggest
Halfords 12v 17A cable sold in 4m reels
‹ Several crimp connectors
‹ The relay itself – JK part number J12928
Method
It is advisable to always disconnect the vehicle’s
battery before carrying out any work on the
electrical system.

  1. Mount the relay in a safe place as close to the
    starter motor as possible.
  2. Take the existing wire from terminal 50 on
    the solenoid and extend it to reach the relay
    position.
  3. Connect this extension from terminal 50 on
    the solenoid to terminal 86 on the relay.
  4. Now connect terminal 85 on the relay to a
    good earth on the vehicle body/chassis.
  5. Connect terminal 87 of the relay to the live
    terminal of the vehicle’s battery.
  6. Now connect terminal 30 on the relay back
    to terminal 50 on the starter solenoid.

Whilst every attempt is made to ensure that
these instructions are as accurate and clear as
possible, the author or club itself cannot be
held responsible for misinterpretation of these
instructions or for any subsequent accident or
damage caused through mis-fitted parts.

Ask The Mechanic – Aircooled engine cooling

The summer is here and that hopefully means that we are experiencing warmer air temperatures.
With warmer air temperatures, comes warmer engines. Those using aircooled engines will find it
even harder to keep the engine cool during the summer months and we have all seen the odd VW
at the side of the motorway! Don’t let that be you (not through overheating anyway!)


Although it may seem like a small detail, to ensure cooler engine temperatures, it is absolutely vital
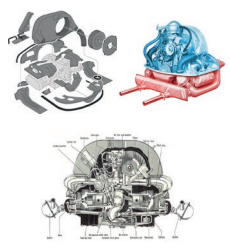
that the tinware and engine compartment rubber seals are all present and intact. This ensures that
there is cool air above the engine and hot air below it. These are known as the cool and warm zones. If tinware parts are missing, or the seals around the front and back of the engine are torn or broken, hot air will be drawn from the cylinder heads and exhaust back into the cool zone around the top of the engine and then sucked in by the cooling fan and re-circulated over the cylinders and heads, causing the engine temperature to rise, potentially to a critical level. This can cause all kinds of problems over time, some of which may not be immediately obvious, from hot starting troubles, to cracked cylinder heads, up to and including a seized engine.
If you’ve just bought a van/bus, it is well worth checking the condition of the tinware and seals and also making sure that there are no foreign bodies stuck in the cooling fan (remember to do this with the engine turned off!) If you are fitting a reconditioned or new engine, don’t just rely on refitting the parts that were on the old engine, as they may not be correct either. The thermostat is another vital piece in the cooling
system. There is a set of flaps inside the fan shroud, that actually block cooling air when the engine is cold, in order to warm up the engine more quickly. These are opened by the thermostat, located between the cylinder barrels and if this part is defective your engine will very quickly overheat. Check the function of the thermostat and flaps and if required, replace. The alternative is to completely remove the thermostat and flaps, which while it certainly simplifies matters, is not ideal. It means that your engine may never reach the correct operating temperature in cold weather conditions.
The last few points to consider are your ignition timing, air leaks and fuelling. Poor ignition timing can cause your engine to run too hot, it’s unlikely to be visible if it’s wrong but you should hear it. Fuel mixture is equally important, so ensure the carburettor jetting is correct for the size of the engine, fuel starvation will raise the engine temperature internally. Your fuel system could be setup perfectly, but if your engine is sucking air in elsewhere through a split hose or a broken gasket, then the whole fuel/air mixture is compromised and the chances of running lean and therefore hot, are increased too. Spraying the intake system with Wd40 whilst running will help to detect this, an air leak will suck the spray in, using it as fuel and changing the engine note at the same time. I hope there are some helpful tips for members to help stay cool this summer.

Ask The Mechanic – Checking spark plugs

An article from Chairman Malcolm Marchbank

Spring has sprung and those classics will be
starting to come out of hibernation. After months
in the garage with the occasional start up to
keep it ticking over, your engine can suffer. I have
personally experienced this after months of an
engine sitting during restoration work and being
moved from one side of a workshop to another.
Once the work was complete, trying to drive
away from the workshop, my T2 Bay Campervan
wouldn’t accelerate down the road. Reason –
fouled spark plugs.

I have also had a spark plug with a closed gap
(don’t even ask how that happened, but it
involved losing part of the carburettor through
the engine… lucky it didn’t do any other damage!)
The condition of your spark plugs can make a
massive difference to the running of your engine,
so it’s worth checking them every so often,
especially after a period of time unused.
Hopefully the following information will help to
make you a spark plug expert.
Before starting work on checking your plugs, it is
helpful to have the right tools to hand; accessing
the rear two spark plugs at cylinders 1 and 3
can be a real fiddle, especially on later twin-port
engines where access is further compromised
by the inlet manifolds. A short 21mm socket and
universal joint may give you a bit more flexibility.
When checking the plugs, it can help to remove
each lead and plug individually so that you don’t
get them mixed up. This will cause an incorrect
firing order and your engine will not run.
When removing the ignition lead from the plug,
be sure to pull it off by the connector, not the lead
itself, as you’ll run the risk of pulling the lead off
the connector (trust me!)
If you notice any damage to a connector or if a
lead is a lose fit, it is best to go out and buy a new
HT lead set.
Make sure you have the socket on the plug
properly when you’re undoing them and it’s also
best to do all this while the engine is cold to avoid
burning yourself!
Once the plug is out, take a good look. Is it brown,
grey, sooty or oily? If the engine is running right,
it should be light brown or grey. If it is sooty but
dry, your engine is running rich and not burning
all the fuel. If the insulator is white and flaky then
your engine is running too lean. Either way, you’ll
need to tune your carb to adjust the fuel/air
mixture.
If the plug is wet and oily, there are a couple of
possibilities. The first is that you’re not getting
a spark, in which case you may have noticed
a misfire. If this is the case, check the HT lead
connection at the plug and also where it pushes
into the top of the distributor cap.
A worse scenario is that your engine has worn
piston rings and/or valve guides, which means a
rebuild is on the cards. If there is serious carbon
build up on the plug, or what looks like molten
bits of metal, chances are your ignition timing is
out.
Whatever their condition, while the plugs are out
of the engine they will benefit from a good clean
up using a brass wire brush. While you are at it,
check the spark plug gaps using a feeler gauge.
For most air cooled engines the gap should be
0.024” or 0.6mm, however check your workshop
manual because the gap will be different on
some engines. If the gap is correct, the gauge
should slip in and out without much resistance.
If it is too loose, you can adjust it with a gentle
squeeze in a vice to close it slightly, or if the gap is
too tight, carefully prise open the contact with a
flat bladed screwdriver.
Spark plugs should be checked every 3000 miles
and replaced every 10,000 miles as part of your
service routine. If you suspect a poor running
engine there is no harm fitting new ones sooner,
they are relatively cheap for a set.
When refitting, always start screwing the plug
back in by hand, only using the socket for the
final tightening, otherwise you risk forcing a cross
thread. If you feel any resistance early on, unscrew
and carefully try again