Category Archives: Technical

Items of a technical nature relating to mechanical, electrical or bodywork issues

Inspect a Gadget – Frontier stove

Steve and Michelle Tatner were at the AGM, BBQ Club Camp (ABC) in Banbury in May 2022 and we spotted their stove being used in the coolness of the evening. We had never seen one – Steve advised us:

We first saw these little frontier stoves when camping a few years back with our son Kyle and his wife Annabelle, when they produced one from their van and proceeded to cook an excellent meal.

They are brilliant for wild camping when there is no electricity to be had and plenty of dry wood and branches around. They pack down really well, with the chimney section being able to fit easily inside the stove after use.

Made for countries with people who have limited access to cooking facilities they have grown popular with the outdoor types in other parts of the world.

They seem to be more acceptable with certain campsites that do not really like BBQs, as they are off the ground and contained, although you may find that the site you are staying at may want you to buy the wood from them.

There are several attachments that you can buy, like the water heater we have on our photo, very useful for tea or washing up water

We are very pleased with ours which gets used on a regular basis.

The frontier stove is around £200 with the water heater an optional extra around £100. Similar products are available at lower prices from major stockists online.

Ask The Mechanic – Sticky throttle pedals

This edition we focus on sticky throttle pedals, courtesy of club member John “Undie” Underwood and his late bay “LottyAnne”. If you have a technical way forward with your vehicle, email editor@vwt2oc.co.uk for inclusion in a future post.

Since many of you have probably had the pain before me, let me see if what I have done helps you out. At first, I thought that it was the throttle cable catching through the tinware after my last one snapped, no not this time! Next, as Phil mentioned it could be the nuts on the carb linkage catching the tinware or shroud housing? Not this either! The only place now was at the front! First, I took off the pedal cover underneath, and checked the end plate had no muck or grime, then took the cover off the link arm in the driver’s footwell and checked all here, even the spring on the back of the pedal. Pushing down on the pedal, I noticed the two side plates that connect the pedal to the link arm seemed to be rubbing.

Checking the comments from my post, Nick Gillott suggested I try Buttysbits. The resulting conflab with owner Simon came up with the only (at the moment!) possible solution, which was to replace these plates with new stainless-steel ones, and he would also throw in a newly manufactured pedal link arm end plate. If I gave him a mention in our group! The new bits arrived and without too much technical know-how, I replaced the parts in question.

As you can see, no need to undo any of the cables at the engine end, just release the cable from the end plate and attach new then attach to the link arm. Straight away I noticed that the accelerator pedal is now in a more upright position! First couple of depressions on the pedal instantly gave me a smoother response. Happy days! BUT as a note, I will say this new pedal height, apart from feeling like my old Beetle throttle pedal, gives me a more responsive acceleration, but tick over is slightly higher, thus the need to adjust the end plate stopper down to slow the tick over, again without the need to adjust the cable at the engine end. The new plate has been manufactured to a slightly different angle to the original ones, hence higher it the pedal height.

Notice the new angle of those link plates to those in the first photo. I have been running this now for over a week and, touch wood, I have had no sticky pedal or any other issues, I recommend this product for others experiencing this issue as along with other products from BUTTYSBITS.

Ask The Mechanic – Alternator swap

This issue we look at the Alternator. This gadget uses some of the energy from the engine to make electricity to charge the battery as the engine is running and provide enough power to run the stereo, headlights, ignition and anything else electrical that you need.

In theory, the output from the alternator should be around 14.4 volts – putting a voltmeter on an earth point and the alternator output with the engine NOT running will show you the battery voltage. Once the engine is running, the output is the alternator output which is also about the voltage that you will get once the battery is fully charged.

If you measure the alternator output with the engine running and you are not getting 14.0 to 14.5 volts then you are not doing yourself any favours – higher will risk overcharging the battery, lower and you are not charging the battery sufficiently. If you additionally run a split charge system then your leisure battery is also not getting a full charge.

This article is for a Type 1 upright engine and a 50 amp alternator, however the principle remains the same.

Step 1 – Disconnect all batteries, I favour removing the earth connections first. Now you can safely work on the electrics. Then undo the big bolt on the alternator then carefully screwdriver / prize the pulley towards you, counting how many shim washers are on each side of it. Once the pulley half is off, hopefully you will find the woodruff key that makes the pulley turn the alternator. Save that for when you lose the new one!

Step 2 – If you have the original oil bath air filter, remove that by disconnecting the air hose at the top of the carburettor and unfastening the clips holding the filter to its tray. If you have non-standard air filter or other items limiting access, now is a good time to remove these.

Step 3 – Remove the carburettor/s if in the way as well. For this article, we have a standard Solex PICT3 which comes off with just 2 bolts at the base, the throttle cable (one bolt) and the air pipe.

Step 4 – Undo the bolts securing the alternator stand to the top of the engine. There are 4 of them, the front 2 are easily accessible, the rear 2 are a little more tricky. With the carb out of the way and a wobble bar on a racket, it just takes a little fiddling. A magnet can be handy to retrieve errant bolts! I also recommend putting a cloth or similar across the work area to catch nuts and bolts rather than them dropping on the ground or grass below. Also undo the bolt on the right hand side of the alternator that secures the metal strap. The strap keeps the alternator on its stand and is a very key component – if it is loose, you can create major cooling issues! You do not need to remove the strap just get it undone.

Step 5 – There is a plate at the back of the alternator flush with the main air housing / dog house fan cover. There are 4 bolts holding this in roughly north east, south east, south west and north west. The top 2 are accessible for a socket. The bottom 2 need a spanner and a good deal of patience – you may not get them all the way out depending on your manifold. Do not worry!

Once you get to this stage the alternator is now loose and you can move it somewhat. We got to this stage and really struggled and cursed. One call to the amazing Stuart at Sussex Air Cooled and he gave us the top tip that gave us our “Yee har” moment.

Step 6 – on either side of the main air box you will find a bolt downwards. Undo both of those so that the air box moves. Now being careful of the oil cooler behind the air box on the left side, tilt the whole air box backwards – you can push quite hard. Then lift the alternator upwards and rearwards and the 2 inches behind the black plate has a big fan attached. With some pushing, wiggling and a liberal amount of talking nicely, the fan will pass far enough to clear the hole and lift up and out.

As you can see from the picture, we had removed the carburettor and put a rag over to stop anything getting in. We also removed the distributor cap just in case of damage – no other reason.

Now at your bench, the bolt on the far end of the alternator spindle need removing. Hold the spindle in the vice and remove – you may need an impact tool or a lot of brute force. Again, once removing the bolt, watch out for losing the woodruff key. Ours is somewhere on the floor in a workshop in Pevensey Bay!

Reassembly is the reverse of the above process. For the woodruff key installation, you may find that Locktite is your friend to hold it in place on the spindle before offering up the next piece.

Torque the bolts up per the manual and ensure that as you turn the new alternator’s outer pulley half that you are turning the pulley to keep the fan belt from being trapped. The tighter you go, the more slack will come off the fan belt. Do not over tighten though.

If you removed the carburettor, now might be a good time to change the base gasket as well as you are there.

Test that the fan belt is moving as expected, because a fan belt that is not moving means no cooling.

Ask The Mechanic – A Guide to AGM batteries

The Mechanic – A Guide to AGM Batteries

This guide to AGM batteries has been supplied by one of the Club’s generous supporters, Alpha Batteries.

Don’t forget that you can get a 5% discount on an order using code “motorhomer5” on their website www.alpha-batteries.co.uk

What Does AGM Mean?

AGM stands for Absorbent Glass Matt. AGM batteries are still fundamentally lead acid batteries, but the electrolyte (acid) is soaked on absorbent fibreglass mats between the lead plates inside, rather than traditional liquid acid. You will also notice that AGM batteries are rated over three capacity discharge times C10, C20 & C100. This relates to the power available in the battery over 10 hours, 20 hours and 100 hours. Designed for multi-application use, the power available will very much depend on how quickly you discharge the battery. From this common base AGM batteries come in three different forms:

AGM Type 1 – European

These batteries are used in multi-application environments such as modern stop-start vehicles and deep cycle applications. Great for starting engines and off grid use with a typical cycle life of around 300 – 350 cycles. It’s worth pointing out that ‘life cycles’ don’t mean the battery expires and needs replacing, rather it refers to the optimum power of the battery life. AGM 1 batteries are limited in size but are popular for the low height fitment demands in Campervans, Caravans and Motorhomes.

AGM Type 2 – Eastern

AGM 2 batteries are the more cyclic type with a typical max cycle life of between 500 – 700 cycles. They are generally recommended for regular off grid use as they have a higher cyclic ability to discharge and recharge over a long term period. In addition, they are less prone to sulfation and charge much more quickly than traditional batteries – if you charge them correctly, more on that later!

Lead Carbon AGM

By adding carbon graphene to the traditional AGM Type 2 battery you get Lead Carbon AGM. This adds further improvements to charging times and a typical cycle life of 1200 – 2000 cycles depending on the model. Lead Carbon AGM are becoming more and more popular and are often the last step along the AGM range before looking into Lithium based solutions.

Charging AGM Batteries

Despite what you may have been told, all 12v batteries are not the same! Wet Lead Acid, AGM, Carbon AGM and GEL batteries all charge and behave differently. To get the full benefits from an AGM battery it takes a little bit of research and time to check your existing charging method each step of the way.

If you take a look at the datasheets and technical specifications for AGM batteries on our website, you will see that we publish specific charge settings and this ultimately centres around voltage. AGM batteries are designed to require 14.6v – 14.8v when performing a full charge from a state of discharge, whereas standard lead acid batteries need 13.8v – 14.4v, hence this is what most onboard chargers are designed to deliver – not the 14.6v – 14.8v that AGM requires.

Let’s go into a little more detail and break-down the most common charging options on Campervans, Motorhomes, Caravans and Boats and point out what you need to look for:

Mains Chargers

Onboard you will, in most cases, have a mains powered battery charger / power management system. These are designed to be used when you have access to mains power to replenish the state of charge in your batteries or maintain them when not in use. Given that these chargers are generally the main and best method of charging, you need to make sure that you know what it can and can’t do when it comes to charging AGM.

You’ll need to check the make and mode of your onboard charger – if you have the owner’s manual check it as it should tell you in there – you are looking for specific charge programmes for different 12v battery technologies. If it says nothing and the charger has no selectable charge options, then you can assume it is designed for traditional wet lead acid batteries not AGM.

Furthermore, if your manual states ‘may be suitable with AGM check with your battery supplier’ and has a max charge voltage of 14.4v then this isn’t suitable for AGM either. We are aware that most Sargent onboard chargers and PSU’s state this – please take our advice, they are not suitable for AGM in the long term. Good quality modern onboard chargers have selectable charge profiles that support AGM and it’s important to check this first before investing in quality AGM batteries as battery warranties do not cover incorrect charging profiles.

My charger doesn’t support AGM but I want the benefits from AGM technology. What can I do?

All isn’t lost here. You can still use the onboard charger but you will need to supplement the undercharge from the non-AGM charger with a secondary mains charger at least once a month, as your non-AGM charger will only recharge the battery to around 85% and this will cause a memory effect in the battery reducing its life. The cost to replace the onboard power system for an AGM one will be costly, so using a secondary charger is more cost effective and will prolong the life of the AGM battery by getting the battery up to the all important 14.6v – 14.8v it needs.

Secondary chargers are great, you can use them anywhere when you have access to mains power and are a sure fire way to ensure your battery is getting the correct charge it needs. We recommend Victron Energy smart chargers which have dedicated charge profiles for AGM batteries – they are fully automatic and do everything that the battery needs. The size you will require depends on the size of your battery bank but Victron offer a range of solutions such as 7A, 10A, 15A.

Alternator Charging / Split Charging

Similar rules apply to split charging AGM batteries and standard alternator split charging by common durite systems are not optimised for AGM – they simply divide the preset wet lead acid starter battery voltage and apply it to the secondary leisure battery or bank. Again, like mains chargers this will be a typical voltage of around 13.8v – 14.4v and over time this will cause under charge to the AGM battery.

We are big advocates of battery to battery chargers also known as DC/DC chargers when it comes to split charging AGM batteries as they have specific AGM charge profiles and are simple to fit. Once programmed for AGM it takes the standard alternator charge voltage from the starter battery and converts the settings to suit an AGM battery ensuring a true and even charge. Some even come with solar charge controllers built in and can act as a single charging hub for your system – effectively acting as a wild camping mains charger when you have no mains power! Some great examples here are the Ring RSCS30 and Victron Orion.

Similarly as with mains charging, if your system doesn’t support AGM then it’s not the end of the world, you can use your existing set up, just make sure you compensate for the undercharging via an AGM optimised mains charger or solar charger if you have enough watts.

Solar Charging

Solar has become an ever popular method of charging batteries though we would never advise relying on solar alone as your main charge method, though they do offer benefits when used for maintenance or top charging. AGM batteries work well with solar and are widely used on solar systems. Most if not all solar charge controllers support AGM however the terminology varies when it comes to solar controllers and they may refer to AGM as ‘sealed’ – always check your manual and ensure that the AGM or sealed charge profile gets up to that magic 14.6v – 14.8v parameter.

Something to note – we have seen instances were charge controllers on AGM settings utilise whats known as equalisation mode. We would advise removing this setting on solar charge programmes as it can over charge the battery at more than 15v! Not good. Solar charging can be utilised to compensate for undercharging from your other, non-AGM optimised, methods of charging. If your standard split replay or mains charger is designed for wet lead acid up to 14.4v then you can let your solar panel get the AGM battery up to the 14.6v – 14.8v it needs.

Maintaining AGM Batteries

As with all batteries correct maintenance is important – particularly if it’s unlikely to be used for an extended period of time. With that in mind there are a few core points to follow:

Ensure the battery is fully charged before being left. A fully charged AGM battery should read 13.00v or above. Ideally you need to ensure the final charge is done via an AGM optimised charging profile.

  • Never leave a battery on permanent charge (including trickle!) – despite having no free flowing acid inside, long term charging will cause the battery to dry out. Once fully charged and stored just ensure you charge the battery once a month overnight instead.
  • Try to keep your max discharge level to 50% – this is 12.1v on AGM batteries – as our cycle life data is based on a 50% discharge level. You can technically take AGM batteries lower than that, but the cycle life will reduce accordingly. The opposite is also true – discharging above 50% will increase the cycle life.

Note: Remember, the cycle life is a guide on the optimum life span of the battery – it doesn’t mean the battery will pack up and stop working – but you will notice considerably less running time once the cycle life has been achieved. Battery warranty does not cover loss of capacity as this is subjective to the usage, the frequency the battery is under and whether it’s been correctly charged.

If you are looking for true deep cycle batteries designed for regular discharge and recharge then AGM products can offer all the benefits you require. No topping up with water, non-spill, quicker charging and long life. If you can invest some time in getting your charging right, then you will see much better performance over traditional wet lead acid types – something we have first hand experience of over many years – low return rates and minimal warranty issues speak volumes for AGM batteries.

Do you have an interesting fix or technical topic that you think members will find interesting? If so, let us know and we will share it with the club. Please email us at editor@vwt2oc.co.uk
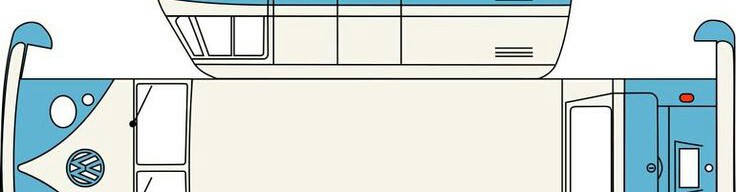
Time for bed!

As the long season comes to an end and following on from last week’s winterizing, some owners may elect to cover their pride and joy with a cover.

Please. Pretty please. Pretty please with little chrome covers on. Don’t cover your expensive paint work with a tarpaulin that will get condensation inside it, press that moisture onto your bodywork and accelerate the attack on the paint and the metal underneath.

If you don’t have access to a garage or a car port that will keep most of the weather off, try to invest in a good breathable cover. Get the right one for your vehicle and make sure that the material is not flapping around, abrading where it touches.

Ideally park on hard ground that will not have standing water. Parking on grass at the bottom of the field will collect water underneath which will evaporate upwards into your van and its little cover. A breathable cover will let some or most of that collected moisture out but ideally you should remove the cover over winter every month to let things properly dry out and then put it all back to bed once more.

If possible, get a cover with straps that go under the vehicle from side to side, so that the wind cannot lift the cover off the vehicle. It is disheartening to get home from work in the dark and find your expensive van exposed to the elements and a wet cover wrapped across your hedge.

For those of you lucky enough to have a garage, a dust cover is optional but again, think about the possibility of trapped moisture pressing against the bodywork. Does a quick dusting or a nice spring time wash and wax give more benefit than the winter cover?

Yes, it is that time again, winter is very much heading our way. For anyone with a vehicle, VW or not (apparently other vehicles are available!), winter in the UK is the worst time for metal on the roads.

Some suggestions:

Inside

Water

If you have anything containing water, drain it all out. Water tanks, boilers, kettles. Don’t just empty the tank, drain the whole system including the pipes. Remember that water in pipes still expands when it freezes, not just in the tank. It also goes stale after a period of standing. If possible take the tank indoors to keep it above freezing and/or clean it thoroughly.

We use a mild Milton solution to thoroughly clean ours including the impeller that sits in our tank and its associated pipe and electric cable. Then we rinse everything and air dry it all. Other options are available too!

Power

Leisure batteries like ambient temperatures and extreme cold will reduce their operational life. Keep them above freezing by removing them and keeping them in the garage or similar. Remember to keep the electrical contacts in the van safely insulated if applicable.

Keep those batteries charged using a trickle charger that is fit for purpose, which will also prolong their life.

Gas

Butane or propane tanks and bottles should be removed from your vehicle and stored safely with their openings closed properly – don’t leave the regulator open relying on the gas tap on the cooker as these can fail. Now is a good time to weigh them against their empty counterparts to know when you need to change them!

Boring cleaning

Now that you have opened up your van, removed the relevant tanks and bottles, you can get all misty eyed and miss the peace and tranquility of your van by getting in there and cleaning it all. It gives you a great sense of personal achievement as well as going into the winter with a nicely clean kitchen area, the fridge has been bleached and rinsed, and if applicable the bathroom, the shower and maybe the hot tub are all clean. Leave internal doors slightly ajar to keep mould and mildew at bay.

Soft furnishings

If possible, remove curtains, bedding, that emergency woollen blanket from Granny and take them indoors for a good wash or airing.

Ingress

Don’t be tempted to leave doors open or windows more than cracked open. All sorts of miscreants can get in and eat your lovely interior.

Outside

If possible store your vehicle in a garage. If that is not possible, a car port will do a similar job. A breathable cover can be good but make sure it is listed as fully breathable otherwise moist air gets under the cover, rises when things warm up and the vehicle will get wet, holding that wet against the bodywork. Avoid a heavy cover for sure!

Tyres

Tyres degrade from extreme temperatures and long periods of standing still. Winter does that very well! Inspect the tyres, check the pressures and consider putting the van on axle stands if you are not using it for a very long time, taking the wheels into the garage or shed. It also makes theft more difficult!

Moving parts

Lubricate everything. Hinges, moving parts, sliders, mechanical parts. Check the oil level. Use the right lubricant for the part in question. It will pay dividends next year and will keep water away, which is good for the life of the part.

Boring cleaning

Again, give the outside of your vehicle a proper clean, ideally by hand. Dry fully including the fiddly bits inside doors and between panels. Give it all a good quality wax polish. This also keeps water away and prolongs the panels and parts. It also makes you happy as you pass over the cold season when you don’t want to be away.

Underneath

If you are an advocate of underseal and waxoil, get the old visible stuff removed and apply new underseal to dry clean parts. The jury seems out on the benefits of underseal against the downside of it trapping moisture but waxoil or similar applied hot into cavities must be better than not applying it?

Engine

Some texts state to start your engine once a month and run it on idle for 30 minutes. More than that is not necessary and I don’t touch our air cooled engine at all.

An oil change just before the winter alongside a fuel-storage additive in the fuel tank if you like that sort of thing.

Main battery

We leave the main battery connected and the solar panel bolted to the roof of a van in a car port for the leisure battery. If that was not the case, we would trickle charge the main battery once a month over the winter. Again, this just makes sure that you don’t degrade the battery and end up having to replace it all of the time.

Got to dash, I think my van might be snoring.

Ask The Mechanic – Cool air for hot heads

Cool air for hot heads

Camping is great in the summer; that cool rain swept evenings huddling under the duvet listening to the “pitter patter” of the rain and comforting howl of the wind. Quote from Val!!! This is of course what we all enjoy? But camping in France yields a different problem too much heat night and day.

Connie is equipped with insulation double glazing and a heater but no cooling so it’s open the roof vent and side window and spend sweaty night on the duvet. Also cooking causes heat to build up and if it is raining then hot heads result! I decided an extractor fan would help, but how to do this?

The obvious suspect was the roof vent pix 1. I obtained a piece of 3mm polycarbonate sheet, 2 of 100mm cooling fans 12 volt with grills, a double throw double contact centre off switch and a 2000 microfarad 63 volt capacitor (actually from my stores but easily purchased).

The polycarbonate sheet was chosen as it does not crack like acrylic and transparency was not a prime criterion. This was cut to fit the aperture under the roof vent it presses against the seal on the inside of the van. In Pix4 you can see that one edge is supported by 2 aluminium brackets fixed to the hinge bolts and the other edge is held by the raise lower mechanism cover. The edge strips add rigidity and stop rattles.

The parts were then positioned and the holes cut, the fans and switch project upwards under the roof vent. The switch is wired to put the fans in parallel for maximum speed (and noise) or series for virtually silent running at night. The power for this is by means of a cable fixed to the roof and lifting frame and connected to the over door light.

An important part is the switch wiring and the use of the capacitor. The fans are “brushless” so use an internal inverter to drive the rotor when used in series one can react with the other and so a capacitor wired across one fan will smooth out the supply and prevent “hunting”  pix 5,6

The results were very satisfactory, with the vent open, roof up and all doors and windows closed full power pulled in the roof “tent” so opening a cab window produced a strong draft. At slow speed the noise was very much less but a useful draft could still be felt.

As each fan can move 90 cu ft min so 180 cu ft min at full speed the air in the van could theoretically be changed every 3 minutes and this can banish the heat and smell build up during cooking.

Ask The Mechanic – Heater cables

The Mechanic received this call for help from a member:

Dear Mechanic
I am working on the heater system of my 1971 early bay and the heat control levers on the dashboard are seized and will not operate the air control flaps on the exhaust system.
I have disconnected the air control flaps from the control cables and they operate well.
I also have disconnected both the red knob heat control levers from their cables under the dash and pulled both control cables through the bottom of the van and they now go rearwards towards the engine in separate metal tubes. I want to remove both cables and replaced them with new cables.
The heater cables under the dash and up to the metal tubes have seem to have an inner and outer (like a bike cable) and I expect to be able to pull the cables forward through the metal tubes to remove them from the vehicle, but they are stuck fast.
Do you know if the outer part of the cable continues through the metal tubes or do they
stop at the start of the metal tubes and the inner cable continues to the heat exchangers?
Can you provide any advice on removal of these cables?
Kind regards
Bob Hodgkinson

The Mechanic wrote back:

Let’s start with a “how to” guide and hopefully your questions will be answered. That way we can assist any other members also wishing to complete this task.


In the cab of your VW there will be three levers; one blue and two red. The blue lever controls the cold air intake, on and off, the left hand red lever controls the distribution of hot air between the foot well and the windscreen and the right hand red lever controls the amount of hot air entering the cab, location defined by the left hand red lever.
It is the right hand red lever that you are describing which connects to two cables
which travel the length of the van to the heat exchangers at the engine. These cables are readily available from VW parts suppliers and are relatively easy to replace, although you are experiencing the dreaded rusted conduit tube! Before work commences, it is advisable to jack the front of the van as high as possible (that you
can leave for a day or so) and spray penetrating oil down the conduit tubes and leave as long as possible to allow it work. This should make removing the cables (both inner and outer sheath) a much easier task.


To gain better access to the cables, and cab area, it is advisable to remove the steering wheel and is done so using a 24mm socket or spanner. To gain access to the nut, use a small flat bladed screwdriver and prise up the black plastic cover, not the aluminium ring around the cover. When removing the steering wheel, loosen the nut but do not remove it yet, give the steering wheel a few tugs to remove the wheel from the column,
doing this with the nut loosely fitted will stop you smashing yourself in the face with the wheel when it gives way, (TRUST ME!)

If you can avoid removing the part of the dash where the coloured control levers are located, I would. You should be able to reach under and disconnect the cables from levers in situ. They are retained by two clips and the cables loop over each other with a spring clip. Note how it fits before removing (take a picture). Follow the cables down 150mm and you will find the cable outer sheath is retained by a spring clip. Moving underneath the van, disconnect the cables from the heat exchanger flaps (8mm
spanner) and pull the cables clear of the flaps. The nuts are prone to corrosion due the heat and exposed location, so it is worth soaking in penetrating oil (get a cuppa and come back) before removing to avoid damaging the flap on the exchanger.
Staying under the van, head to the front and find where the cables enter the conduit. Now pull the inner and outer parts of the cables back through the conduit, this is where you may have trouble if they are seized, but hopefully the penetrating oil has done its job. Many people have trouble at this stage, but do find that brute force and ignorance does get the job done eventually. Make a note of which cable comes from which side as they are different in length, you don’t want to come up short at the end of the job!
At this stage, if you cannot remove the cables from the conduits at all, you could leave the cables in place, trim them back and fit an alternative conduit directly next to the adjacent one. Not ideal, but a potential fix. This could be done using some kind of plastic water pipe and cable ties, but I have never attempted it.
With the cables removed from the conduit it is time to refit your new cables into the existing or replacement conduit. The passenger side cable has a metal rod bent at 90° on the end and the driver side cable has a loop made from the cable itself. Prior to fitting the cables, it is advisable to grease the inner cables as best you can and also
grease the outer sheath part of the cables to prevent them from seizing within the conduit, should you need to replace in the future.

From under the van, push each cable through the conduit until it reaches the heat exchanger. The opposite end is then passed into the cab area through the grommet in the floor and reconnected to the heater control levers. The retaining clips on the levers are very tricky to hold in position whist you tighten the screws, but keep persevering and you will get there. If you have it, another set of hands to assist you may help at this point (and probably another cuppa!)


Now that you are done in the cab, move the RH heater lever to the down position and return back to the rear of the van. Connect the cables to the heat exchanger mechanism, making sure that you replace any grommets from the end of the conduit. Move the flaps to the maximum open position against the spring pressure and thread the cable through the retaining nut. Complete for both sides. Now check that when the heater lever is moved up, that the heat exchanger flaps close. An assistant is handy here too to save keep getting up and into the cab and back down on the floor again!
If all is working well, the job is complete and you can refit the steering wheel and any
underneath panelling removed for access. Now drive and enjoy your heating in the
colder months and ability to turn it off in the warmer ones.

Ask The Mechanic – Fuel problems By Robert Girt

TRANSPORTER FUEL PROBLEMS: HOME AND AWAY.
Reports in Transporter Talk Issue 148 of Club Members having blocked fuel lines chimed with us as our 1970 Bay has recently suffered similarly and others may wish to benefit from our experience.


The MOT was due 2 weeks before our ferry was booked for a 3 week holiday in France. I cast my eye over everything and found nothing wanting so went off to my friendly testing station with confidence. However, mindful of repeated warnings in Transporter Talk of the fire risk from perished fuel lines I asked Roy, the tester, what his opinion was of my fuel hoses.
All seemed fine, but with the engine running Roy uncovered a small leak between the pump and the carb. It hadn’t been evident to me or Roy when the engine was still and there had been no smell of petrol. I was grateful for Roy’s experience. He replaced all the rubber pipes and the in-line filter (£90!); the MOT was secured and we were set fair for our holiday. Off we sped (?- well 55mph!) down the A1M, but approaching Peterborough we ran into a congestion standstill and discovered that tickover had disappeared. Crawling in thick traffic was a real pain, constantly having to juggle the clutch and the accelerator, but otherwise we could make good progress and we reached our overnight Dover campsite OK.
I took out the slow running jet; that looked clear, but I baulked at taking the carb off, with diminishing daylight and without the resources of my garage at home. We considered soldiering on to France but the prospect of trying to access the ferry without slow running decided me to seek professional help. If I tackled the carb myself we were going to miss our early morning ferry booking anyway.
We phoned our predicament to DFDS Ferries and did a quick internet search on the smartphone which lead us, with Satnav guidance, to a likely garage in Dover. They
could tackle the problem, but only in 3 day’s time and directed us to another garage.
They immediately redirected us to Cowens Motors (Unit 11, Holmestone Road, Coombe
Valley Industrial Estate, CT17 0UF Tel 01304 207743) where we received a warm and
friendly welcome from Ian, the proprietor. He was enthusiastic about tackling our problem, having cut his teeth on Beetles and early Transporters, but he already had a Bay for that day’s work. We killed a day visiting the White Cliffs, very interesting and were back early next morning at Ian’s garage. 2 hours (and £90 later) we were sorted, carb cleaned out and engine retuned; it had never run so sweetly in the 41 years we have owned it! Definitely recommend Ian! Off we raced to get the next available
ferry, an extra £50! and the holiday was really under way.

All went well for the next 1000 miles: the van ran like a Swiss watch! However, leaving Albi and following a slow lorry up a hill with a tail of impatient French cars behind us, the engine suddenly cut out and we kangarooed to a halt.
Initially we had tickover, but nothing more unless I pumped the accelerator jet. Then
tickover disappeared too. We limped in to a lay-by and thankfully the shade of a tree and rang the rescue service. Although they were initially somewhat slow to understand our predicament, they eventually cottoned on and 2 hours later a friendly French mechanic in a rescue truck hauled us off to the yard at Garage Pradelles Roland in Lisle sur Tarn. Language was a bit of a problem as our schoolboy French was not quite their Occitaine dialect. They called in a neighbouring Madame who spoke some English and we got talking. Again they were too busy to start our job until the next day and it was late afternoon by now. We rang to advise the rescue service and they went away to organise a hotel and taxi for us , although the garage kindly said we could camp in their
yard and have a key so we could use their toilets overnight. Communication with the
rescue service became problematic due to our not having registered our trip for voicemail purposes, but before our accommodation needs could be sorted one of the mechanics strolled out of the garage and indicated I should start the engine while he diddled the carb. He raced and raced the engine and eventually, after much dying and starting, it ran on its own, though still not on tickover. He then started fiddling with the points, took them out to reface them and put them back, but to no avail. Finally, he thought of the slow running jet, removed it, declared it “merdoise” (a rude French word we did understand!), dragged an airline from the garage, blasted out the jet and its socket, and “Sacre Bleu”all was well again! He then took us for a hair-raising trial run where the Transporter French Land Speed Record was broken before handing the keys back in to my trembling hands, and relieving me of €89 (say £82). Worth every penny just for the experience!
So we were able to move on and camp nearby that night, much to my wife’s disappointment at missing a night in a posh hotel! And much to our dismay as that night a frightening thunderstorm in the early hours brought down large bits of shading trees all over the campsite, enough to make a small dent in our roof! After that, what else could go wrong? Thankfully nothing did and we were able to enjoy the rest of the holiday on the Loire and Somme, but with some apprehension the carb would block
again: but it hasn’t in a further 1,000 miles. So what lessons to draw?

  1. Check your pipes with the engine running.
  2. Make sure the new pipes are clean inside before fitting them.
  3. Consider cleaning the carb when you fit new pipes.
  4. Sort your voicemail before you venture abroad, BUT don’t be afraid of going: your problems will get sorted and you will meet some really nice people. Well, we’re already planning next year’s trip.
    Robert Girt

Ask The Mechanic – Fitting T5 Side bars

The Mechanic – Fitting T5/T6 Sportline Side Bars

If you have a T5 or T6, you can fit protection side bars, which also serve a purpose of styling. Just Kampers sell a kit made by Sportline, which seems to be popular.

Here is a guide on how to fit the kit to your van.

 Before you start, check you have all the components:

 (1) Side Bars (x2)
(2) Front Brackets (x2)
(3) Rear Brackets (x2)
(4) Threaded Plates (x8)
(5) M8 Spring Washers (x8)
(6) M8 Washers (x8)
(7) M10 Spring Washers (x4)
(8) M8 Nuts (x8)
(9) M10 Screw (x4)
(10) M10 Washers (x4)
(11) Lock (x8)

** Please note item ‘9’, has been replaced with a Nut & Stud with allen key holding end.

1. Clean the installation areas and then identify the front and the rear brackets, as shown.

2. Remove the front splash shield (a) by unscrewing the retaining bolts.

3. Remove the rear splash shields (b) by unscrewing the retaining bolts.

4. Remove the rubber caps (c) from the sill rail in the chassis from the front and rear of the vehicle which align with the holes in the mounting brackets.

5. Once the rubber caps are removed, insert the threaded plates (d) inside the holes on the chassis so its threaded ends are exposed. Do this for the front and rear. Once installed, slide the lock into the threaded plate into the threaded section as shown. This will stop the threaded plate from being pushed into the chassis.

6. Place the front bracket on the thread plates so its threaded end extends.

7. Place the rear bracket on the thread plates so its threaded end extends through the bracket and secure with M8 washers, M8 spring washers and M8 nuts.

8. Hold the side bar into position and attach using M10 screws, M10 washers and M10 spring washers. Tighten all the bolts fixing the bracket to the vehicle; then finish by tightening the bolts holding the side bar to the brackets using the following torque settings as guide.

9. Before re-installing splash shields, it is necessary to remove some of the material from the splash shields to allow clearance for the M8 nuts on the mouting bracket. On the front splash shield, from the front edge, measure along 180mm (SWB) and make a cut 25mm deep. Make another cut a further 30mm from this cut, also 25mm deep and remove the section of material. Then take another measurement from the front edge of the 480mm (SWB) and repeat the procedure for removing another section of material, 25mm x 30mm.

On the rear splash shield, from the back edge, measure along 120mm (SWB) and make a cut 25mm deep. Make another cut a further 30mm from this cut, also 25mm deep and remove the section of material. Then take another measurement from the back edge of the 450mm (SWB) and repeat the procedure for removing another section of material, 25mm x 39mm. Apply these principles for the long wheel base with the correct measurements as shown above.

Ask The Mechanic – Electric hook up

Many people ask!

230V electric hook up allows you to use campsite
supplies to give you mains 230v sockets inside
your van, meaning you can use those everyday
appliances whilst on your travels.


The easiest way to tackle a 230V Mains Hook Up
in your van is using a kit that comes with all the
parts you need. These are readily available and
Just Kampers sell two great kits (don’t forget your
discount) that have either a surface mount socket
or flush mount socket.


The kit should contain:
• Inlet Socket (Flush or Surface Mount)
• Consumer Unit (25amp Draw)
• 2 x 13amp Sockets
• 2.5mm2 Cable (Socket to Consumer Unit)
• 3 Core Flex (Consumer Unit to Sockets)
The kit should be installed by a professional, unless
you are confident with wiring and we would still
suggest that the install is tested by a professional
following self installation.