Website Manager and General Committee member of the Owners Club.
Owner of Eric the Viking (converted panel van with Viking roof) undergoing complete restoration. Tinkerer to Poppy the camper van (1972 Crossover dormobile).
Do you ever leave your lights on in your classic van and forget because your modern car reminds you with a buzzer? Add one for very little money yourself!
Have you ever not noticed about the lights and ended up with a flat battery? It is easier than you think to add this level of protection and can be done by anyone with an electrical test meter.
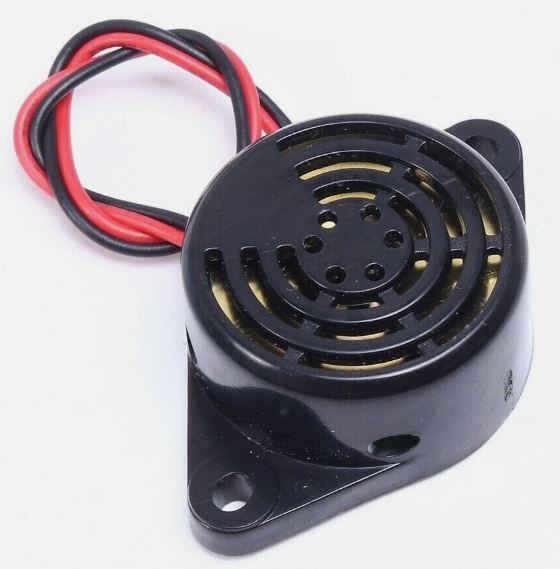
Head over to your favourite auction site of choice and type in “12 volt buzzer”. You can choose the size and volume of the buzzer and maybe get several!
The buzzer should have just 2 wires, red and black. Take the red wire and connect it to the grey wire with the red stripe on it that is on the headlight switch (there will be half a dozen wires in and out of the switch, use your test meter to find one that goes live when the sidelights are on but has no power otherwise). Remember that your vehicle may not provide power to the headlights unless the ignition is turned on – that throws me every time until I remember.
Now connect the black wire to the brown wire of the door switch on the door pillar. The circuit will be completed when the door is open and the buzzer will be off.
Open the door – no noise. Close the door, turn on the sidelights and open the door – the buzzer should now go off.
Why did I suggest buying 2? If you want to be reminded about an open door, just wire the red wire of a second buzzer to the permanent live of the headlight switch (always live even with ignition off) or any other permanent live under the dash. Attach the black wire to the same brown wire of the door switch. Now you have a buzzer for the door being left open.
Given that these buzzers are about £3 and only go off to remind you about your lights being on, that is a small price to pay to avoid a flat battery!
Well, what do we say – a very exciting and fun trip for our three vans.
First of all, a massive thank you to Lorna for all the hard work she and Nick put in to make it work so well. A group WhatsApp was set up so that we could all follow each other, which was a terrific bonus and we didn’t lose anyone en route. All of the camp sites were amazing. A true testament to the organisation of the trip.
Sunday 19th May
Departure day … we all travelled separately to our respective campsites before crossing the channel tunnel the following day.
We set off for Park Farm Campsite about 30 miles from Folkstone as we wanted the train journey to be stress free. We set off from home around 9am and had the day to get there. The campsite was spotless and virtually empty at this time of year. A great start for the coming trip to France the next day. We arrived late afternoon and so we took a walk to Bodium Castle. There was a pathway from the campsite alongside a river. A beautiful walk in the sunshine and had an evening meal in the local pub next to the castle.
Monday 20th May
The next morning, we packed up early and set off for the Channel Tunnel. This was the first time that we had been on the tunnel, and found it interesting and exciting. It could not have been easier. We arrived early and were told that we could take an earlier train than our ticket specified, as it was not busy. We took this opportunity to go to France early and I would certainly use the Tunnel again.
Arriving in France 35 minutes later we decided to go to Dunkirk, as it is nearby and I have been fascinated by the stories and films of WW2. This was well worth the small trip. We then headed for the campsite at Renescure. We arrived first out of our group and so set-up pitch. The pitches were individual and quite large. Val, Malcolm, Lorna and Nick arrived about an hour later having been shopping for supplies. The place was so nice. Each pitch had its own electricity and water supply. I did not bring a French plug convertor (against my wife’s advice) but the Campsite owners lent us one. They were such lovely people.
And so the trip had really begun.
Tuesday 21st May
The next morning we set off on a 240 mile journey through France, Belgium, and Holland and on to Germany. Although this was quite a number of miles, we stopped for meal / toilet breaks or whenever someone felt they needed a further stop. It gave the drivers a chance to get used to the ‘other side’ of the road.
Taking the bypass round Antwerp was quite an experience, as the roads were extremely busy and it was raining hard. We all noticed the extreme number of huge lorries on the roads particularly on this section. And when we say big, they were enormous. Apparently, this is a trade route so this could be expected. But this was all part of the Adventure.
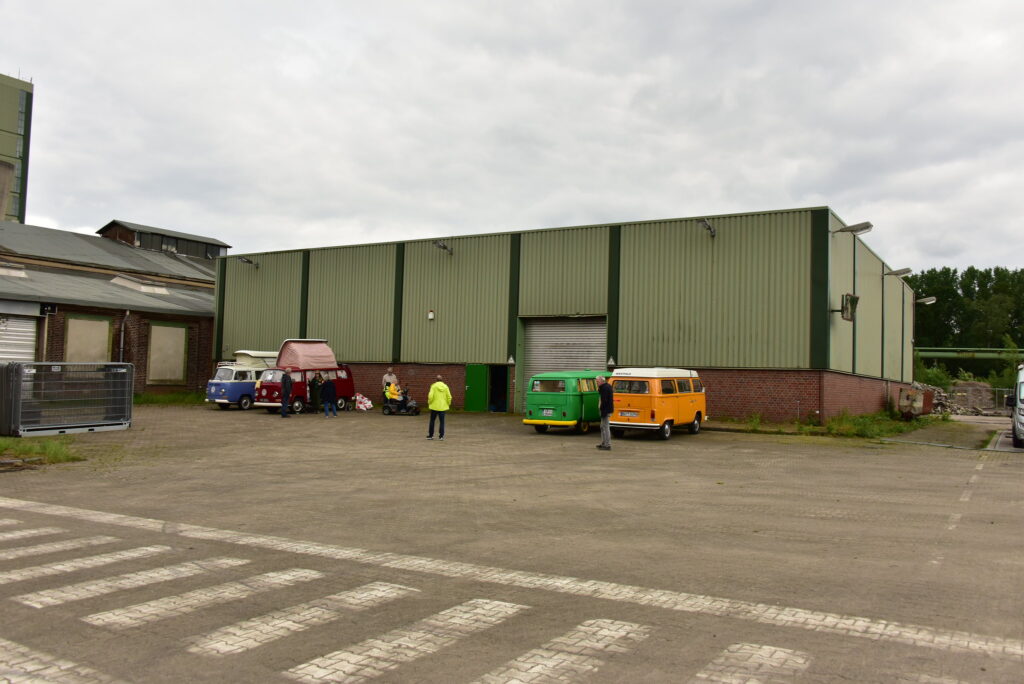
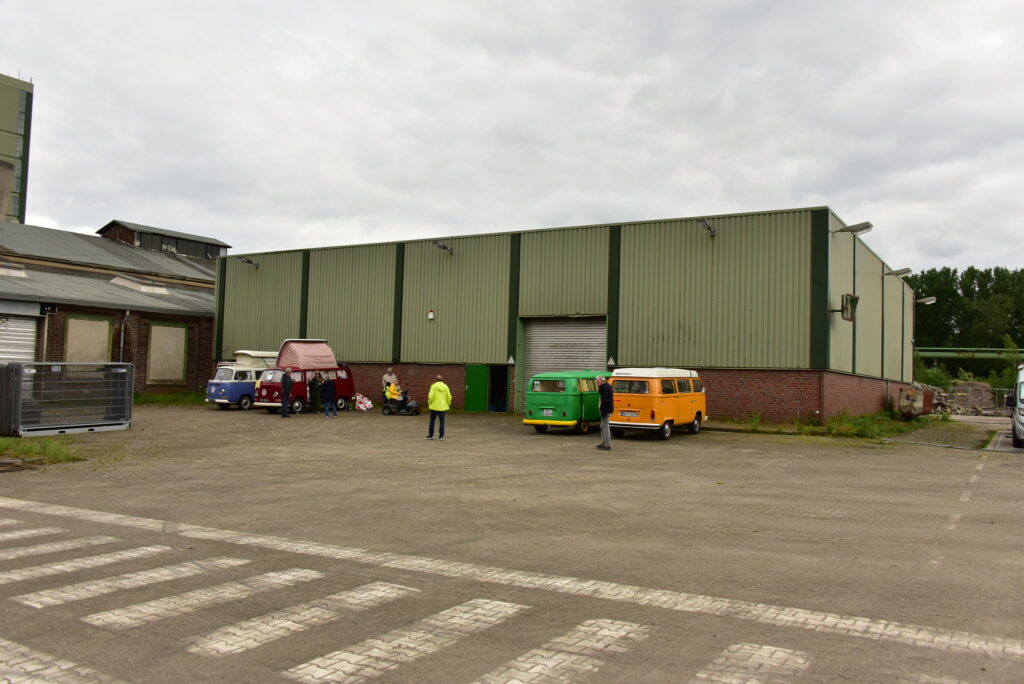
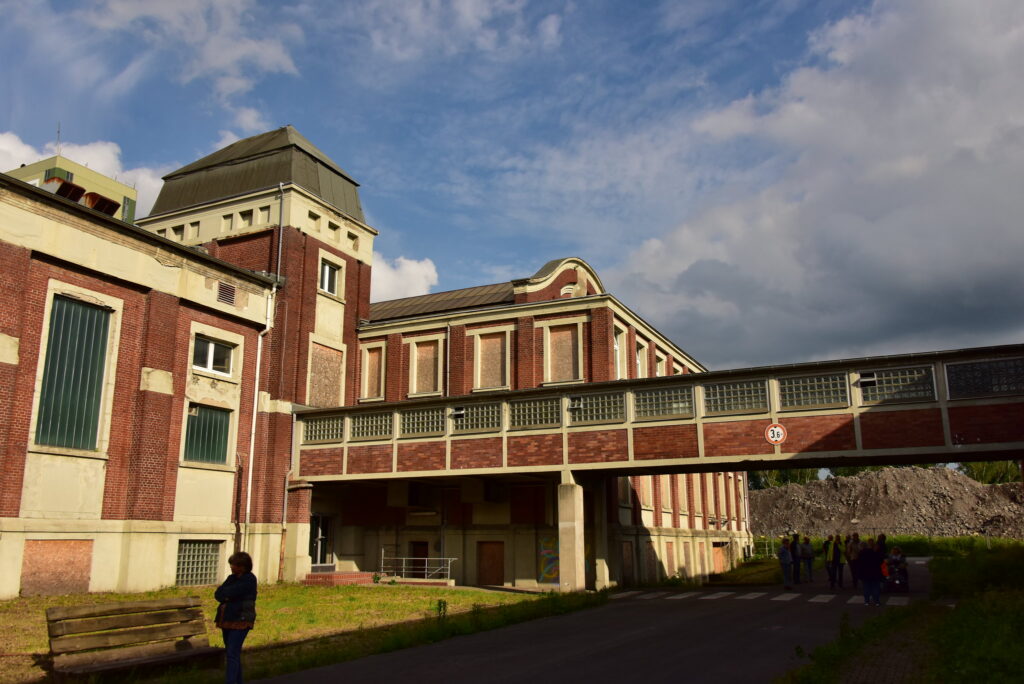
Leaving Antwerp the road opened out and we made good progress. Our first stopover was to be in a disused coal colliery, and we wondered what we might find there. We had just stopped to decide if we were in the correct place when someone hailed us to follow them which we did. We arrived at the Bulli Museum in Gelsenkirchen.
One of the buildings was used by the T2 Club in Germany to store all their vans and parts. Roland greeted us and made us very welcome. My word when they opened the doors and we saw their fabulous collection (many under wraps), we all got very excited.
After showing us where the facilities were, we had a general chat and were invited out for a meal. We camped in the car park which was not as bad as it sounded as a water supply and toilets were available in the Museum which remained open during our stay.
Wednesday 22nd May
Bright and early our hosts arrived including Detlef (who was the German organiser of the trip) and Ulf (who became our driver to certain events) together with a few of the Club members. We couldn’t wait to have a look at their collection. Most of the vehicles work or at least they will when completed.
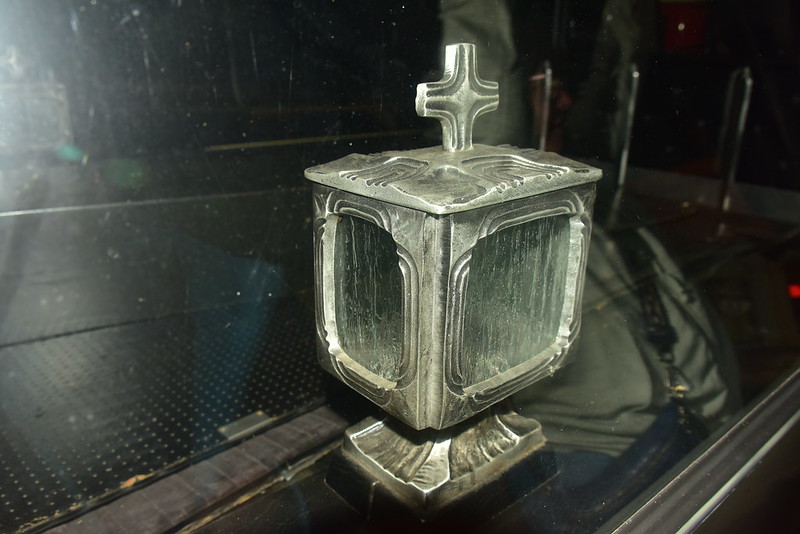
A lot of the vehicles had individual stories attached to them and one by one we were shown them. There was even a fire truck and 2 hearses; one reminded us of the Victorian times as it was decked out with lace fringing and carriage lanterns.
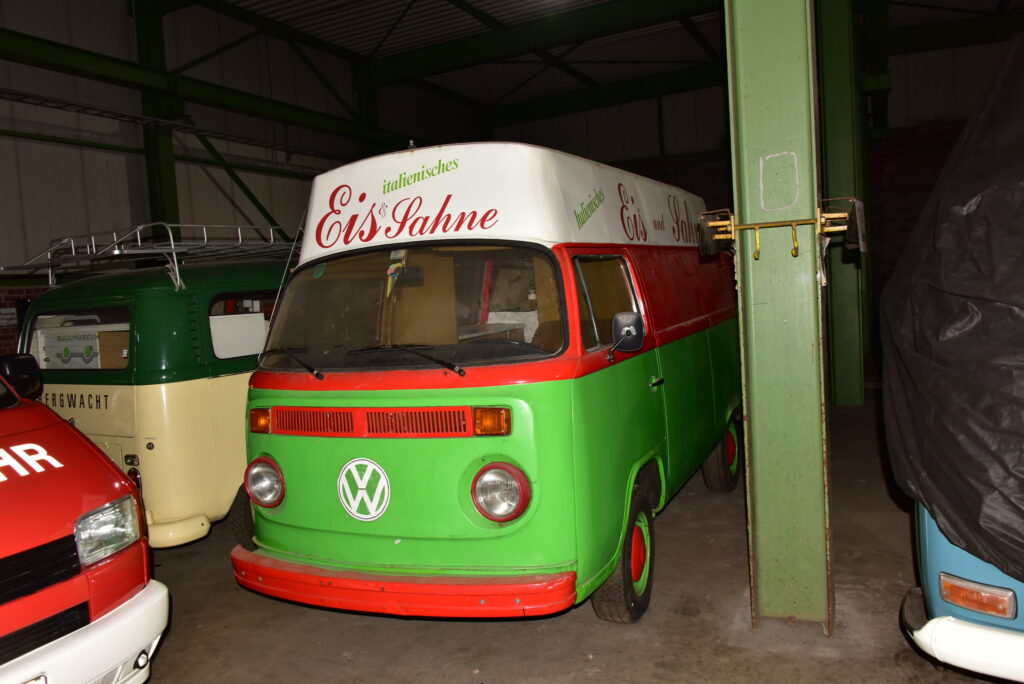
It was amazing the number of different kinds of vehicles. One was used at the airports with a lookout tower on the top, another had a crane used for carrying lamp posts. An ice-cream van and a Police radar van were also there. The vehicles ranged from Split screens to T4s. Each one was unique.
In the afternoon, we were given a guided tour around the colliery by a man who was working on the buildings and site. The whole site is being preserved and put to use in different ways. The Bulli Museum (Bulli being the German name for VW transporter vans) is working towards making a bigger area in order to display their vehicles to their best advantage.
We look forward to a possible return trip in order to see that!
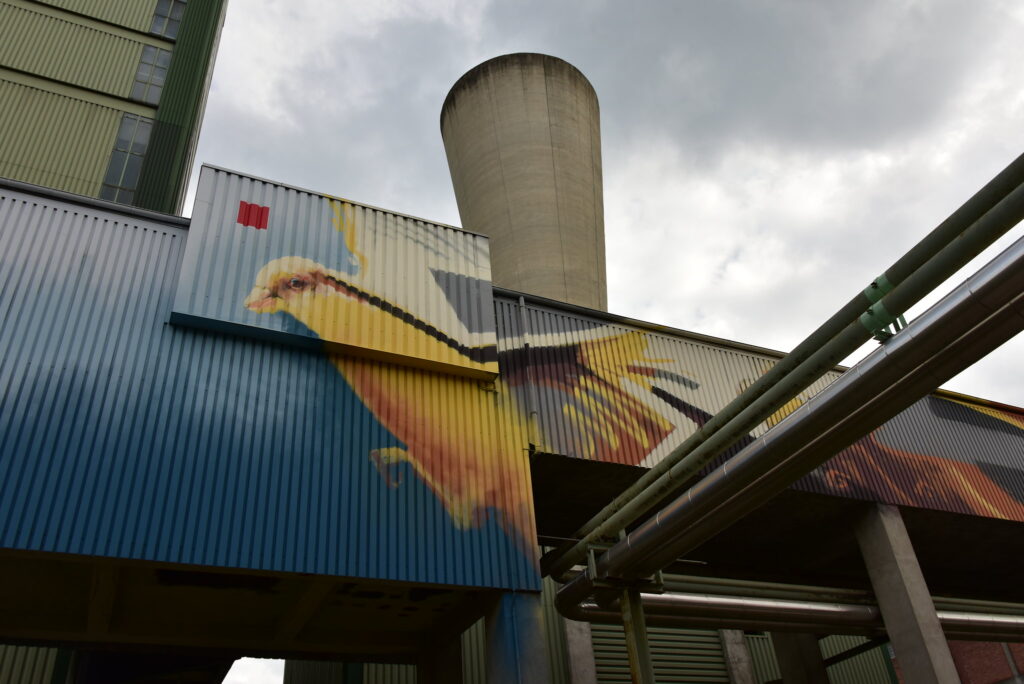
There had been an art celebration a little while ago and many of the buildings had been painted with different artwork and writing. CAN YOU SPOT THE DELIBERATE ERROR IN ONE PIECE?
Some beautiful artwork included Canaries representing the birds taken down the mines to give an alarm when gas is detected.
It was interesting to know how the colliery had been worked and what the buildings were used for. One room was for the injured and there was a doctor’s house on site although this is not going to be used as part of the regeneration of the site.
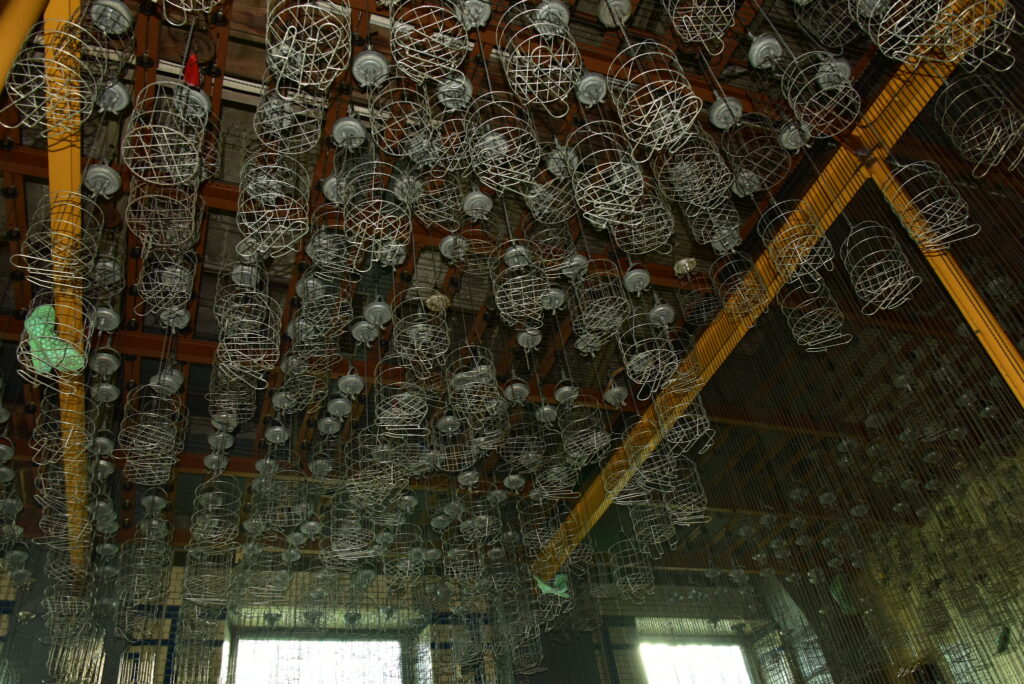
One area contained many metal baskets which were hanging from the ceilings on long chains with an individual padlock on each one. These were for the workers to leave their clothes in when they changed into their working clothes in a different room. At the end of the working day they put their dirty clothes down into a special hole in the room where they dropped into the laundry area. They then took a communal shower and were so close to each other that they could wash each other’s backs.
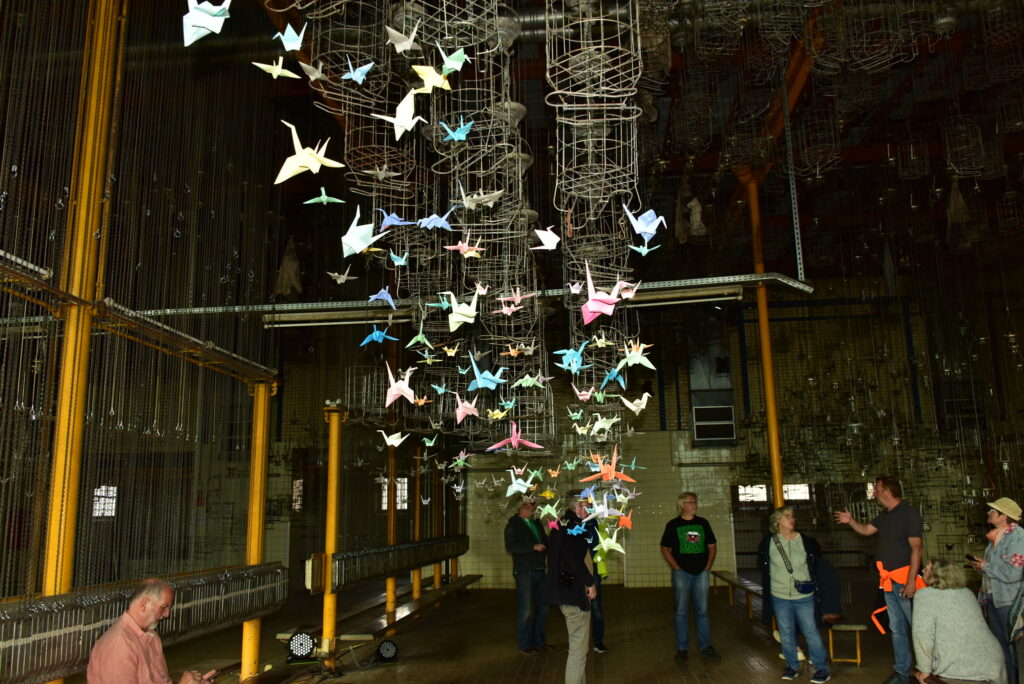
As part of the art exhibition an artist had made origami birds. These were coloured from black to grey to a variety of colours depicting the coal dust to clean. The birds were then put in the cages. A lovely spectacle.
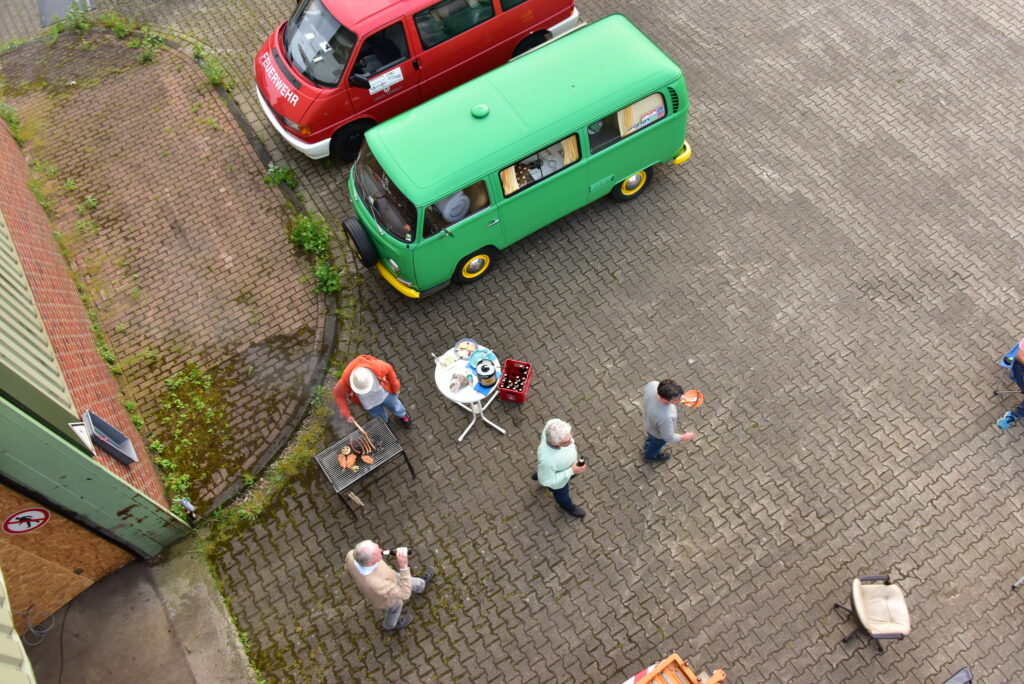
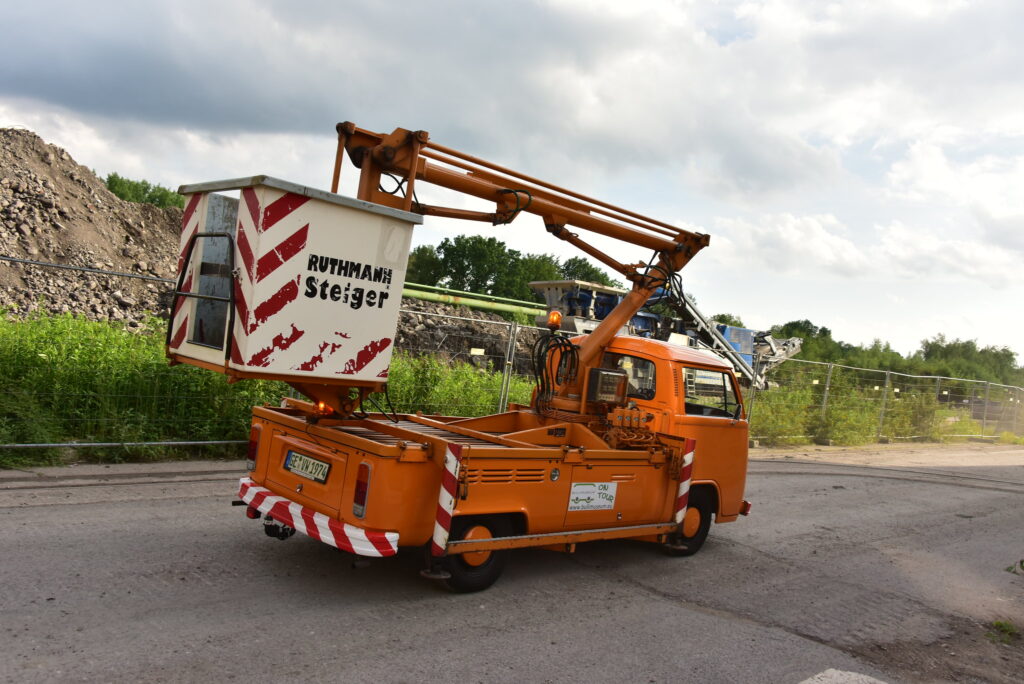
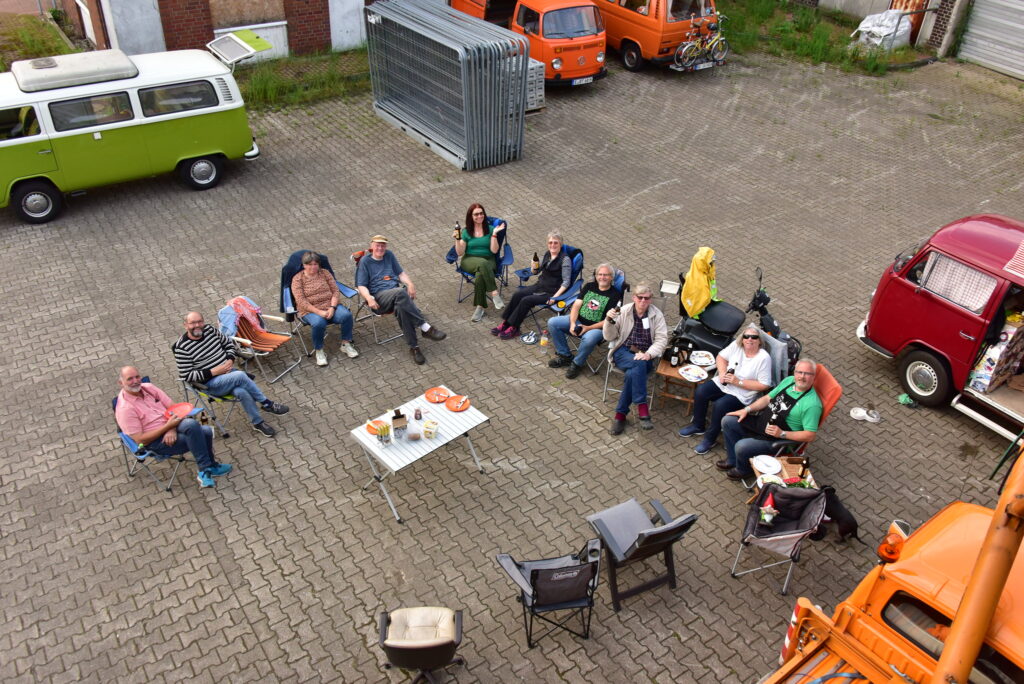
Being nominated ‘unofficial’ club photographer I was asked by Nick and Lorna to take a picture of us all from the top of the Bulli Museum building. I needed to get high, so I was offered this vehicle as the platform (Editor notes that “I needed to get high” means elevation, not smoking!). This vehicle is owned by a member of the German VW Club.
The resulting picture shows the fun were we having with the German Club. They laid on a BBQ for us with plenty of food and drink of all varieties including some incredible German sausages made by Roland’s next-door neighbour who is a butcher.
This was just the first day with the German Club members.
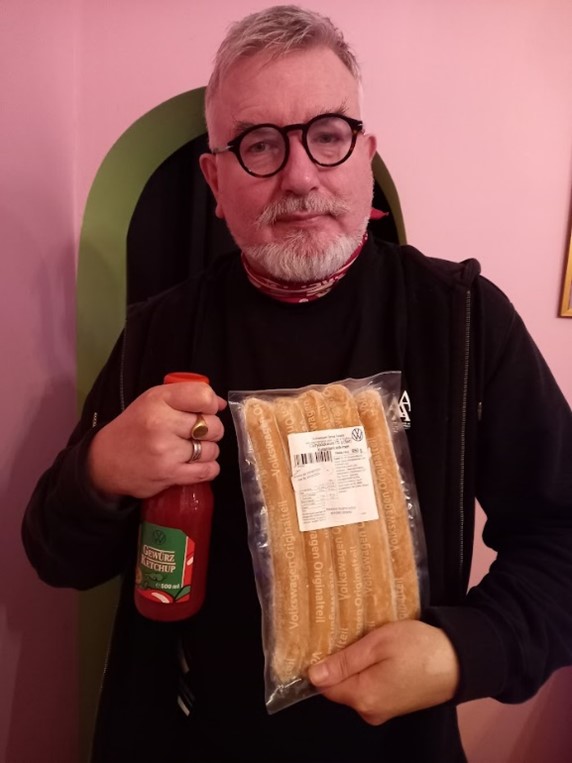
Volkswagen currywurst Chips Gewurz ketchup (or other tomato ketchup)
If asked which product VW has sold the most of, it would be reasonable to think the answer would be “the VW Beetle”, given that they built over 21 million of the vehicles between 1938 and 2003, but you would be wrong. In fact, it is Volkswagen Originalteil (Volkswagen Original Part) number 199 398 500 A, the Volkswagen currywurst. Manufactured at the company’s Wolfsburg plant, it is served in the canteens at their six German factories, with more than 7 million made every year since 1973. It has long been available outside the factories through German VW dealers who would give away packs to car buyers, but in more recent years it has been sold to the general public, along with Volkswagen ketchup, Volkswagen Originalteil 199 398 500 B.
On discovering this, it seemed that I had found the ideal meal for camper van excursions and promptly tracked some down to sample on an early autumn weekend visit to Norwich with my partner Frances. In the UK, both the sausage and the ketchup are sold by the specialist online German sausage retailer, The Sausage Man (sausageman.co.uk) and by Crafted Meats (craftedmeats.co.uk) for £16 a packet of five. This may sound steep, but they are imported from Germany, with the additional costs that now entails, and are huge. At 25cm long each one is a meal in itself – there are smaller ones available in Germany, but I can only find the monsters here. Made with best quality pork and only 20% fat, it is important to note that they are not actually curry flavoured – they are just the kind of sausage used to make classic currywurst in Germany. This consists of the sausage, fried or grilled, with a good splash of the ketchup and a sprinkling of curry powder, eaten with fries or in a bun, hotdog style.
So, equipped with my giant sausage, the ketchup, and an air fryer to cook the chips with (I did not fancy running a deep fryer with all that hot fat in the confines of our T2!) and safely settled in the Top Farm campsite in Marsham, just north of the city, I set about cooking the wurst. Given a brisk fry on the van’s stove, the sausage took about 20 minutes to cook, while the air fryer, plugged into the electric hookup, quietly prepared the chips beside me. As they are almost too big to fit on a camping plate, I halved the wurst, then doused them in ketchup, sprinkled on the curry, added the chips and we piled in. The sausages turn out to be firm, tasty and slightly smoky, akin to a classic bratwurst, with the ketchup being a little more sweet and less vinegary than UK ketchups, with a hint of spice, perhaps tamarind, that tilts it a little in the brown sauce direction. Either way, it was a perfect accompaniment to the wurst, and I easily polished off one and a half of the giant sausages and can confidently say I now have the official food of family camper trips sorted out, with three more of the things awaiting the next expedition in the freezer.
The team are offering additional services this year of engine servicing as well as rebuilding. Again, their experience means that those niggly issues with your engine can be addressed by people who live and breathe these machines. This is for Beetle engines, Splitscreens, Bay windows and T25s but petrol engines only. Everything from a 1300cc up to some huge 2.3 litre beasts if that is what you want.
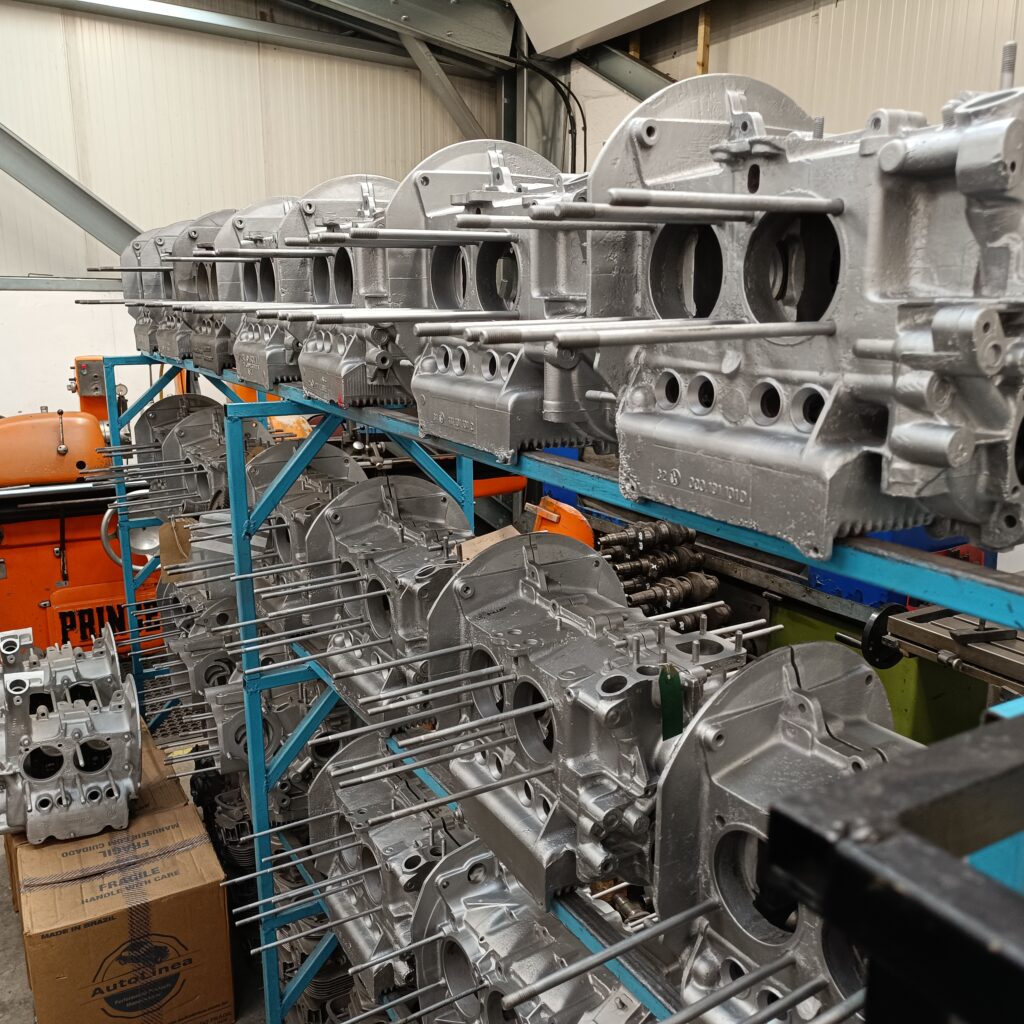
Next over is the storage racks of cleaned, painted and tested crankcases, with around 20 on the rack ready to build up. This is also where they check the crankshafts, machining them if required and repair the edges of the cases if they have damage where they need to be bolted to other components.
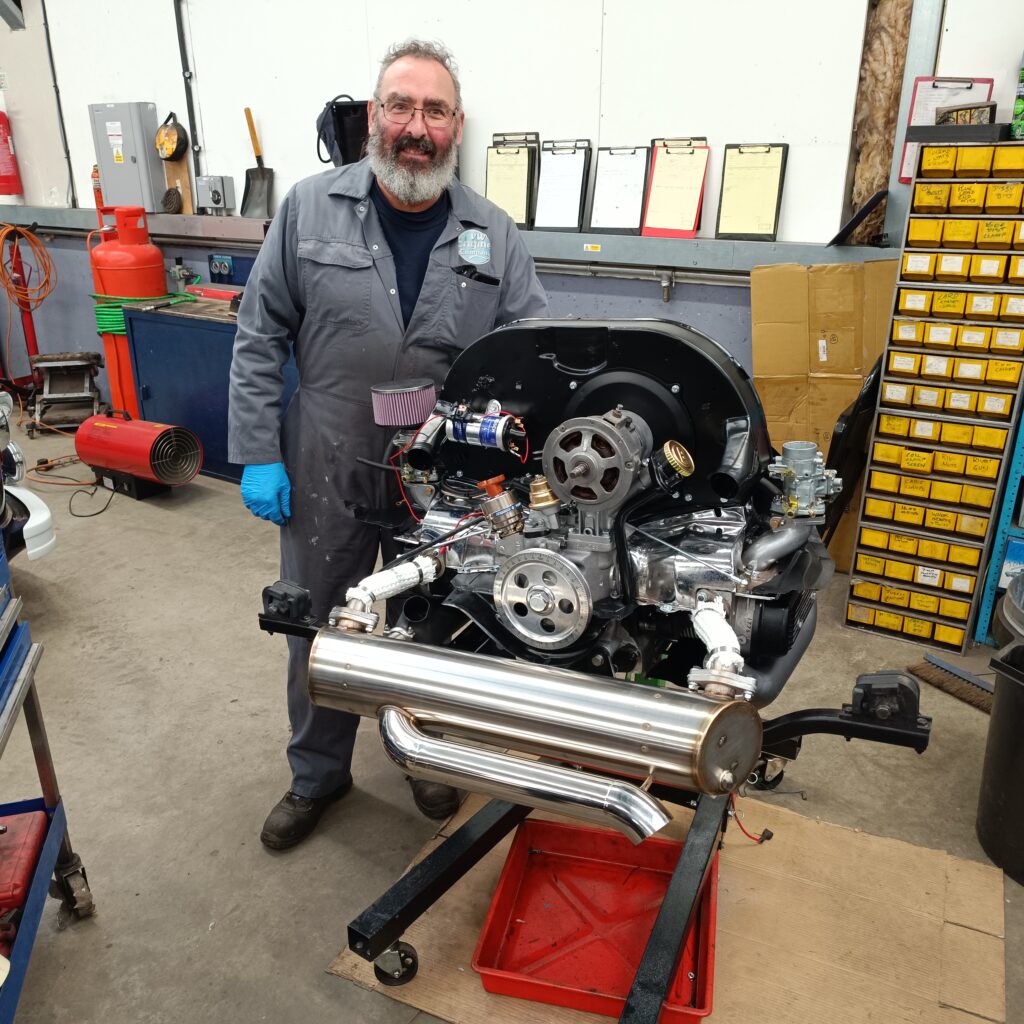
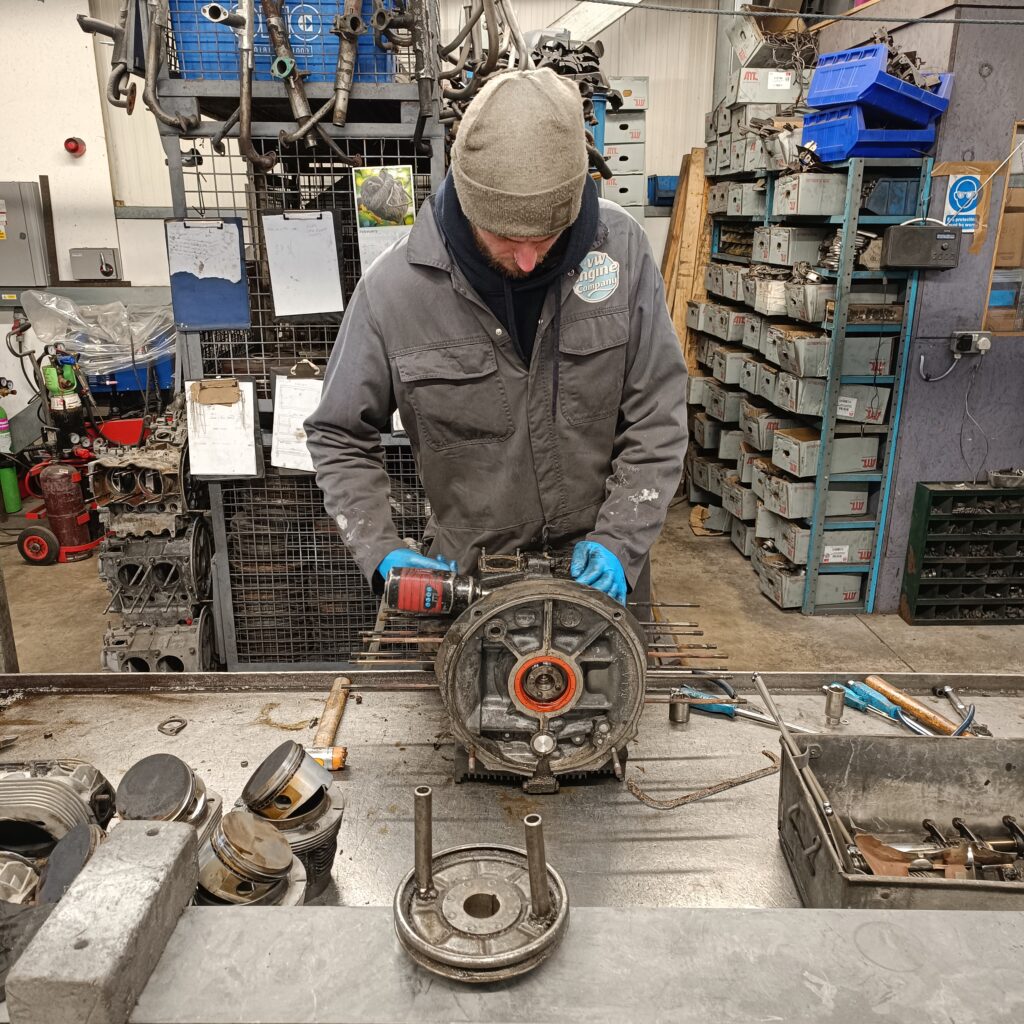
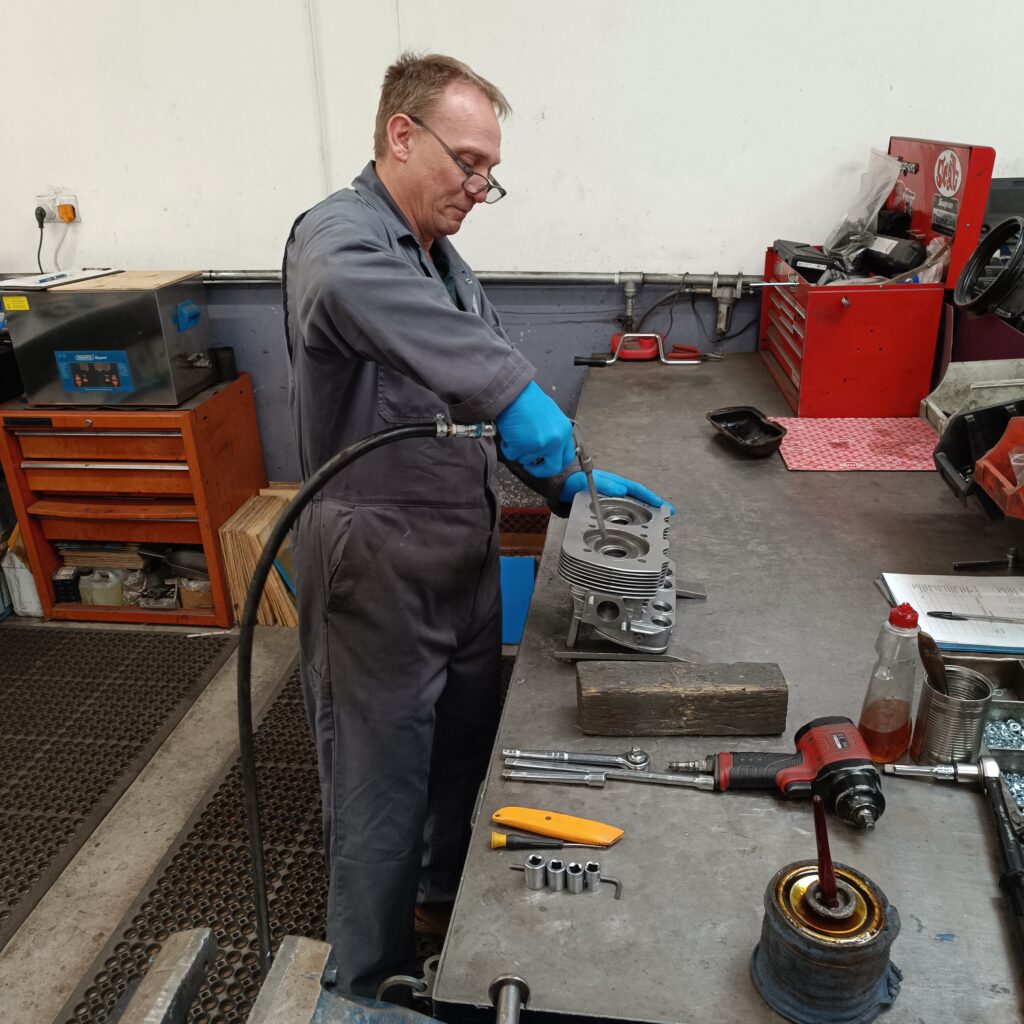
Once the case has been chosen, machined if required for larger heads and is ready, it goes to the engine build room. Sam who was doing customer engine work is normally in here building engines but today instead it was Michael, preparing engine heads and putting the final touches to another customer engine and cold testing yet another. The testing also allows them to measure oil pressure and record cylinder compression levels in their high-tech A4 diary. You don’t need technology for everything, and it is much easier than having to start up a computer each time! To test the paper trail, we looked at Poppy’s engine, noted the engine number and looked it up in the book. The engine was built on Friday 27th October 2023 by Sam, and we can see the test results.
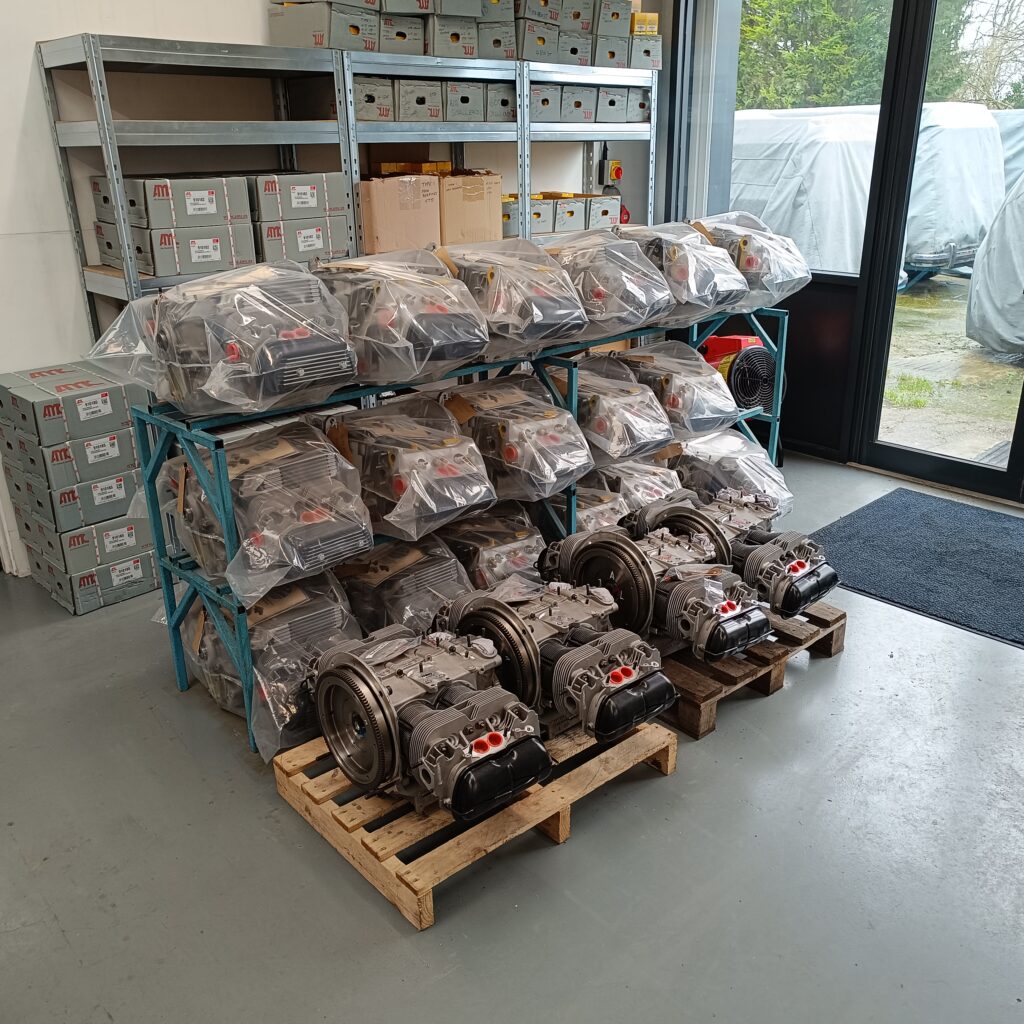
Back out to main reception, James then showed me the warehouse storeroom where there are over 150 engines all finished as long blocks, sitting on pallets, and bolted inside metal frames to keep them protected. These were ready for shipping and the number was very high during my visit as the season was about to start and they simply cannot keep up with spring demand otherwise!
With these pallets, you can order the long block and have it delivered to your house or your local mechanic. The engine can then be removed from your vehicle and stripped of the tinware, fan, alternator, fuel pump, distributor, oil cooler and so on. The new engines are supplied with a new oil cooler though. Then rebuild those parts onto the new arrival and fit back into the vehicle. Then the old block complete with rocker covers at each end can be bolted into the metal frame on the pallet and the VW engine company will arrange for the pallet to be shipped back to their HQ for rework. And so the process begins again. I was surprised to find that shipping the engine to you and the old one back to them comes to a total for both journeys of just £168! Given that they are inside the ULEZ zone at £12.50 for older vehicles and I used the Dartford crossing both ways, I spent a good chunk of that heading over there myself!
On the turnkey side, if you rock up with your vehicle, they can also offer extra bits – refinishing your tinware to get it looking good, a new 123 distributor, upgrade to electronic ignition if you want to retain the distributor, add an electronic fuel pump. Almost anything can be done there.
As you can tell, this is an impressive operation filled with passionate experts, helping to keep our vehicles running properly. This is not a budget operation, and the word-of-mouth recommendations are extremely strong.
As a reminder, example prices to our club are:
A 1641cc long block engine with a reconditioned crank case = £2,200+vat
A 1641cc long block engine with a new crank case = £2,700+vat
A 1776cc long block engine with a new crank case, big valve heads, mild road camshaft = £3,400+vat
These prices are based on an exchange process with your old engine. During this interim period a surcharge deposit is held of £400+vat. Once your old engine is returned this deposit can be refunded. In the event of your old engine not being “serviceable” they will contact you to explain, send pictures if necessary and a proportionate value of deposit may need to be retained which is understandable.
Knowing what I know now about their operation, I’d have had Eric the Viking’s engine done here. Poppy’s engine was swapped by our local, tame mechanic but in fact, driving Poppy over to Biggin Hill, the team could have done it all for me.
James and I loaded Poppy’s shiny, new 1776cc engine into the boot of my car and I headed off to Aylesbury to see Poppy and deliver it to our mechanic ready for reinstallation. All engines come with a 12-month unlimited mileage warranty. Not that I expect to need that – these are built with the best quality parts, sourced from America, Brazil, Denmark amongst others to give longevity of your new engine to ensure that you get as much time with it as possible.
Instead of getting your local mechanic working on your engine that has not run correctly for many years, consider taking it to James and the team. Or take the vehicle and have them change the engine. Or they can just supply the main part of the engine for someone else to do the fun bits. Whatever you choose to do, don’t forget to mention your membership of the club to get the discount that varies depending on which engine you need.
Example prices for a turnkey solution where you take your vehicle over (club prices, not available to the public) are:
Turnkey Service £595+vat (transfer all of your engine’s bits from the old to the new engine)
Basic service parts (oil, fan belt, fuel filter, ancillary nuts and bolts etc) £70+vat
Engine removal and refitting £495+vat
Plus any potential ancillary replacements that may be required or that you may wish to be replaced at the same time.
Lead times depend on the time of year but would be typically 3 to 8 weeks’ notice, and your vehicle would need to be with them for about 2 weeks.
My thanks to James, Patricia and the team at the VW Engine Company for showing me around and helping me to understand in depth about the operation and what they can offer us.
You have surely heard of them and most likely seen them but do you know about them?
Solar panels capture energy from light (not necessarily sunny days, bright will work), using a photovoltaic cell that generates electrons when it is exposed to light. These flow through the circuit and create electricity. With the right number of cells, these panels can act almost like a battery to provide electricity – however they obviously do not generate without light and the current varies depending on the weather.
For those of us in sunny countries, who like to go away in our vehicles and who use 12-volt electrical items, solar charging is now possible. In fact, it is quite easy with a small amount of reading and hopefully this article will help.
The theory
You have a battery that I’m going to call the leisure battery, but you can call it a second battery or camping battery. It powers your various camping related items but is not designed to run large appliances like heaters or disco units!
You want to charge that up for free from the sun so that you are not tethered to an electrical socket on each camp site.
The calculation
List all equipment that you have in your vehicle that needs powering from 12 volts
Check on the equipment or in the manual (which is probably online too and you can magnify the text easier!) for the wattage or the amperage. Make a note of each one in a list.
Think about how often you use each item in each day and be realistic.
Think about when you camp.
Now, convert the amps to watts by multiplying by 12 if you only noted the amps.
Otherwise list each item like this:
Fridge uses 60 watts and will be in use for 12 hours per day on average when in the UK. That makes 720 watt hours per day.
Lights are 2 watts each and I use 4 of them making 8 watts. In use for 2 hours each. Total is 16 watt hours.
I use 2 USB sockets that are 7.2 volts and 2 amp which is a maximum of 14.4 watts. Total of 3 hours per day. That is 44 watt hours.
Then add up all those little watt hours to get a total for the day. In this example I get 780 watt hours. It doesn’t really matter what that means, just get the number!
In the UK I think we can get 6 hours of sunshine per day in the summer and 4 hours in spring and autumn (fall). Your country may be different and your feeling might be different.
You then take the total watt hours, in this case 780 watt hours and divide that by the number of hours of sunshine (aka charging) to get the number of watts of input charge you need to counteract the discharge. 780 watt hours divided by 6 hours is 120 watts.
Therefore to replace the lost charge I need a solar panel that has an output of 120 watts. If you need more than 100 watts, consider more than one panel.
The solar panel itself
They come in 3 main flavours, choose the type you prefer!
Briefcase – these pack away and get stored unused when travelling. They can plug into the cigarette lighter that connects to the correct battery.
Solid frame free standing panel – these can either be inclined towards the sun and stood on the grass when you are pitched or could be mounted on the roof of your vehicle. They tend to be the least expensive.
Flexible and semi-flexible – these tend to be the most expensive and will be the focus of the rest of this article. They can be permanently attached to your vehicle.
Attachment
We purchased a 100 watt solar panel that is “semi flexible” meaning it is about 2mm thick and bends a little but bending too much will break it. We have used both Biard and Renogy panels but other manufacturers are available. The price is around the £100 mark for the supply only of just a flexible 100 watt panel and around £180 for a flexible 200 watt. We would recommend buying a branded panel and ensure that the physical size matches the quoted watts – 1 square metre of solar panel will generate just over 100 watts. If the panel is tiny, walk away!
We then purchased a used roof rack and connected it at the back of our bay window to the roof gutters with a little modification as roof racks are generally lower and narrower than a Bay window needs! It did cost £4 though!
As an expedient, we laid the panel on the grass upside down, laid the roof rack on the panel also upside down and gaffer taped the two together. It was a plan for a couple of months before glueing the panel to the Dormobile roof and 5 years later it was still gaffer taped but is now bolted to the same roof rack.
There are two cables coming out of the solar panel and remember they are live except in the dark so tape them up / ensure the ends are not able to create a short circuit.
The clever box in the middle
You cannot just wire the solar panel to the leisure battery – bad things will happen. You need a box in the middle that will stop the leisure battery sending its charge out through the solar panel into the night. It stops the solar panel over charging the leisure battery so far that it explodes. You need to avoid that. This clever box is called a regulator or solar controller and comes in 2 main types – PWM (pulse width modulated) and MPPT (maximum power point tracking). The PWM is less efficient at getting power out of the panel into your battery but is generally a lot cheaper. MPPT would be recommended if you camp outside summer as it is more efficient in less than full sunny days or if you have more than one panel. Do not buy an MPPT controller under about £30 as they tend to think they are MPPT controllers but are just expensive PWM controllers.
The clever box for us was a cheap PWM controller that was about £10 / $15 and has just 3 lights. Charging, discharging and battery health (green is good, flashing is full, red is bad). This has since been replaced with a Renogy MPPT controller at £120.
Wiring it
We dropped the solar panel cables down the air vent at the back so that there are no new holes on the van and therefore no chances of a water leak! Then got the wires up next to the spare wheel inside the vehicle as the controller is easier to see and that engine bay can get quite warm.
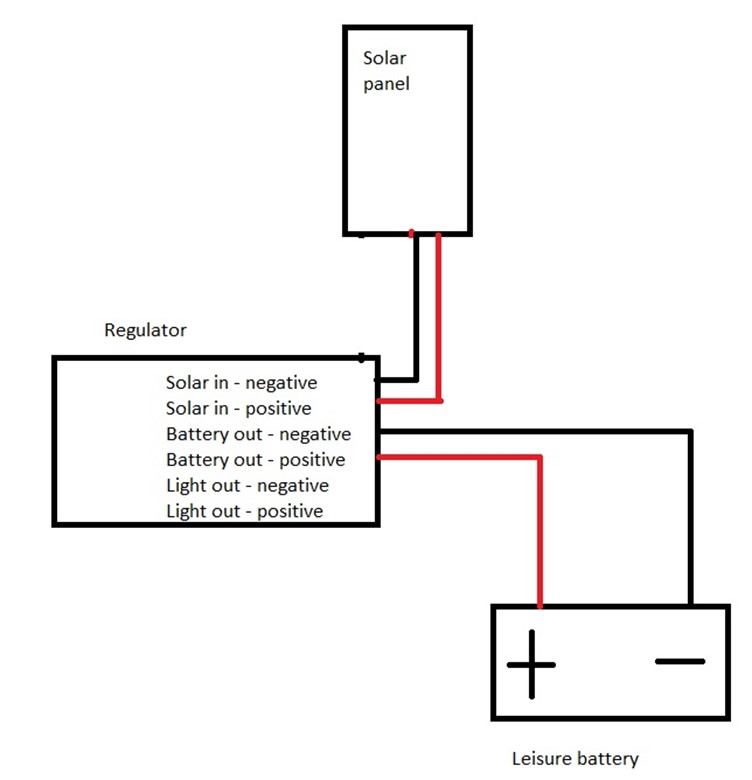
The leisure battery has two new wires, leisure battery positive to the hole on the regulator for battery positive. And then battery negative to regulator battery negative.
Then the solar controller should give you a light on the box.
Next I connected the solar cables – positive first as it is always live in daylight – to the solar controller / regulator. Now my controller had a light saying it was charging.
Then I checked the voltage coming from the controller to the leisure battery – I was getting over 13 volts! It works! I used a dedicated wire directly to the battery rather than using the chassis.
Next step
Take the “Light out” positive and negative terminals and use those to power your leisure items – DO NOT run anything directly from the leisure battery, then the controller can shut off power if the battery gets low. Erm, that’s it!
Now I have a solar panel permanently on the roof, always charging from dawn until dusk even on the move. The regulator means that even with the engine running and the split charge working, we do not over charge the leisure battery and it works even under the car port in the winter keeping that battery going until spring time.
Total cost of solar system for 100 watts non-flexible panel and PWM controller is now under £100. A 200 watt flexible panel and MPPT controller is about £300 at time of going to press. Cost of replacing the leisure battery every year £120. Saving on electricity per night at a camp site is up to £10 per night. This system seriously pays for itself in no time.
The next edition of the club magazine has been finished by our Editors and looks fantastic. It should be arriving through your door soon! If you are enjoying the club magazine and have a story about a trip, an upgrade, a restoration or just a tip, send a contribution to our Editor at editor@vwt2oc.co.uk.
Club member Sarah McCutchion says that this is guaranteed to send delicious wafts of cooking smells to all corners of the campsite.
Needed: One big pot. One knife and a wooden spoon.
For 4 people: 8 skinless boneless chicken thighs One large onion finely chopped One red pepper finely sliced Lots of garlic 1 whole spicy chorizo sausage sliced 1 tin chopped tomatoes Tablespoon tomato puree Paprika Cayenne pepper
Cube the chicken and brown in the pan. Add the onions & chorizo. Brown it all. Add the garlic. When the onion is softened add everything else. Bring to the boil, then simmer for 40 ISH minutes. Add water or red wine as required. Serve with crusty bread, rice, pasta or potatoes.
As the long season comes to an end and following on from the recent winterizing post, some owners may elect to cover their pride and joy with a cover.
Please. Pretty please. Pretty please with little chrome covers on. Don’t cover your expensive paint work with a tarpaulin that will get condensation inside it, press that moisture onto your bodywork and accelerate the attack on the paint and the metal underneath.
If you don’t have access to a garage or a car port that will keep most of the weather off, try to invest in a good breathable cover. Get the right one for your vehicle and make sure that the material is not flapping around, abrading where it touches.
Ideally park on hard ground that will not have standing water. Parking on grass at the bottom of the field will collect water underneath which will evaporate upwards into your van and its little cover. A breathable cover will let some or most of that collected moisture out but ideally you should remove the cover over winter every month to let things properly dry out and then put it all back to bed once more.
If possible, get a cover with straps that go under the vehicle from side to side, so that the wind cannot lift the cover off the vehicle. It is disheartening to get home from work in the dark and find your expensive van exposed to the elements and a wet cover wrapped across your hedge.
For those of you lucky enough to have a garage, a dust cover is optional but again, think about the possibility of trapped moisture pressing against the bodywork. Does a quick dusting or a nice spring time wash and wax give more benefit than the winter cover?
Hello, my name is Tish and I’m having a go at writing some camp friendly recipes. We have a small 70s two hob stove like I’m sure many of you do. I carry on board a small and large cast iron saucepan and a none stick frying pan. I’m also a bit of a foodie so I have a small wicker basket on board which always contains – a proper salt and pepper grinder, olive oil, stock cubes, a few dried herbs and cinnamon. I also like to have some chutney/pickle/jam around too. Great for making fancy sandwiches or elevating a charcuterie board when it’s too hot to cook. Whenever my husband complains about fuel economy I just shrug my shoulders.
I tried to incorporate bits you’ll have on board for breakfasts or have at home to use up. With the cost of camp sites going up, and restaurants increasing their prices (understandably) it’s nice to try and save a few pennies where you can.
This can be made on a camping stove, or at home and warmed up on site.
You’ll need 2 hobs
Whatever chicken you have available (about 250g) or vegan alternative. Chopped. Bacon lardons (I used smoked for extra flavour) Mushrooms 200g Chicken stock Cream cheese (at least a tablespoonsworth – useful if you’re using it for breakfast!) Small Waxy potatoes. (You can precook these at home, they travel well – or boil in a separate pan) Salt and pepper and some butter.
Instructions Boil a full kettle. Once kettle is boiled add almost all the water into a small pan, add your potatoes on to boil. (Omit this if you’ve precooked them at home) try reserve about 100ml of water. Add a small bit of oil into a medium saucepan and once hot add in chicken and bacon. After the chicken starts to cook through (about 5-10 mins) crumble in your mushrooms. Leave for another 5 minutes to soften. Now you can add in your stock, soft cheese, salt and pepper with 100ml of water. (I add in some onion chutney here) Leave this to bubble and reduce. At this point you can add your peas into the stew or green beans into the same pan as the potatoes. Neither need very long. Once potatoes are soft, pop onto a plate and crush gently with a fork. Add salt and pepper to taste and as much butter as you like. I’m not your doctor! (If you’ve precooked your potatoes, similarly crush them and warm them up in a pan with some butter, salt and potatoes) If you wanted some fresh herbs now is the time to mix into the stew.
Then divvy up into bowls and enjoy. To make this a one pot lower carb meal, omit the potatoes entirely. Or if you’re low on cooking facilities the stew can be happily mopped up with some bread.
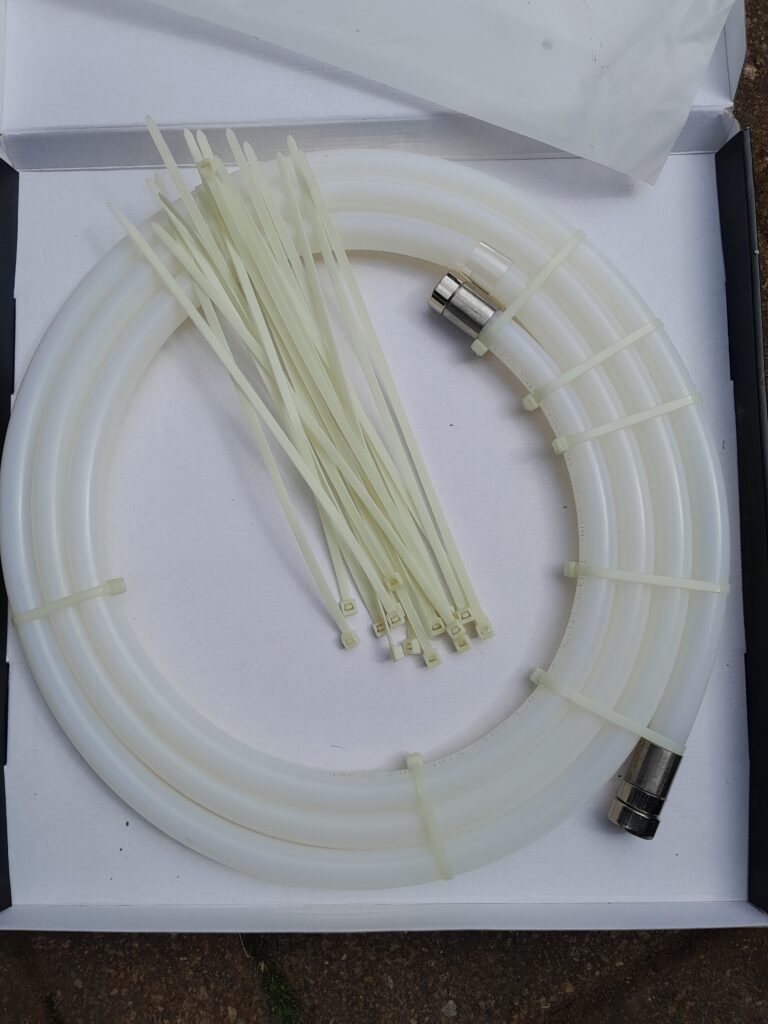
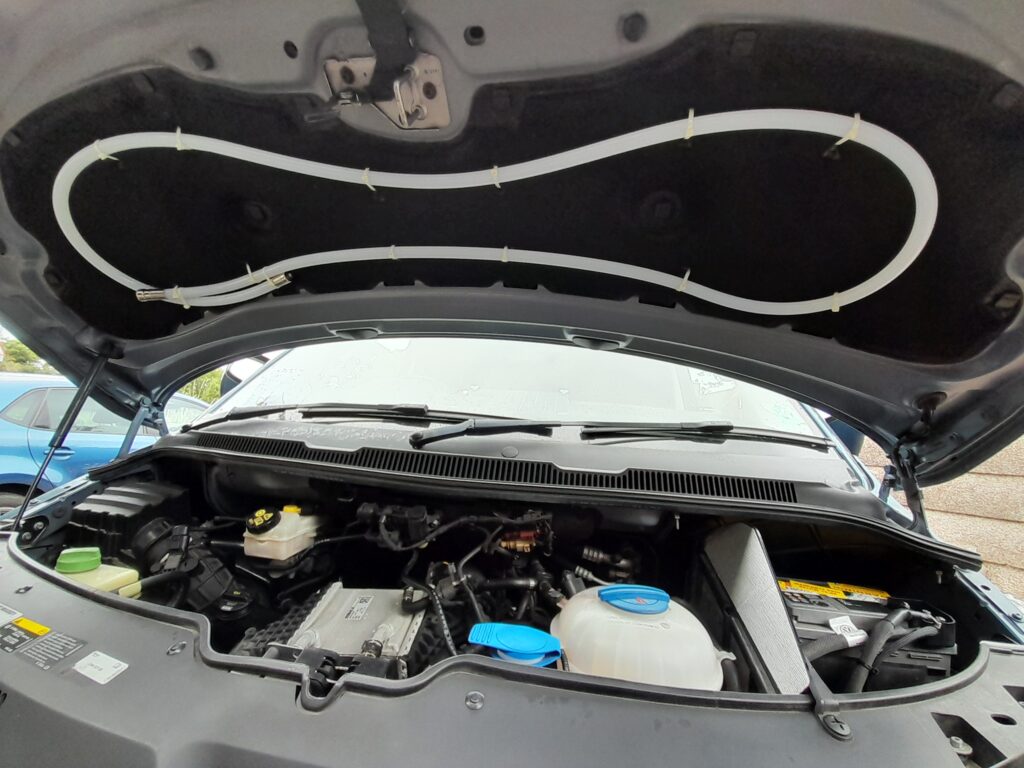
Fitting my competition prize (at last). Quite a while back I was lucky enough to win an Engine Fire Fighter, Automatic engine fire suppression device in one of the club competitions as supplied by our friends at Just Kampers.
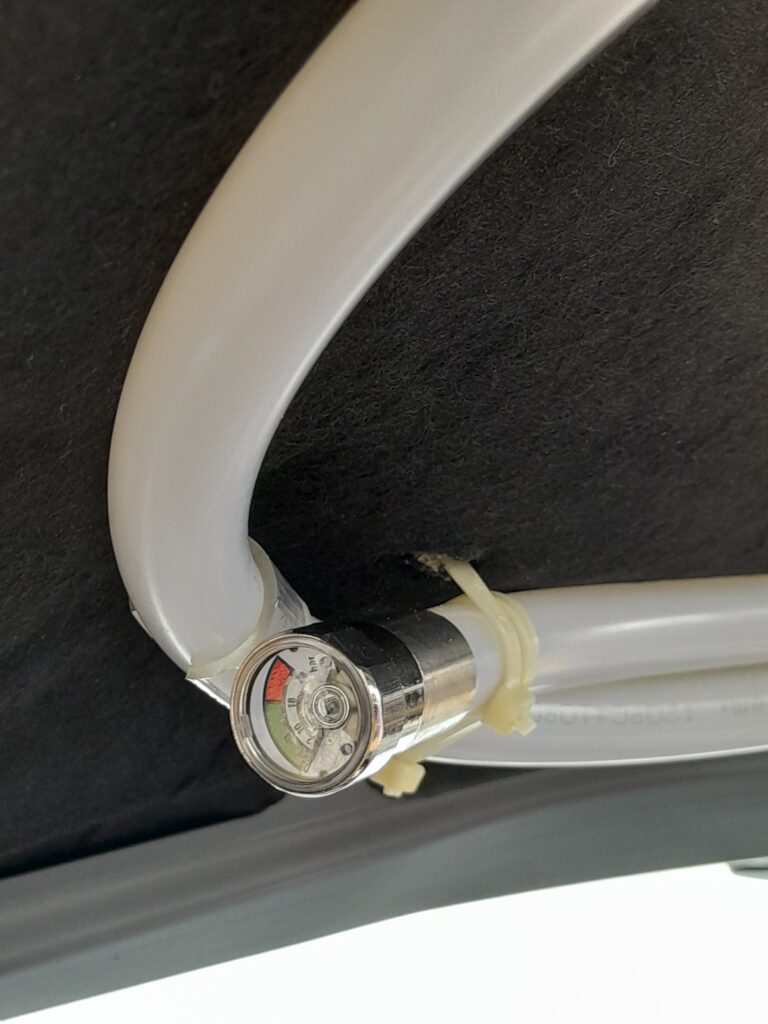
It’s 3m in length, has a burst temperature of 120 degrees centigrade, fire rating class A,B,C,E and only takes five minutes to install (as long as you don’t have to work around other fittings such as an under bonnet insulation pad that is). It’s still not a long job though!
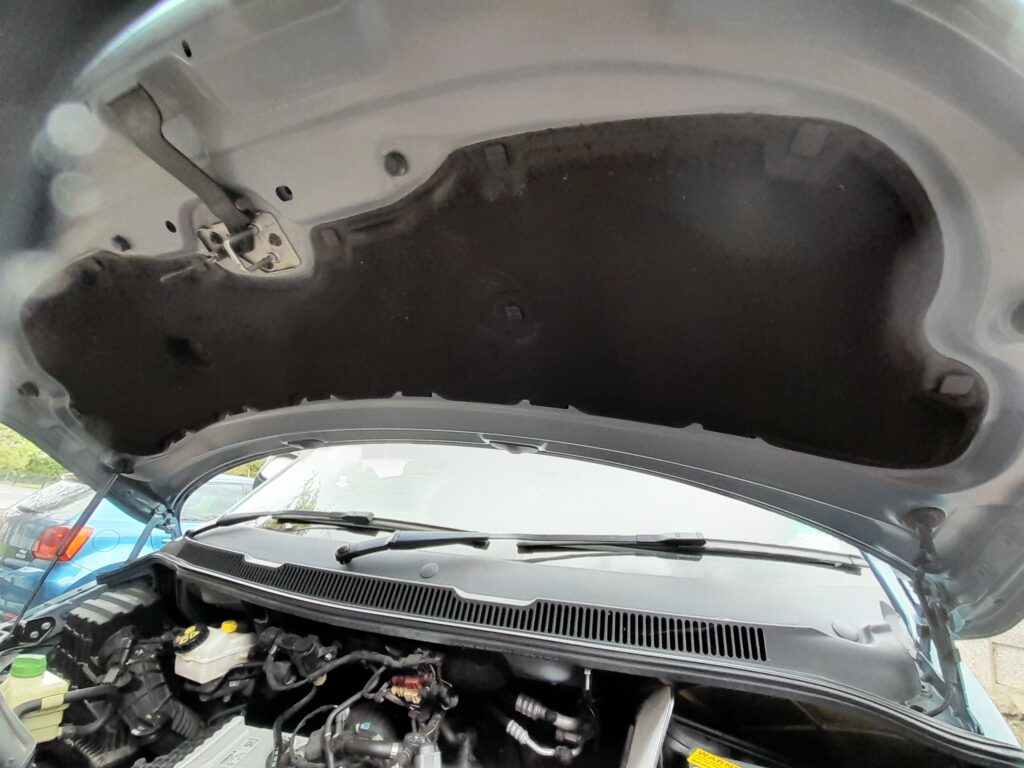
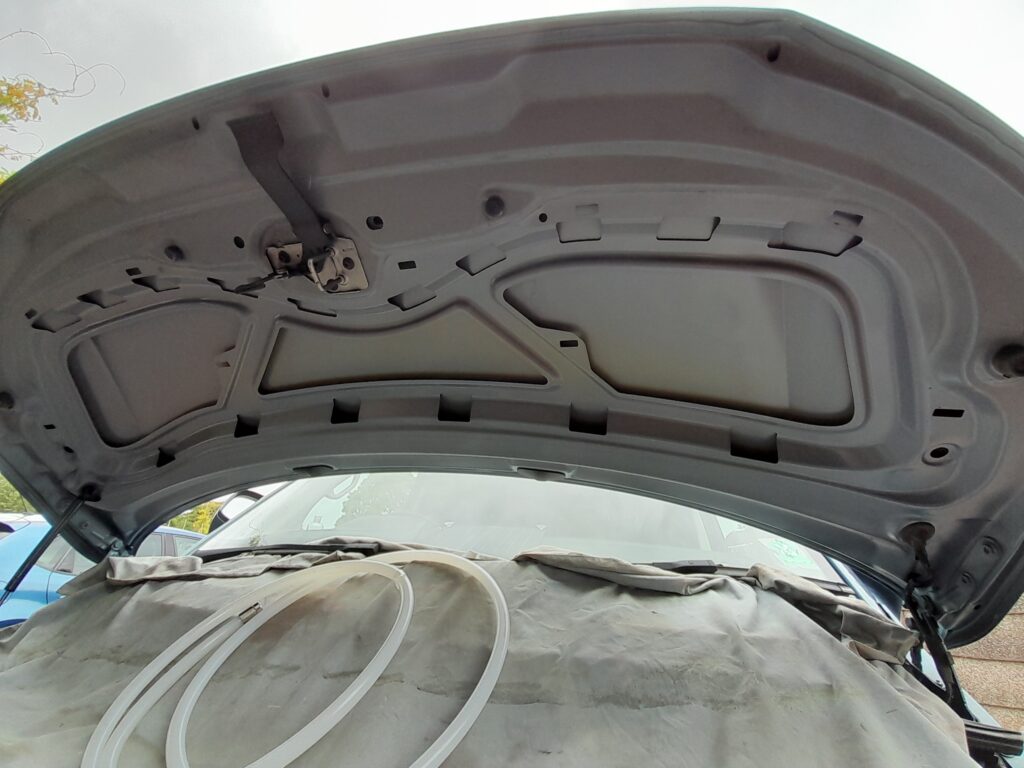
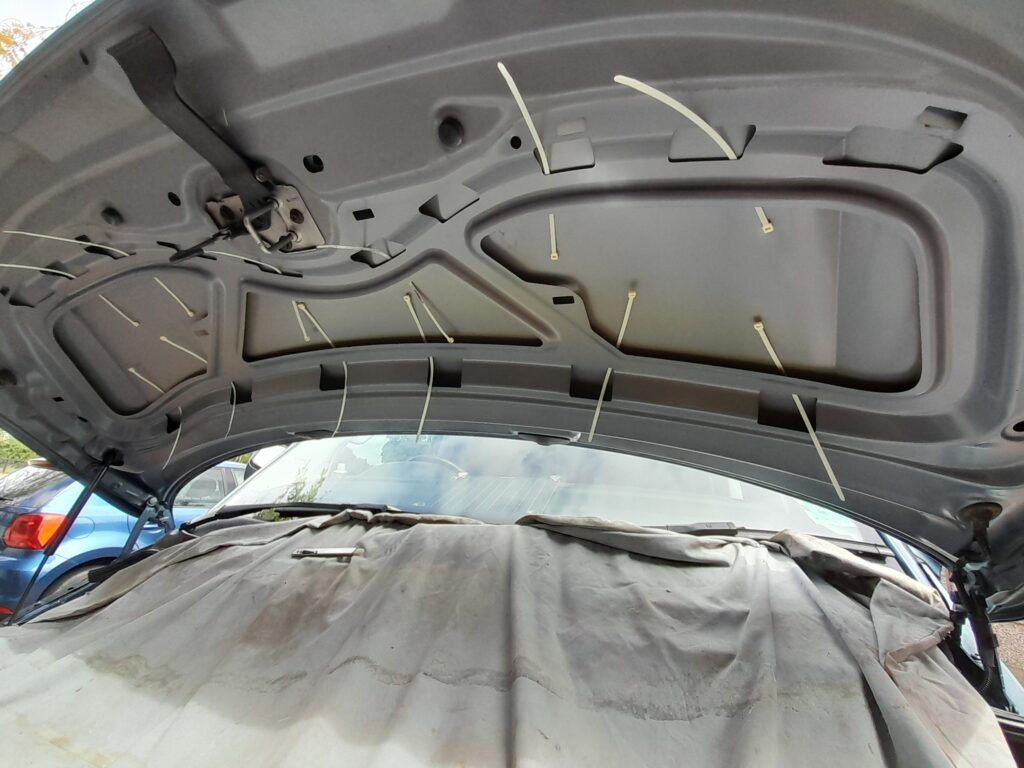
I decided to remove the pad and utilize the bonnet framework to attach the included cable ties to secure the extinguisher to the bonnet.
It is advised to use these cable ties as opposed to wire because part of their job is to melt in the eventuality of an engine fire and allow the extinguisher to drop onto the engine.
Passing the ties behind the framework wasn’t too hard, although I did have to make some small holes through the factory mastic in a few places. Next, I marked and made holes in the bonnet pad to enable it to be put back in place. This was the trickiest part, achieved by temporarily taping the two ends of each cable tie once passed through the pad and when all were in position I could reattach the pad to the bonnet. It was then just a matter of cable tying the extinguisher into position and hope it’s never called into action.