Category Archives: T4

Always trying to stay ahead of the curve, the T4 used all the automotive design enhancements that had occurred in the last 10 years. The very essence of Volkswagen usability.

Ask The Mechanic – Windscreen wiper condition

This issue, The Mechanic takes a look at
an often overlooked but important issue,
windscreen wiper condition.
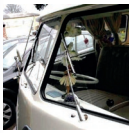

Windscreen wipers are an invaluable part of any vehicle, providing the driver with a clear,
unobstructed view of the road when it is needed most. Whether it is rain, sleet, snow or
leaves covering your windscreen, the wiper blades will quickly and efficiently clear the obstruction,
meaning you can continue your journey in safety.
However, of all the parts of a car which are subject to wear and tear, windscreen wipers are perhaps
the most fragile. Manufactured from thin rubber, they are designed to operate smoothly on the windscreen without damaging the surface of the glass, yet despite their fragility they are often required on a daily basis, possibly for long periods of time during wet weather. In winter they become frozen to the glass and in summer they are used to help to clean the windscreen, while being subjected to high temperatures. It is hardly surprising then, that windscreen wipers do not last indefinitely and require regular replacement. Often the need to replace wipers is overlooked, although regular servicing and MOT testing should identify if they are becoming worn.
However, rather than relying on these tests to assess the condition of the blades, car owners should be aware of the common signs that the windscreen wipers are failing, especially with autumn upon us. So what are they?
Streaking: blades that are in good condition should clear the rainwater from the windscreen effortlessly, in one complete action. This means there should be no streaks of water where the blade has failed to make contact with the glass.

Unusual noises: windscreen wipers should operate with minimal noise or ideally should be silent. Sounds such as squeaks, screeches or scrapes could indicate that the blades have become worn.

Irregular movement: wiper blades which are in good condition will move smoothly across the windscreen. As they become worn over time, you may notice that the blades judder on operation which is an indication that replacement may be necessary.

Ragged or distorted blades: visually inspecting the condition of the windscreen wipers should be a weekly task for all vehicle owners. By lifting the arms of the wipers away from the windscreen, you can quickly assess the condition of the rubber. Ragged, jagged or distorted edges, where the blade makes contact with the glass, should prompt you to replace them immediately.

Worn blades may not only hinder your vision, but can also damage your windscreen, which will in turn not only cost you dearly in a replacement screen, but also hinder your vision even more, making it dangerous to drive with the vehicle in such a condition.

Replacement blades can be picked up very cheaply for all types of van, so there is no excuse not to check yours and change if required, but remember… “Buy Nice or Buy Twice”.

Ask The Mechanic – T4 CLUTCH PEDAL SUPPORT BRACKET

The Mechanic features some technical talk every issue and welcomes member submissions.
This issue, The Mechanic takes a look at a very common problem for the T4 Transporter and how to fix or prevent it from occurring.

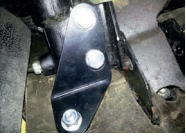
A common problem that T4’s and their owners’ suffer from is the clutch pedal mounting bracket cracking.
This in turn then causes the clutch master cylinder to become loose and move. This may not be a huge problem in the beginning, but it will eventually break away completely, leaving you without a working clutch in your T4 van. As well as the damaged pedal, it can also damage the master cylinder beyond repair and/or crack the pipe work, covering your foot well and footwear in corrosive brake/clutch fluid.

There is a quick and affordable repair/prevention method by fitting an additional angled bracket that strengthens the existing pedal bracket. The kits are readily available online and can be found with a quick
search. The kits contain an angled bracket, three M8 bolts (one longer than the other two), an M8 nyloc nut and four washers (one larger than the other three).


Fitting Guide
1 Start off under the bonnet and locate your brake servo unit. It is the big round unit below the brake master cylinder and brake fluid reservoir.
2 Remove the M8 bolt (13mm head) from the lower right side of your brake servo and replace it with the longest of the three M8 bolts supplied in the kit, along with the largest M8 washer.
3 Now move inside the car and into the driver’s foot well. Locate your clutch master cylinder, located between the clutch and brake pedals and remove the two M8 mounting bolts (13mm heads).
4 Place the new clutch pedal support bracket into position, ensuring that it goes over the protruding bulkhead bolt you first fitted. Now loosely fit the bracket to the clutch master cylinder using the two remaining M8 bolts and small M8 washers supplied in the kit with your support bracket.
5 Now fit the other small M8 washer and M8 nyloc nut to the longer bulkhead bolt you fitted earlier and tighten.
6 Now tighten the two clutch master cylinder bolts you fitted loosely earlier.
7 Job complete. Enjoy a strong clutch pedal and relax knowing that this failure has been repaired or prevented.

Club Event – RAF Odiham Family Day 2021

Can it be a year already?

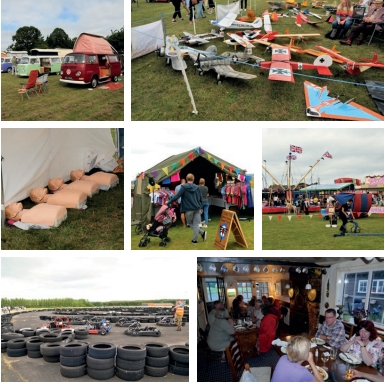
August 14th 2021 saw the return of RAF Odiham’s Family Day. The club had several vans in attendance as part of the show’s classic car event and members camped for the weekend at a nearby pub. The day involved displays from resident Chinooks, Typhoons and also the Red Arrows, who put on an excellent 40 minute display. This event is getting better and better each year and we are privileged as a club to be invited to attend.
Photo credit to David Eaton.

Another one in the bag! Club camp completed – Odiham

The Club on tour – Just Kampers, Odiham, Hampshire

June 10 to 12 2022

6 members were in the dedicated club field with more coming over to say Hello. 15 new members joined on the day, lots of money raised for charity for the Phyllis Tuckwell hospice. Live music from multiple bands, open air cinema on Friday (Breakdance) and Saturday (Karate kid), a big raffle with prizes worth up to £700 each.

Another great weekend at JK.

Another one in the bag! Club camp completed – Banbury

The Club on tour – Barnstones Caravan and Camping Park, Banbury, Oxon

May 12th to 16th 2022 saw the Club’s annual AGM, BBQ and Club Camp (ABC camp) in Great Bourton. Convenient for the M40 allowing many people to join us, we had nearly 30 vehicles after some late dropouts due to mechanical trouble. Over 60 people spent the weekend together with a lot of laughter, plenty of burgers and maybe the odd glass of something.

In addition to the AGM and BBQ, we also had the FA cup final televised in one gazebo, Eurovision later in the evening and some singing from our resident jazz singer Lorna.

On the plus side, 5 people joined the Committee. On the minus side, Derek Leary stepped down from the Committee after several decades shaping the Club into what it is today. We’ll miss you Derek (and Christie).

Upcoming event – Just Kampers Weekend! – 10th to 12th June 2022

The hugely popular JK Weekender is back! Having been cancelled due to COVID, last year’s tickets are still valid in a rollover way to this year.

Set in a field next to the JK headquarters just outside Odiham in Hampshire, Mark and the team give us a chilled out, music, outdoor evening movies, stalls, displays and of course their shop.

Our club enjoys a dedicated club field for members only which includes a disabled toilet. We get plenty of space in a prime position and the club lays on a club tent for congregating is you feel sociable plus we are doing our famous BBQ on Saturday evening – come and get a free burger and have a natter!

If you are lucky, our very own Events Manager Lorna will be singing again! Check out the Events page on this site or see the latest edition of Transporter Talk

See the source image


See the source image

Another one in the bag! Club camp completed – Cheddar

The Club on tour – Petruth Paddocks, Cheddar, Somerset
April 22 to 25 2022

The first club camp of the season saw us down in the pretty down of Cheddar at Petruth Paddocks, hosted by the wonderful Jules.

What did you miss? Burgers, fire pit, marshmallows, bacon baps. Cheddar village, Cheddar gorge, the caves. Locally made cheese, 16 club member dogs, 33 adults, 2 children, live singer on Friday and Saturday and a lot of laughter.

Here is some feedback from a member:

“We have been VWT2OC members for a few years but had not previously got involved in meetings or attending camps. What have we been missing? The St George’s camp at Cheddar over the weekend was a fantastic event. The campsite was beautiful, clean and friendly; the club negotiated camping rates that could not be beaten; the Saturday evening social around the firepits, with burgers provided and lovely entertainment from Lorna was fantastic; and the coffee, tea and bacon rolls provided on Sunday morning was very welcome. I had nothing to do than enjoy myself. Big shout out to Lorna Williamson, Nick Gillott, Malcolm Marchbank and Val Lewis for all the hard work planning, organising and delivering the camp. You are stars. We were already booked in for the May BBQ & AGM, now we are looking forward to it more than ever.”

Here are some photos from the weekend:

Ask The Mechanic – Checking spark plugs

An article from Chairman Malcolm Marchbank

Spring has sprung and those classics will be
starting to come out of hibernation. After months
in the garage with the occasional start up to
keep it ticking over, your engine can suffer. I have
personally experienced this after months of an
engine sitting during restoration work and being
moved from one side of a workshop to another.
Once the work was complete, trying to drive
away from the workshop, my T2 Bay Campervan
wouldn’t accelerate down the road. Reason –
fouled spark plugs.

I have also had a spark plug with a closed gap
(don’t even ask how that happened, but it
involved losing part of the carburettor through
the engine… lucky it didn’t do any other damage!)
The condition of your spark plugs can make a
massive difference to the running of your engine,
so it’s worth checking them every so often,
especially after a period of time unused.
Hopefully the following information will help to
make you a spark plug expert.
Before starting work on checking your plugs, it is
helpful to have the right tools to hand; accessing
the rear two spark plugs at cylinders 1 and 3
can be a real fiddle, especially on later twin-port
engines where access is further compromised
by the inlet manifolds. A short 21mm socket and
universal joint may give you a bit more flexibility.
When checking the plugs, it can help to remove
each lead and plug individually so that you don’t
get them mixed up. This will cause an incorrect
firing order and your engine will not run.
When removing the ignition lead from the plug,
be sure to pull it off by the connector, not the lead
itself, as you’ll run the risk of pulling the lead off
the connector (trust me!)
If you notice any damage to a connector or if a
lead is a lose fit, it is best to go out and buy a new
HT lead set.
Make sure you have the socket on the plug
properly when you’re undoing them and it’s also
best to do all this while the engine is cold to avoid
burning yourself!
Once the plug is out, take a good look. Is it brown,
grey, sooty or oily? If the engine is running right,
it should be light brown or grey. If it is sooty but
dry, your engine is running rich and not burning
all the fuel. If the insulator is white and flaky then
your engine is running too lean. Either way, you’ll
need to tune your carb to adjust the fuel/air
mixture.
If the plug is wet and oily, there are a couple of
possibilities. The first is that you’re not getting
a spark, in which case you may have noticed
a misfire. If this is the case, check the HT lead
connection at the plug and also where it pushes
into the top of the distributor cap.
A worse scenario is that your engine has worn
piston rings and/or valve guides, which means a
rebuild is on the cards. If there is serious carbon
build up on the plug, or what looks like molten
bits of metal, chances are your ignition timing is
out.
Whatever their condition, while the plugs are out
of the engine they will benefit from a good clean
up using a brass wire brush. While you are at it,
check the spark plug gaps using a feeler gauge.
For most air cooled engines the gap should be
0.024” or 0.6mm, however check your workshop
manual because the gap will be different on
some engines. If the gap is correct, the gauge
should slip in and out without much resistance.
If it is too loose, you can adjust it with a gentle
squeeze in a vice to close it slightly, or if the gap is
too tight, carefully prise open the contact with a
flat bladed screwdriver.
Spark plugs should be checked every 3000 miles
and replaced every 10,000 miles as part of your
service routine. If you suspect a poor running
engine there is no harm fitting new ones sooner,
they are relatively cheap for a set.
When refitting, always start screwing the plug
back in by hand, only using the socket for the
final tightening, otherwise you risk forcing a cross
thread. If you feel any resistance early on, unscrew
and carefully try again

Ask The Mechanic – 171 – E10 fuels

The mechanic has noticed a recent uplift in questions and concerns surrounding the upcoming introduction of E10 fuels. The following is information provided by the Federation of British Historic Vehicles Clubs that we hope members will find useful. Federation of British Historic Vehicles
Clubs – Introduction of E10 petrol After an extensive consultation process, the Department for Transport has announced that they will legislate to introduce E10 petrol as the standard 95-octane petrol grade by 1 September 2021. They will also require the higher-octane 97+ ‘Super’ grades to remain E5 to provide protection for owners of older vehicles. This product will be designated as the ‘Protection’ grade.
The introduction of the 95-octane E10 grade and the maintenance of the Super E5 protection grade will be reviewed by the Government after 5 years to ensure they remain appropriate to the needs of the market:
In relation to the E5 protection grade, such a review will examine market developments over the period.
HM Government have sought to reassure FBHVC members and historic vehicle owners that, without
a suitable alternative becoming available, it is highly likely the Super E5 protection grade would continue
to be available. Filling stations that stock 2 grades of petrol and supply at least one million litres of fuel in total each year will need to ensure one product is the Super E5 protection grade. While not all filling stations meet these criteria, almost all towns across the UK will have a filling station that supplies the ‘Super’ grade and currently one major retailer, a national supermarket group, has committed to offer the product. The main exception to this is in certain parts of the Highlands, north and west coast of Scotland, which will be covered by an exemption process and allowed to continue to market the 95-octane E5 grade. The Federation therefore recommends that all vehicles produced before 2000 and some vehicles from the early 2000s that are considered non-compatible with E10 – should use the Super E5 Protection grade where the Ethanol content is limited to a maximum of 5%. To check compatibility of vehicles produced since 2000, we recommend using the new online E10 compatibility checker: https://
www.gov.uk/check-vehicle-e10-petrol . It should be noted that some Super E5 Protection grade products do not contain Ethanol as the E5 designation is for fuels containing up to 5% Ethanol. Similarly E10 petrol can contain between 5.5% and 10% ethanol by volume.

Product availability varies by manufacturer and geographical location and enthusiasts should check the situation in their location.


Latest News:
The federation’s fuels specialist Nigel Elliott has received some new questions with regards to
ethanol and the use of E10 in historic vehicles and his thoughts are as follows:
There are three key areas of concern with Ethanol compatibility with historic and classic vehicle fuel
systems:
‹ Corrosion of metal components
‹ Elastomer compatibility – swelling, shrinking and
cracking of elastomers (seals and flexible pipes)
and other unsuitable gasket materials
‹ Air/fuel ratio enleanment
Corrosion of metal component
Ethanol has increased acidity, conductivity and inorganic chloride content when compared to
conventional petrol which can cause corrosion and tarnishing of metal components under certain
conditions. These characteristics are controlled in the ethanol used to blend E5 and E10 European and UK petrol by the ethanol fuel specification BS EN15376 in order to help limit corrosion. Corrosion inhibitor additives can be very effective in controlling ethanol derived corrosion and are recommended to be added to ethanol in the BS EN15376 standard. It is not clear if corrosion inhibitors are universally added to ethanol for E5 and E10 blending so as an additional precaution it is recommended that aftermarket corrosion inhibitor additives are added to E5 and E10 petrol. These aftermarket ethanol corrosion inhibitor
additives often called ethanol compatibility additives are usually combined with a metallic valve recession additive (VSR) and sometimes an octane booster and have been found to provide good protection against metal corrosion in historic and classic vehicle fuel systems.
Elastomer compatibility
As the ethanol molecule is smaller and more polar than conventional petrol components, there is a lower energy barrier for ethanol to diffuse into elastomer materials. When exposed to petrol/ethanol blends these materials will swell and soften, resulting in a weakening of the elastomer structure. On drying out they can shrink and crack resulting in fuel leaks. Some aftermarket ethanol compatibility additives
claim complete protection for operating historic and classic vehicles on E10 petrol. The FBHVC is not aware of, or has tested any additives that claim complete fuel system protection with respect to elastomer and gasket materials for use with E10 petrol. The FBHVC therefore recommends that elastomer and gasket materials are replaced with ethanol compatible materials before operation on E10 petrol.
Air/fuel ratio enleanment
Ethanol contains approximately 35% oxygen by weight and will therefore result in fuel mixture enleanment when blended into petrol. Petrol containing 10% ethanol for example, would result in a mixture-leaning effect equivalent to approximately 2.6%, which may be felt as a power loss, driveability issues (hesitations, flat spots, stalling), but also could contribute to slightly hotter running. Adjusting mixture strength (enrichment) to counter this problem is advised to maintain performance, driveability and protect the engine from overheating and knock at high loads.
Modern 3-way catalyst equipped vehicles do not require mixture adjustment to operate on E10 petrol
because they are equipped with oxygen (lambda) sensors that detect lean operation and the engine
management system automatically corrects the fuel mixture for optimum catalyst and vehicle operation.
Operating classic and historic
vehicles on E10 petrol If you should decide to make the necessary vehicle fuel system modifications together with the addition of an aftermarket additive to operate your classic or historic vehicle on E10 petrol. The FBHVC strongly recommends that you regularly check the condition of the vehicle fuel system for elastomer and gasket material deterioration and metallic components such as fuel tanks, fuel lines and carburettors for corrosion. Some plastic components such as carburettor floats and fuel filter housings may be become discoloured over time. Plastic carburettor float buoyancy can also be affected by ethanol and carburettors should be checked to ensure that float levels are not adversely affected causing flooding and fuel leaks.
Ethanol is a good solvent and can remove historic fuel system deposits from fuel tanks and lines and
it is advisable to check fuel filters regularly after the switch to E10 petrol as they may become blocked
or restricted. If your vehicle is to be laid up for an extended period of time, it is recommended that the
E10 petrol be replaced with ethanol free petrol which is available from some fuel suppliers. Do not leave
fuel systems dry, as this can result corrosion and the shrinking and cracking of elastomers and gaskets as
they dry out.

Spares by Ian Crawford

Many people will be away and wish they had something with them – here is a list from club member Ian Crawford on spares he packs in his 1971 Bay window that he bought at 1 year old in 1972. I am not sure about corks – leftover wine is not something I really understand!

Parts
• Accelerator Cable
• Aluminium Tube (To Fit Inside Fuel Hose If Leaking)
• Battery Earth Strap
• Brake and Clutch Fluid
• Brake Pedal Return Spring
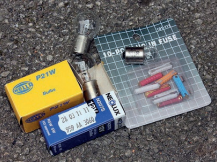
• Spare Bulbs
• Cable Ties (Various Lengths)
• Carburettor Return Spring
• Clutch Cable
• Coil
• Condenser For Distributor (Make Sure You Have The Correct “Bung”!)
• CV Axle Boot Cap and Grease
• Distilled Water
• Distributor Cap and Rotor Arm x2
• Distributor Contact Points
• Dynamo Brushes
• Engine Oil (5 litres)
• Fan Belt x2
• Fuel Hose and Clips
• Various Fuses
• Handbrake Cable
• Rocker Cover Gaskets x2
• Spark Plug Set
• Starting Relay and Fuse
• Tyre Valve Cores
• Voltage Regulator
• Walking Boot Laces

Tools
• Allen Keys
• Battery Diagnostic Tester
• Feeler Gauges
• Hacksaw Blades
• Insulation Tape
• Magnetic Dish Holder
• Magnifying Glass (My Eyes Are Dimming!)
• Multi Meter and Spare Battery
• Plastic Wire Cutters
• Pill Pot Containing Matches, Lighter, Flints, Water Purification Tablets, Sweeteners, Sewing Kit, Safety Pins and Buttons.
• Shorting Links
• Stanley Knife
• Tyre Pressure Gauge
• Vaseline
• Wine Corks
• Other Various Tools
Ian has provided a pretty extensive list here, very cautious!
We would also recommend a timing gun if space allows, a foot pump, warning triangle, decent jack, various sockets and spanners and maybe even a fuel pump! (We even carried a spare carburettor once!)
Thanks to Ian for his submission, hopefully this will help members when putting a kit together.