Category Archives: Technical

Items of a technical nature relating to mechanical, electrical or bodywork issues

Focus on Discounts – The VW Engine Company – Part 2

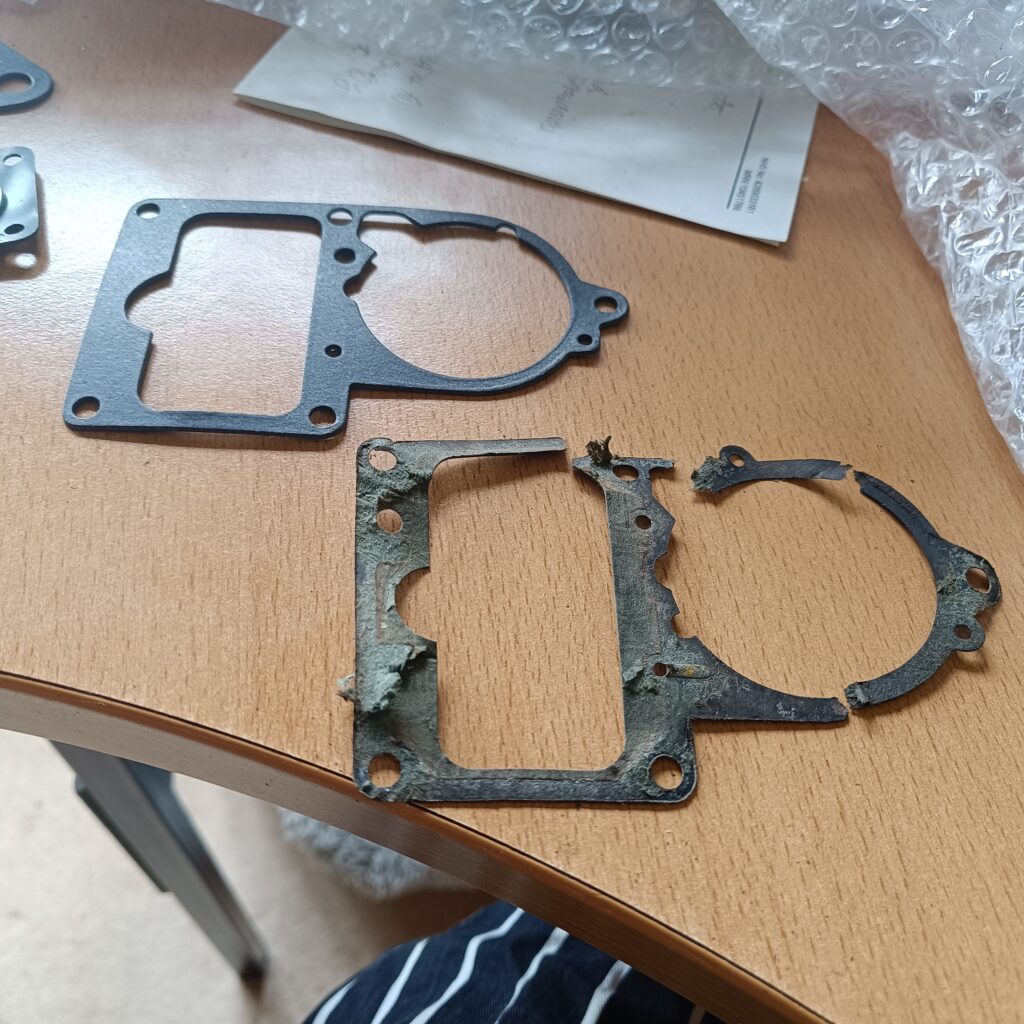
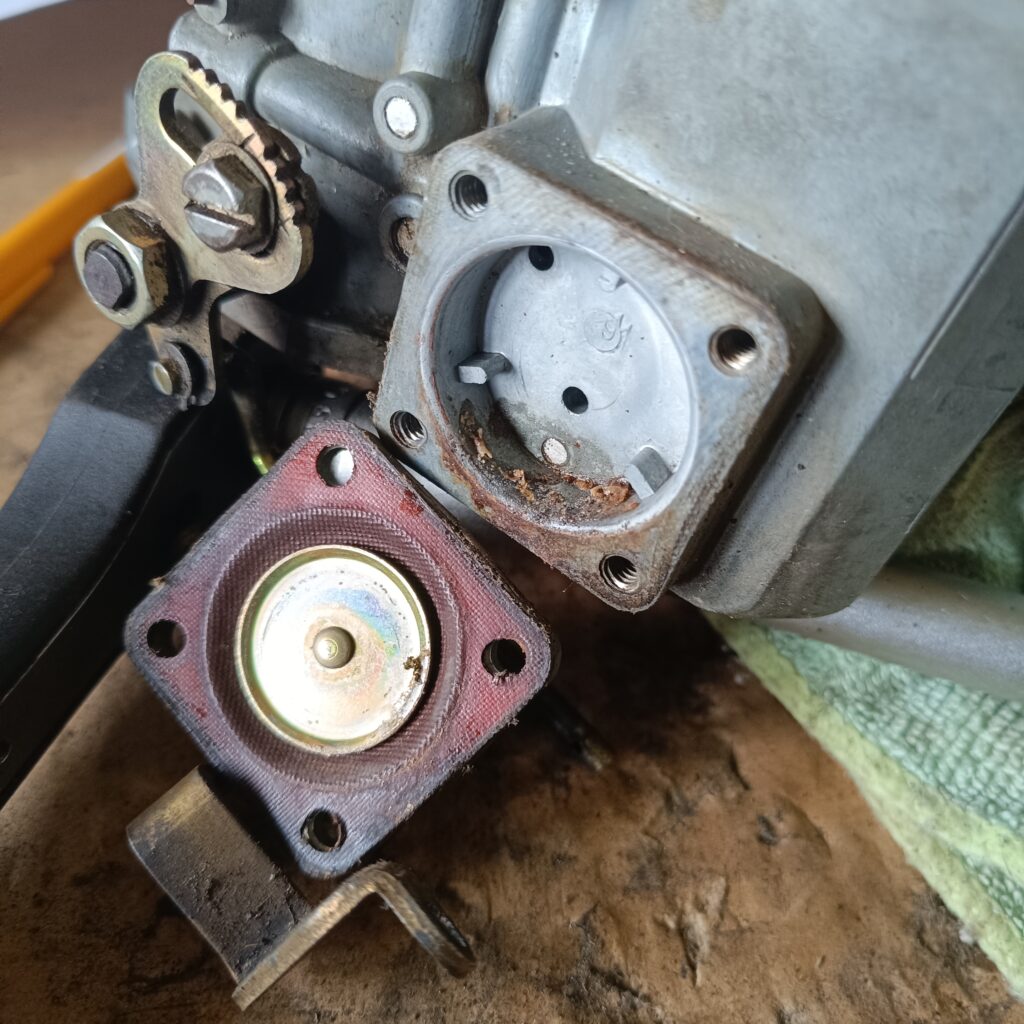
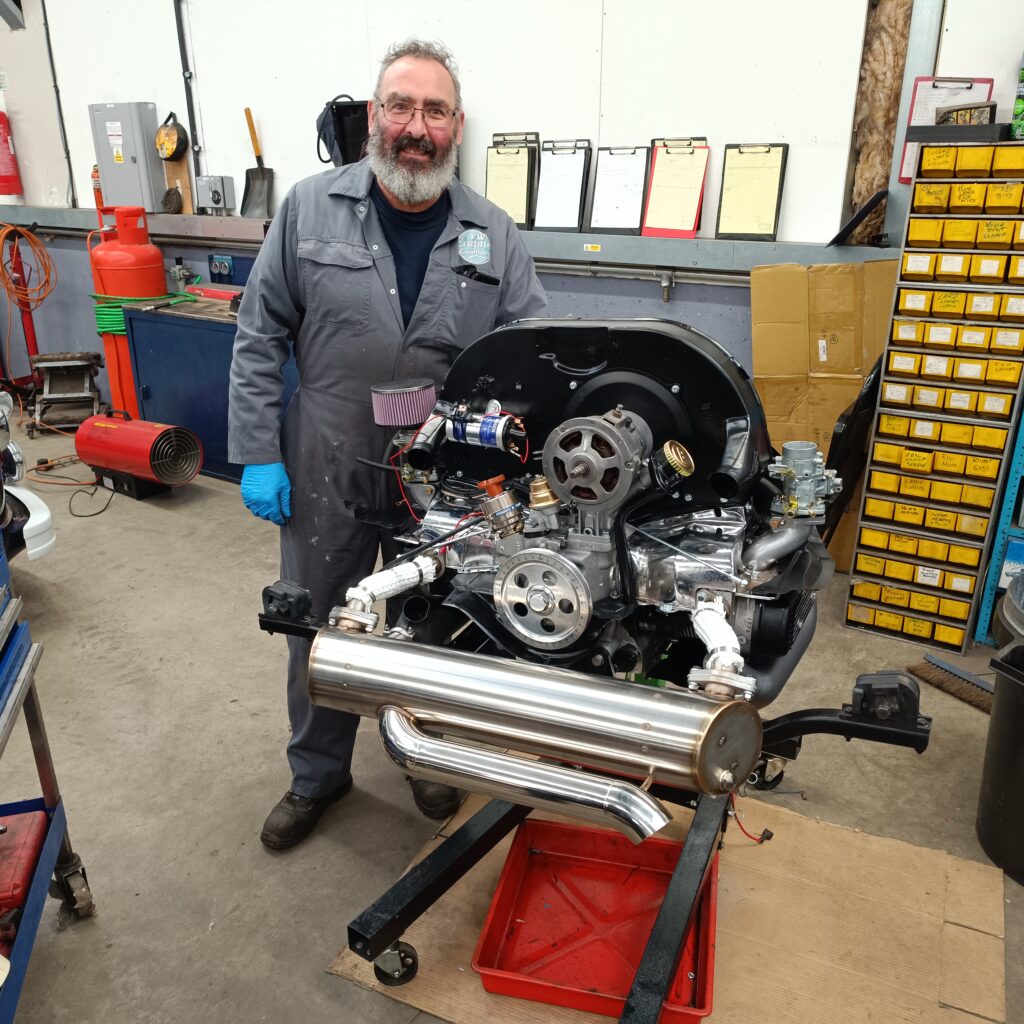
The team are offering additional services this year of engine servicing as well as rebuilding. Again, their experience means that those niggly issues with your engine can be addressed by people who live and breathe these machines. This is for Beetle engines, Splitscreens, Bay windows and T25s but petrol engines only. Everything from a 1300cc up to some huge 2.3 litre beasts if that is what you want.

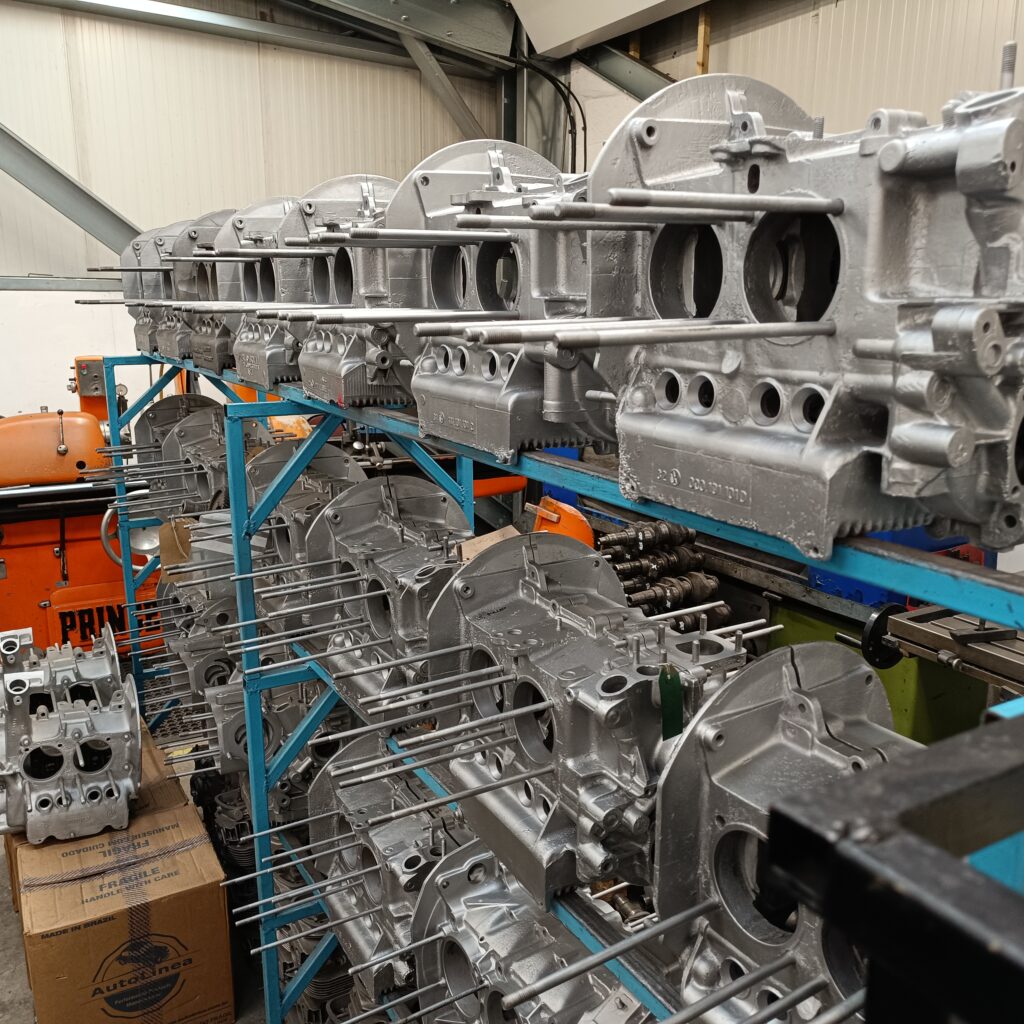
Next over is the storage racks of cleaned, painted and tested crankcases, with around 20 on the rack ready to build up. This is also where they check the crankshafts, machining them if required and repair the edges of the cases if they have damage where they need to be bolted to other components.
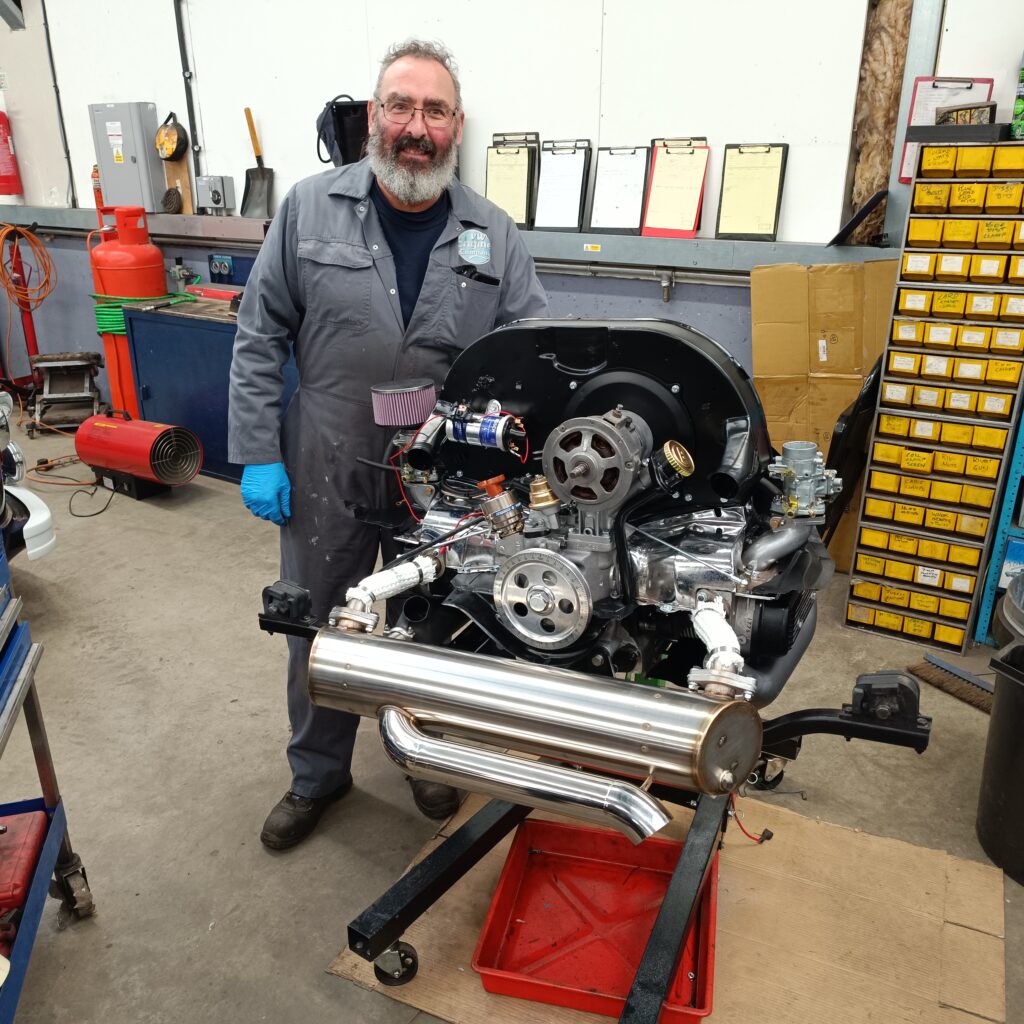
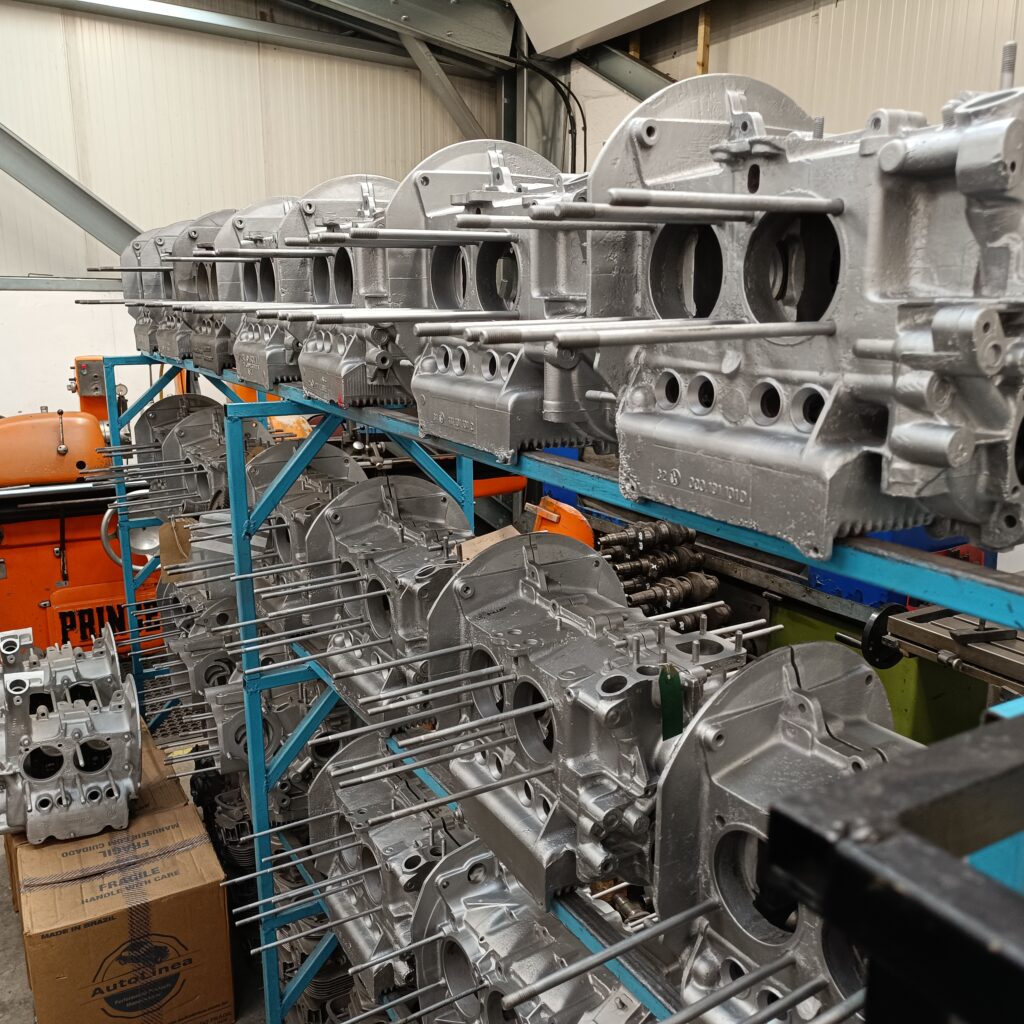
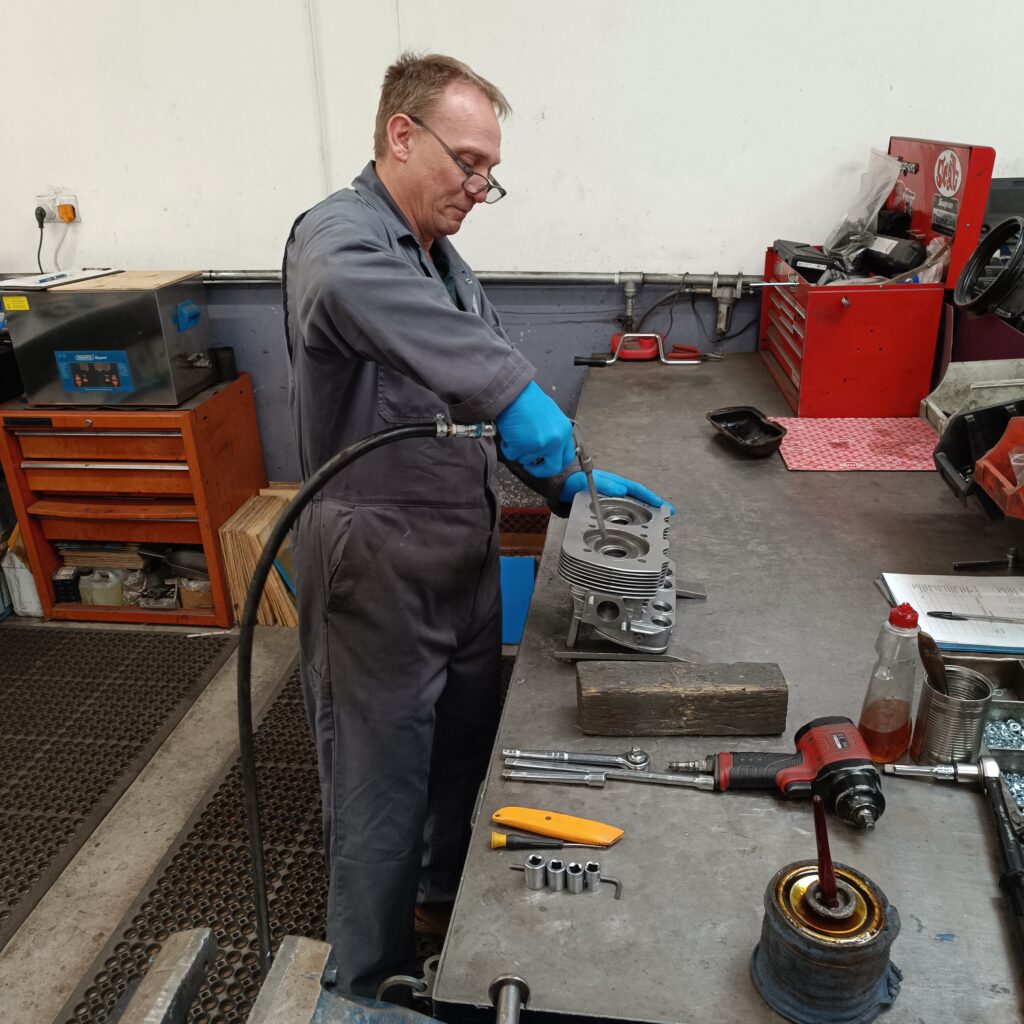
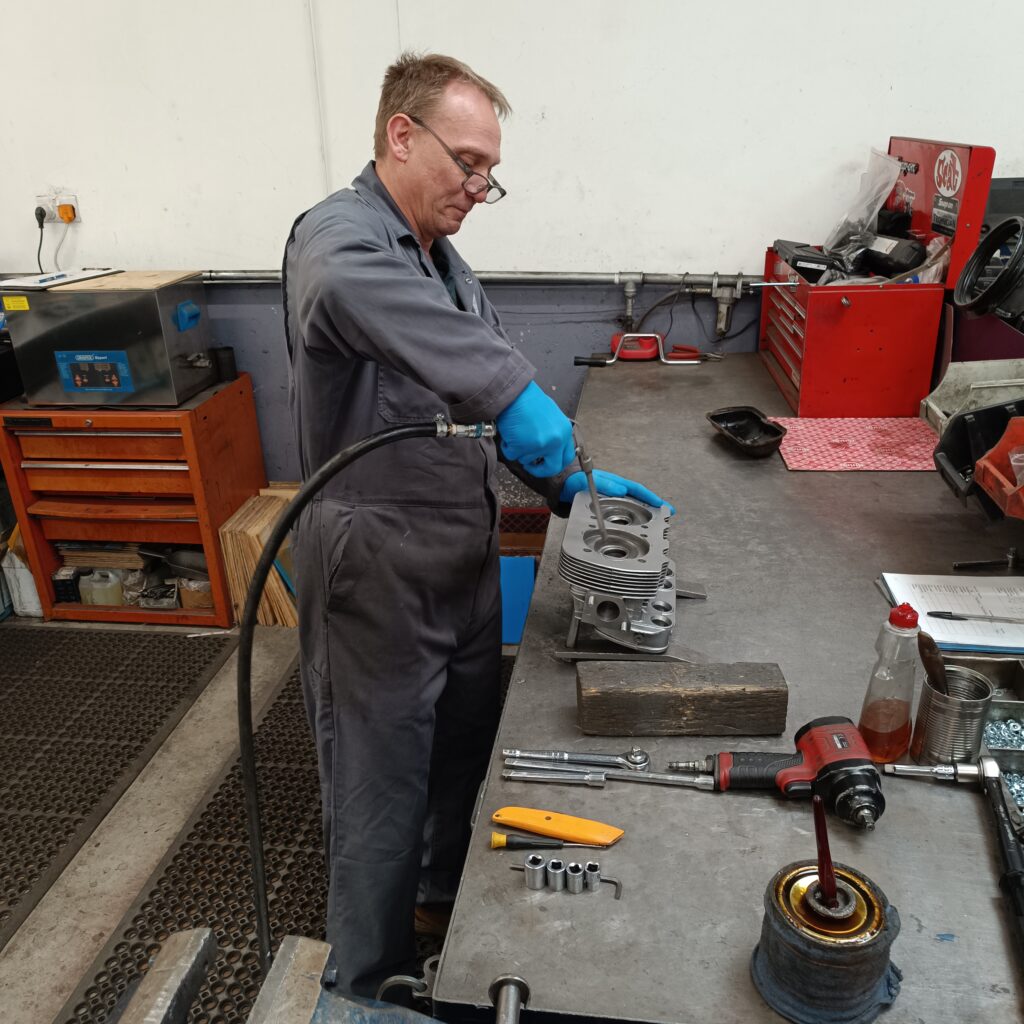
Once the case has been chosen, machined if required for larger heads and is ready, it goes to the engine build room. Sam who was doing customer engine work is normally in here building engines but today instead it was Michael, preparing engine heads and putting the final touches to another customer engine and cold testing yet another. The testing also allows them to measure oil pressure and record cylinder compression levels in their high-tech A4 diary. You don’t need technology for everything, and it is much easier than having to start up a computer each time! To test the paper trail, we looked at Poppy’s engine, noted the engine number and looked it up in the book. The engine was built on Friday 27th October 2023 by Sam, and we can see the test results.

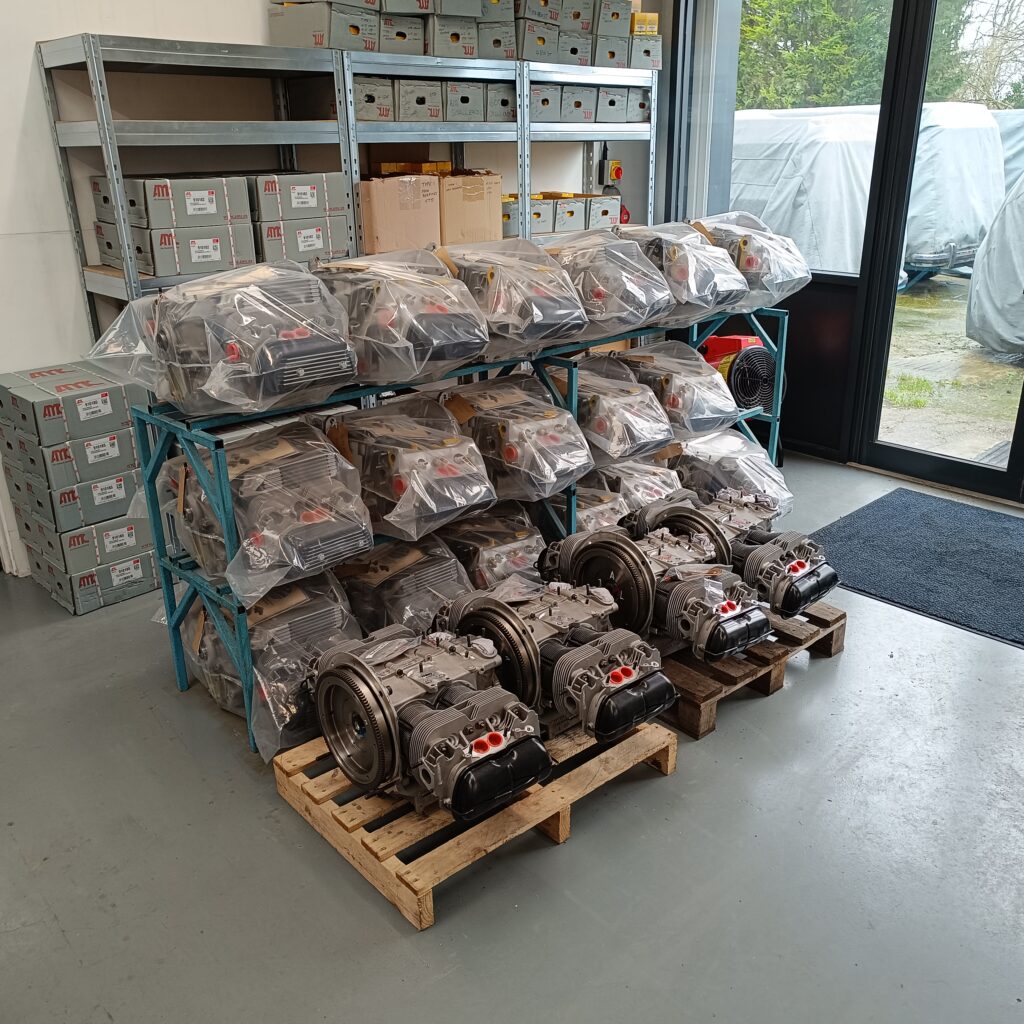
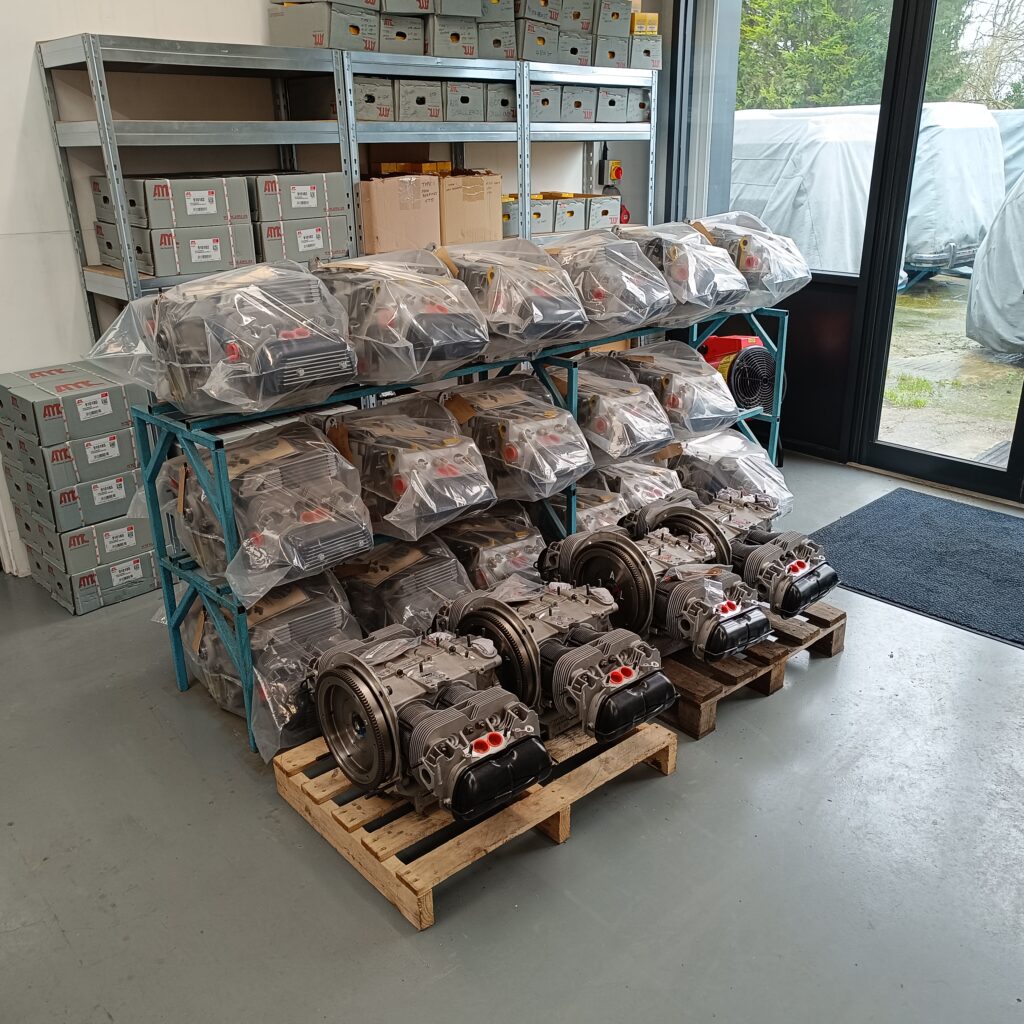
Back out to main reception, James then showed me the warehouse storeroom where there are over 150 engines all finished as long blocks, sitting on pallets, and bolted inside metal frames to keep them protected. These were ready for shipping and the number was very high during my visit as the season was about to start and they simply cannot keep up with spring demand otherwise!

With these pallets, you can order the long block and have it delivered to your house or your local mechanic. The engine can then be removed from your vehicle and stripped of the tinware, fan, alternator, fuel pump, distributor, oil cooler and so on. The new engines are supplied with a new oil cooler though. Then rebuild those parts onto the new arrival and fit back into the vehicle. Then the old block complete with rocker covers at each end can be bolted into the metal frame on the pallet and the VW engine company will arrange for the pallet to be shipped back to their HQ for rework. And so the process begins again. I was surprised to find that shipping the engine to you and the old one back to them comes to a total for both journeys of just £168! Given that they are inside the ULEZ zone at £12.50 for older vehicles and I used the Dartford crossing both ways, I spent a good chunk of that heading over there myself!

On the turnkey side, if you rock up with your vehicle, they can also offer extra bits – refinishing your tinware to get it looking good, a new 123 distributor, upgrade to electronic ignition if you want to retain the distributor, add an electronic fuel pump. Almost anything can be done there.

As you can tell, this is an impressive operation filled with passionate experts, helping to keep our vehicles running properly. This is not a budget operation, and the word-of-mouth recommendations are extremely strong.

As a reminder, example prices to our club are:

A 1641cc long block engine with a reconditioned crank case = £2,200+vat

A 1641cc long block engine with a new crank case = £2,700+vat

A 1776cc long block engine with a new crank case, big valve heads, mild road camshaft = £3,400+vat

These prices are based on an exchange process with your old engine. During this interim period a surcharge deposit is held of £400+vat. Once your old engine is returned this deposit can be refunded. In the event of your old engine not being “serviceable” they will contact you to explain, send pictures if necessary and a proportionate value of deposit may need to be retained which is understandable.

Knowing what I know now about their operation, I’d have had Eric the Viking’s engine done here. Poppy’s engine was swapped by our local, tame mechanic but in fact, driving Poppy over to Biggin Hill, the team could have done it all for me.

James and I loaded Poppy’s shiny, new 1776cc engine into the boot of my car and I headed off to Aylesbury to see Poppy and deliver it to our mechanic ready for reinstallation. All engines come with a 12-month unlimited mileage warranty. Not that I expect to need that – these are built with the best quality parts, sourced from America, Brazil, Denmark amongst others to give longevity of your new engine to ensure that you get as much time with it as possible.

Instead of getting your local mechanic working on your engine that has not run correctly for many years, consider taking it to James and the team. Or take the vehicle and have them change the engine. Or they can just supply the main part of the engine for someone else to do the fun bits. Whatever you choose to do, don’t forget to mention your membership of the club to get the discount that varies depending on which engine you need.

Example prices for a turnkey solution where you take your vehicle over (club prices, not available to the public) are:

Turnkey Service £595+vat (transfer all of your engine’s bits from the old to the new engine)

Basic service parts (oil, fan belt, fuel filter, ancillary nuts and bolts etc) £70+vat

Engine removal and refitting £495+vat

Plus any potential ancillary replacements that may be required or that you may wish to be replaced at the same time.

Lead times depend on the time of year but would be typically 3 to 8 weeks’ notice, and your vehicle would need to be with them for about 2 weeks.

My thanks to James, Patricia and the team at the VW Engine Company for showing me around and helping me to understand in depth about the operation and what they can offer us.

Inspect a Gadget – Solar Panels

You have surely heard of them and most likely seen them but do you know about them?

Solar panels capture energy from light (not necessarily sunny days, bright will work), using a photovoltaic cell that generates electrons when it is exposed to light. These flow through the circuit and create electricity. With the right number of cells, these panels can act almost like a battery to provide electricity – however they obviously do not generate without light and the current varies depending on the weather.

For those of us in sunny countries, who like to go away in our vehicles and who use 12-volt electrical items, solar charging is now possible. In fact, it is quite easy with a small amount of reading and hopefully this article will help.

The theory

  • You have a battery that I’m going to call the leisure battery, but you can call it a second battery or camping battery. It powers your various camping related items but is not designed to run large appliances like heaters or disco units!
  • You want to charge that up for free from the sun so that you are not tethered to an electrical socket on each camp site.

The calculation

  • List all equipment that you have in your vehicle that needs powering from 12 volts
  • Check on the equipment or in the manual (which is probably online too and you can magnify the text easier!) for the wattage or the amperage. Make a note of each one in a list.
  • Think about how often you use each item in each day and be realistic.
  • Think about when you camp.

 Now, convert the amps to watts by multiplying by 12 if you only noted the amps.

Otherwise list each item like this:

  • Fridge uses 60 watts and will be in use for 12 hours per day on average when in the UK. That makes 720 watt hours per day.
  • Lights are 2 watts each and I use 4 of them making 8 watts. In use for 2 hours each. Total is 16 watt hours.
  • I use 2 USB sockets that are 7.2 volts and 2 amp which is a maximum of 14.4 watts. Total of 3 hours per day. That is 44 watt hours.

Then add up all those little watt hours to get a total for the day. In this example I get 780 watt hours. It doesn’t really matter what that means, just get the number!

In the UK I think we can get 6 hours of sunshine per day in the summer and 4 hours in spring and autumn (fall). Your country may be different and your feeling might be different.

You then take the total watt hours, in this case 780 watt hours and divide that by the number of hours of sunshine (aka charging) to get the number of watts of input charge you need to counteract the discharge. 780 watt hours divided by 6 hours is 120 watts.

Therefore to replace the lost charge I need a solar panel that has an output of 120 watts. If you need more than 100 watts, consider more than one panel.

The solar panel itself

They come in 3 main flavours, choose the type you prefer!

  • Briefcase – these pack away and get stored unused when travelling. They can plug into the cigarette lighter that connects to the correct battery.
  • Solid frame free standing panel – these can either be inclined towards the sun and stood on the grass when you are pitched or could be mounted on the roof of your vehicle. They tend to be the least expensive.
  • Flexible and semi-flexible – these tend to be the most expensive and will be the focus of the rest of this article. They can be permanently attached to your vehicle.

Attachment

We purchased a 100 watt solar panel that is “semi flexible” meaning it is about 2mm thick and bends a little but bending too much will break it. We have used both Biard and Renogy panels but other manufacturers are available. The price is around the £100 mark for the supply only of just a flexible 100 watt panel and around £180 for a flexible 200 watt. We would recommend buying a branded panel and ensure that the physical size matches the quoted watts – 1 square metre of solar panel will generate just over 100 watts. If the panel is tiny, walk away!

We then purchased a used roof rack and connected it at the back of our bay window to the roof gutters with a little modification as roof racks are generally lower and narrower than a Bay window needs! It did cost £4 though!

As an expedient, we laid the panel on the grass upside down, laid the roof rack on the panel also upside down and gaffer taped the two together. It was a plan for a couple of months before glueing the panel to the Dormobile roof and 5 years later it was still gaffer taped but is now bolted to the same roof rack.

There are two cables coming out of the solar panel and remember they are live except in the dark so tape them up / ensure the ends are not able to create a short circuit.

The clever box in the middle

You cannot just wire the solar panel to the leisure battery – bad things will happen. You need a box in the middle that will stop the leisure battery sending its charge out through the solar panel into the night. It stops the solar panel over charging the leisure battery so far that it explodes. You need to avoid that. This clever box is called a regulator or solar controller and comes in 2 main types – PWM (pulse width modulated) and MPPT (maximum power point tracking). The PWM is less efficient at getting power out of the panel into your battery but is generally a lot cheaper. MPPT would be recommended if you camp outside summer as it is more efficient in less than full sunny days or if you have more than one panel. Do not buy an MPPT controller under about £30 as they tend to think they are MPPT controllers but are just expensive PWM controllers.

The clever box for us was a cheap PWM controller that was about £10 / $15 and has just 3 lights. Charging, discharging and battery health (green is good, flashing is full, red is bad). This has since been replaced with a Renogy MPPT controller at £120.

Wiring it

We dropped the solar panel cables down the air vent at the back so that there are no new holes on the van and therefore no chances of a water leak! Then got the wires up next to the spare wheel inside the vehicle as the controller is easier to see and that engine bay can get quite warm.

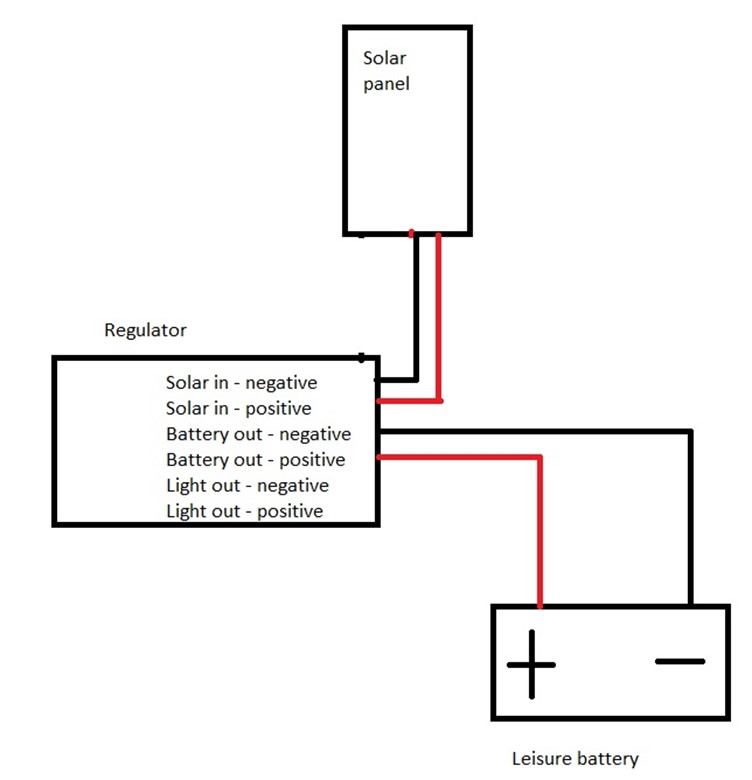
The leisure battery has two new wires, leisure battery positive to the hole on the regulator for battery positive. And then battery negative to regulator battery negative.

Then the solar controller should give you a light on the box.

Next I connected the solar cables – positive first as it is always live in daylight – to the solar controller / regulator. Now my controller had a light saying it was charging.

Then I checked the voltage coming from the controller to the leisure battery – I was getting over 13 volts! It works! I used a dedicated wire directly to the battery rather than using the chassis.

Next step

Take the “Light out” positive and negative terminals and use those to power your leisure items – DO NOT run anything directly from the leisure battery, then the controller can shut off power if the battery gets low. Erm, that’s it!

Now I have a solar panel permanently on the roof, always charging from dawn until dusk even on the move. The regulator means that even with the engine running and the split charge working, we do not over charge the leisure battery and it works even under the car port in the winter keeping that battery going until spring time.

Total cost of solar system for 100 watts non-flexible panel and PWM controller is now under £100. A 200 watt flexible panel and MPPT controller is about £300 at time of going to press. Cost of replacing the leisure battery every year £120. Saving on electricity per night at a camp site is up to £10 per night. This system seriously pays for itself in no time.

Inspect A Gadget – Engine Fire Fighter by Mark Broad-Holcombe

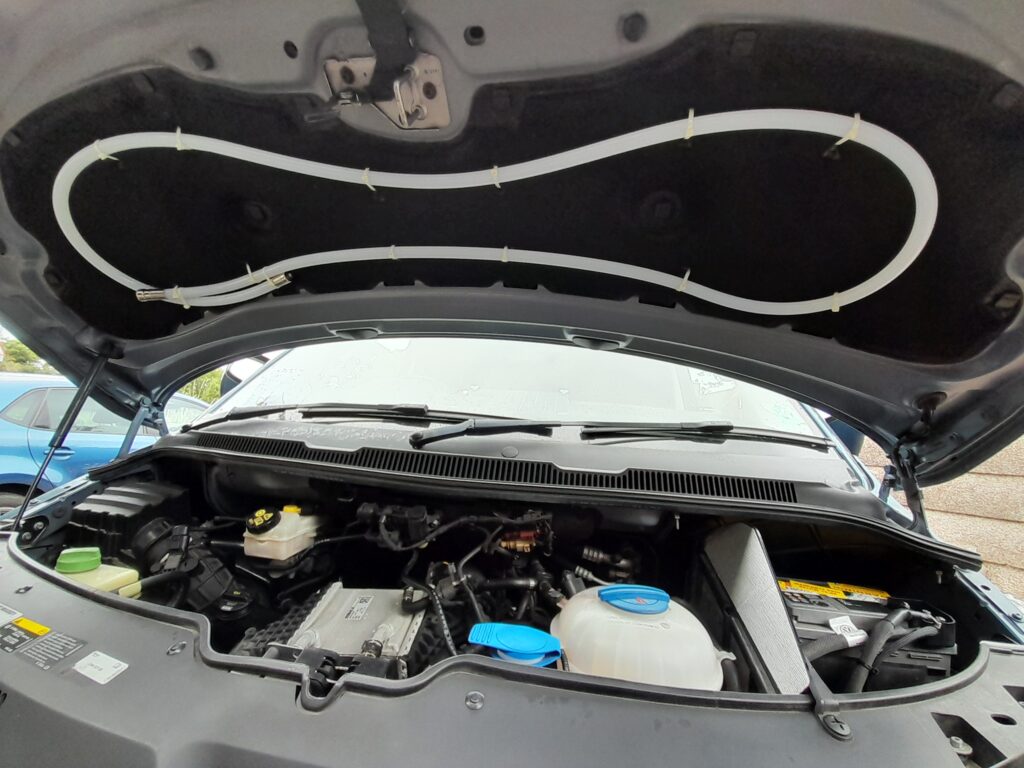
Fitting my competition prize (at last). Quite a while back I was lucky enough to win an Engine Fire Fighter, Automatic engine fire suppression device in one of the club competitions as supplied by our friends at Just Kampers.

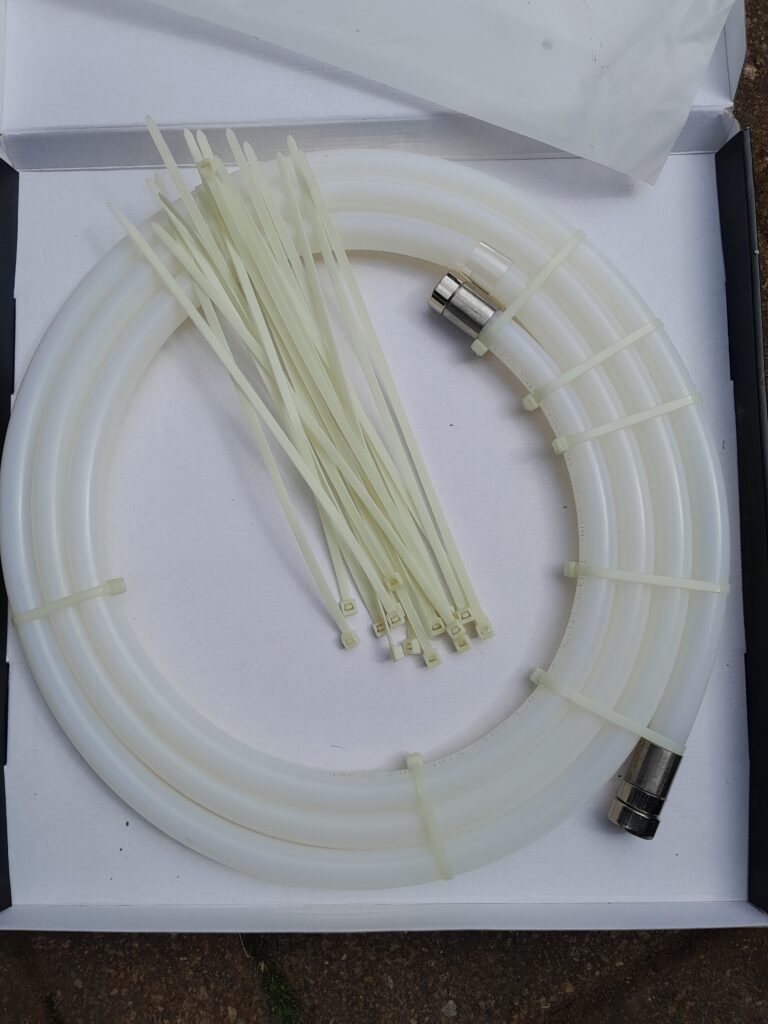
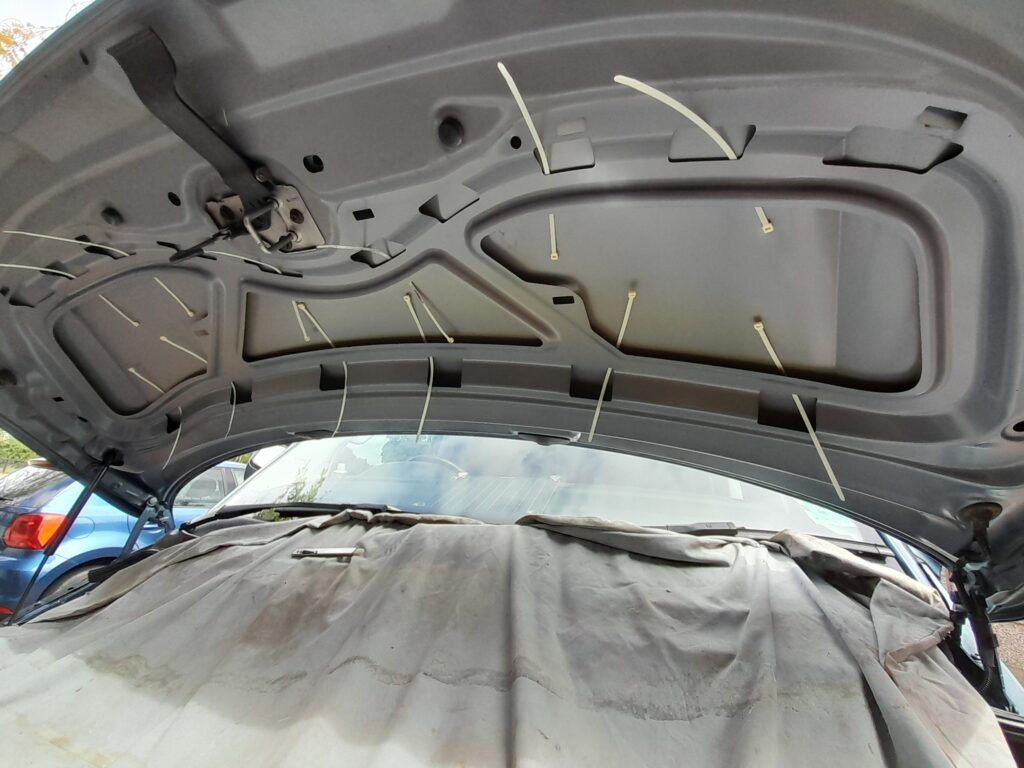
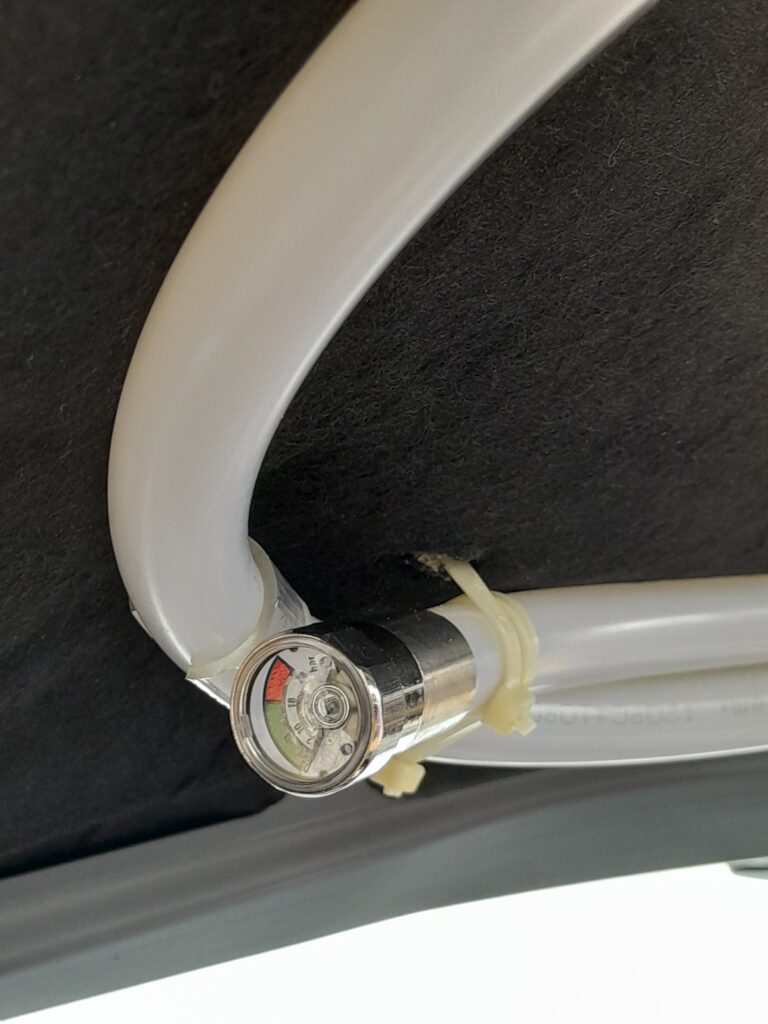
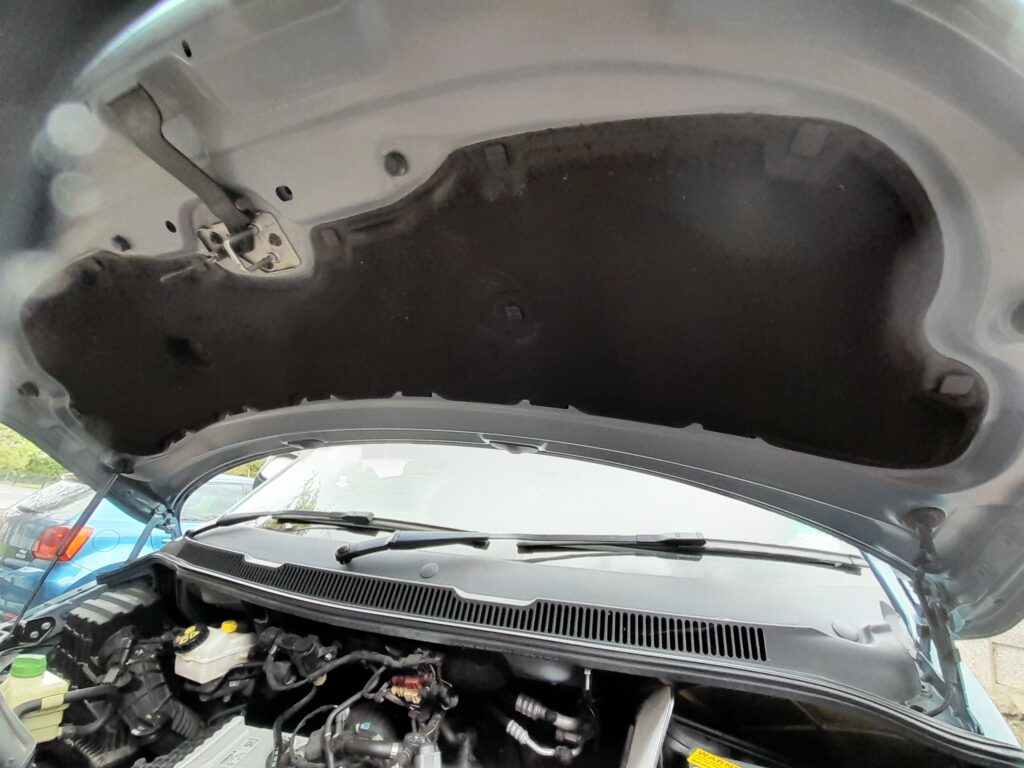
It’s 3m in length, has a burst temperature of 120 degrees centigrade, fire rating class A,B,C,E and only takes five minutes to install (as long as you don’t have to work around other fittings such as an under bonnet insulation pad that is). It’s still not a long job though!

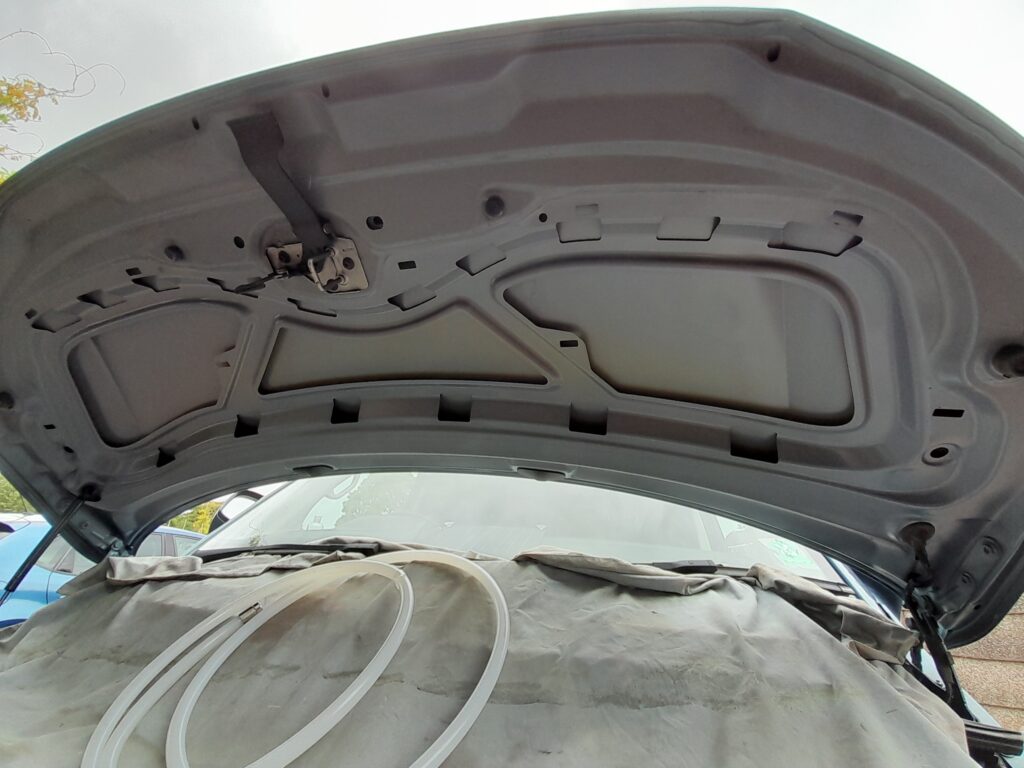
I decided to remove the pad and utilize the bonnet framework to attach the included cable ties to secure the extinguisher to the bonnet. 

It is advised to use these cable ties as opposed to wire because part of their job is to melt in the eventuality of an engine fire and allow the extinguisher to drop onto the engine.

Passing the ties behind the framework wasn’t too hard, although I did have to make some small holes through the factory mastic in a few places. Next, I marked and made holes in the bonnet pad to enable it to be put back in place. This was the trickiest part, achieved by temporarily taping the two ends of each cable tie once passed through the pad and when all were in position I could reattach the pad to the bonnet. It was then just a matter of cable tying the extinguisher into position and hope it’s never called into action. 

Ask The Mechanic – The Ignition System

What the ignition does and how it does it

Within a petrol engine, a spark is required at the exact moment when a gas (of air and petrol) is compressed by a piston. For the spark to exist at all depends upon three essential parts: the distributor, the coil and the contact breaker. There are two electrical components in this system, called the High Tension (HT) and Low Tension (LT) circuits.

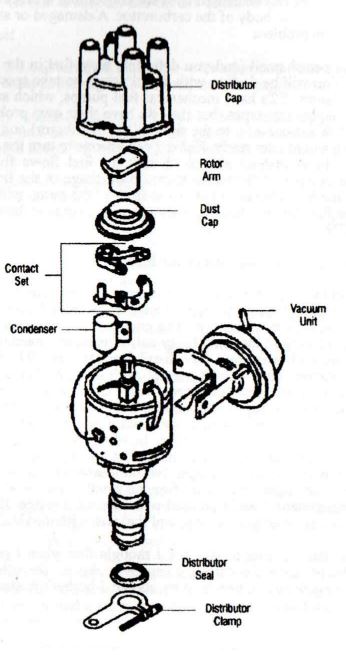
The LT circuit consists of the battery, the coil and the bottom bits of the distributor, namely the contact (with its points) and the condenser. The HT circuit has the spark plugs (and their leads), the top part of distributor, namely the cap and the rotor arm, and the link cable from the coil to the cap.

The coil is essentially two windings of cable; a primary winding of only a few turns of thick wire and a secondary winding of many thousands of turns of finer wire. Initiating voltage to the coil (and starter) is activated by the ignition switch and supplied by the battery. The energy goes directly to the coil’s primary winding, then to the condenser and contact breaker. (The condenser is there to prevent excessive arcing at the points). The primary coil is now active but at an exact moment (when the contact breaker points open), the circuit is broken, and this generates a very high voltage within coil’s secondary winding.

We now begin to follow the HT circuit. From the short link between the coil and distributor, thousands of volts are fed to the rotor arm via a graphite bush, inside the distributor’s cap. Here also are the terminals to all of the engine’s spark plugs. The rotor arm feeds each one in turn as it rotates, again at an exact moment, and the spark plugs receive several thousand volts, arcing across their end terminals.

The HT circuit is completed and an explosion occurs within the cylinder, forcing the piston down.

Ignition fault finding

Symptom – The engine turns over, but doesn’t fire at all.

The chances are that it’s an ignition problem; to make sure, pull a lead off a spark plug, hold it near the engine block and get someone to turn the engine over. A big blue spark means a carburettor (fuel) problem (see later), or defective plugs.

So there’s no spark at all. It’s a good idea now to determine whether fault lies in the Low Tension or High Tension circuit, as this then eliminates a number of variables, saving time.

Pull out the short HT link from the coil terminal and hold it a few millimetres away from its socket. Get someone to turn the engine and watch for a spark. If there is a spark, the HT leads to the plugs or the upper part of the distributor is defective. No spark at all means the coil is suspect and the LT circuit needs testing.

Testing the HT circuit

Put the link back into the coil terminal and remove its other end from the distributor cap. Hold the end close to the engine block and turn the engine over. A weak spark probably means the condenser is short circuiting; don’t mess about with it, it’s irreparable, and easy to replace. No spark at all means the HT link from coil to distributor is defective, or the coil has had it. Replace both.

A strong spark means that we have to apply another test.

Replace the short link into the distributor cap terminal and remove one of the plug leads from the cap, and hold it close to its terminal. Tum the engine over. If there’s no spark, the distributor cap is defective (dirt, moisture or cracks). Ensure the graphite bush and its spring are clean; examine the rotor arm and clean if necessary. Clean the spark plug terminals. If damp, spray everything with WD 40.

If there’s a spark, the leads to the plugs are defective; it is possible that the plugs themselves are also suspect. Take out each lead in turn, hold it close to the engine block, and turn over the engine. If there’s no spark, the HT lead is defective; replace it.

If there is a spark, the plug is defunct; again, replace it.

Dealing with the Low Tension circuit

Notice the term – dealing. Testing the Low Tension side of the distributor and coil requires the use of a test light or meter. If you suspect this is where the trouble lies (after going through the High Tension circuit), it saves time and trouble to just replace the contact breaker points, condenser and maybe the coil (though having no moving parts, it seldom goes wrong). Double-check the wiring; frayed or loose terminals increase electrical resistance, loading the circuit. Sometimes all

that is required is application of a screwdriver, and you’re on the way again. Carrying spare points, condenser and a rotor arm should be as second nature as having a spare alternator belt and bulbs.

Carburettor problems

The carburettor is a precision device and shouldn’t be tinkered with unless you know what you’re doing. Flooding the engine (with petrol) is a very common fault, especially when the vehicle is new to you, or when the engine’s hot. In most cases, all that is required is to rest the engine for a few minutes and try starting again. If the engine fires and splutters, press the accelerator gently (choking). If it still splutters and dies and there’s a definite petrol smell, flooding is the problem.

Repeated flooding can be caused by a sticking choke, a blocked air filter or damage to the float in the body of the carburettor. A damaged or sticking needle valve may also be the problem.

If there’s no petrol smell (and you definitely have fuel in the tank), suspect fuel starvation. You will be dealing with liquid petrol, so take special care with sparks and naked flames. Type 1 upright engines are likely to have mechanical fuel pumps, which are more robust than electrical (diaphragm) types, but they do have their own problems. Find the fuel pump (on air-cooleds, to the right of the distributor) and disconnect the fuel inlet, having a container ready. Either get someone to turn the engine over or do it yourself by hand (safest) and check that the fuel flows from the pump. If it doesn’t, the pump is defective or there’s a blockage in the line or the fuel filter.

Removing the brass hexagon nut at the front of the pump will reveal the pull-out filter. If the fuel line is blocked, a garage will arrange to have the system blown through.

Where am I going wrong? A cry for help.

I have a 1600 twin port in a 1971 T2 camper and average 21 mpg. I drive around at 50-55 mph and don’t go for rapid acceleration. It’s a Devon Moonraker conversion with a low profile pop-top. The engine is a new Veggie replacement, but gives the same mpg as the rattly leaky nail it replaced – much smoother, though.

Timing is set with a strobe – 009 distributor (10 deg BTDC), TDC mark confirmed as correct, plug colour normal with a slight tan coloured deposit and there’s no sign of fuel leaks anywhere. Valve clearances at 0.006 thousandths, checked regularly, but never much adjustment needed and no signs of a misfire; starts well and idles smoothly. New coil, normal carburettor and exhaust (9 months old); tailpipe is always black inside, but no build-up of carbon. The carb has been stripped, cleaned and rebuilt with new float valve, adjuster screws, diaphragms and gaskets with no effect on mpg. No noticeable smoke when driving; oil bath air cleaner looks clean; brakes are free, no smell of petrol when parked, or in the engine compartment; 20w50 oil used with negligible usage. Even on a long run at 55mph I’ve only ever got 24 mpg, and that was with the OLD engine. HELP! !??

Sounds familiar? It does to me; and I thought that when I got round to fitting a 009 distributor, gave the carb a going over and all the things the poster has done, my mpg would improve. Why should I bother? Better to save the money and spend it on petrol!

Why is the mixture so rich – are we to believe that a black inside to the exhaust is normal? (But the plugs seem OK). Can anyone help? Is there something obvious that can be done to improve the mpg that the poster tried? Even if it only improves by 3 or 4 mpg, it’s got to cheer him up, after spending all that money. This guy seems to know what he’s doing, and I sure as hell don’t want to fill the pockets of Shell/Esso/Texaco shareholders while I’ve got my T2.

Vacuum unit

It may seem unlikely, but the answer could lie within this clever gadget on the side of the distributor. The vacuum unit changes the timing of the engine at higher revs giving you a more accurate spark at the time that you need it. This means a better burn, in turn giving the spark at the right time, giving more power, less wasted fuel and therefore better economy.

A worn distributor or the lack of a vacuum unit can be done easily and does not take long for a professional mechanic if you want to outsource it. To buy a brand new SVDA distributor from Accuspark with electronic ignition to dispense with old fashioned points will cost you around £80. This should give you another 3mpg over a non vacuum 009 distributor – more if it is worn!

At 21mpg the fuel is costing you 33 pence per mile.

If the new distributor increases that by 3mpg to 24mpg then the price per mile drops to 28.5p saving you 4.5 pence. Payback on your £80 is in 1,800 miles.

Plus your oil temperature will be slightly lower, what’s not to like?

Ask The Mechanic – Starter Motor

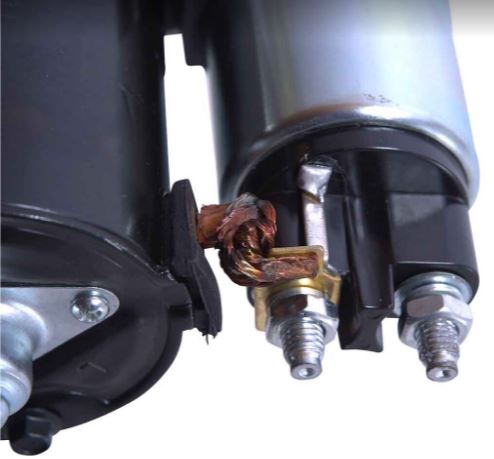
My starter motor does not always engage

Check the Body (Chassis) to Engine (Drive unit) Earth braid, it is 6″ min. & 8″ max long. It is situated underneath the vehicle at the N/S rear, from the diagonal arm axle mounting bracket to a gear casing bolt, (best to replace this braid anyway!)

Also check & clean the following points: –

  • Battery un-insulated braid to body (earth)
  • Battery un-insulated braid to battery (-) Negative post
  • Battery cable to battery (+) Positive post (a 25 mm2 thick black insulated cable) this connects to
  • Starter motor solenoid (connection 30) (this is a ring terminal on a bolt)
  • Starter motor solenoid (connection 30) also has a ring terminal connecting to a 6 mm2 wire having red with white tracer insulation. This connects via a push on ‘250 Faston’ terminal to
  • Fuse box (fuse No. 9) (a brass link joins this to fuse No. 8) so from
  • Fuse box (fuse No. 8) has a push on ‘250 Faston’ terminal connecting to a 4mm2 wire having red insulation. This connects via a push on ‘250 Faston’ terminal to
  • Terminal black ‘T4’ (which has a through connector) so from the other side of
  • Terminal black ‘T4’ a push on ‘250 Faston’ terminal connected to a 4mm2 wire having red insulation. This connects via a soldered connection to
  • Ignition switch (connection No. 30) so from
  • Ignition switch (connection No. 50) a soldered connection to a 2.5mm2 wire red with black tracer insulation. This connects via a push on ‘250 Faston’ terminal to
  • Terminal block ‘T4’ (which has a through connector) so from the other side of
  • Terminal black ‘T4’ a push on ‘250 Faston’ terminal connected to a 4 mm2 wire having red with black tracer insulation. This connects via a push on ‘250 Faston’ terminal to
  • Starter motor solenoid (connection No. 50)

Approximate length of wire between E and N is 13 mtrs varying from 2.5 to 6mm2. Between A and N + starter flange, soldered internal, crimp joints, riveted and loaded switch there are 42 connections and these cause voltage drops!

NOT ALL OF THEM ARE SERVICEABLE!

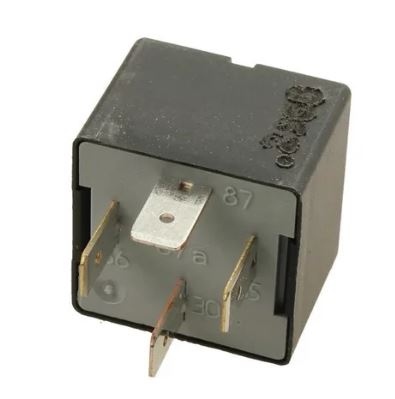
That is an awful lot of cable to navigate. Next time, we will look at simplifying this with a hot start relay system that can be installed in about 30 minutes.

Ask The Mechanic – Servicing a Solex carburettor

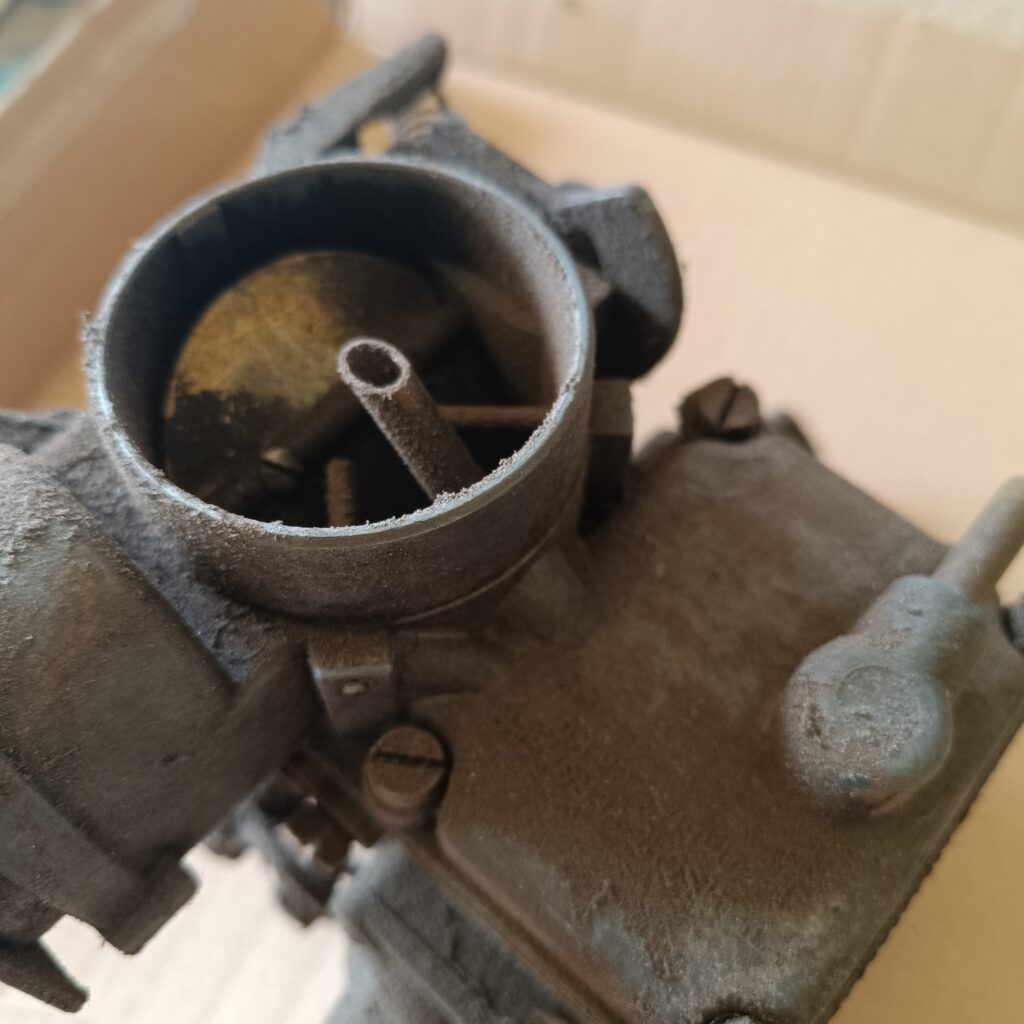
In this issue, we will service a standard Solex carb. Specifically, this one is a Solex 34 PICT3, but the process is very similar for any of the Solex carbs, either single or dual.

Purchasing

Rebuild kit – go to your favourite online store of choice and purchase the Solex carb repair kit, these are available for around £20 at time of going to press. Note, the kit contains the rebuild parts for many sizes of Solex carb, meaning that you will not use all items in the bag! It also usually includes instructions!

Cleaner – Unless you have something else suitable, you should also get a can of carb cleaner. A 400ml can is under £5 and will be sufficient for the task. This should be done in a well ventilated area / outside as carb cleaner is not pleasant and is suspected to be carcinogenic.

Tools

Soft brush (eg toothbrush) – optional
Metal or glass pots for holding parts as they soak, with lids
Medium and small screwdrivers
11mm, 13mm and 14mm sockets
Needle nosed pliers
Pencil

Removing

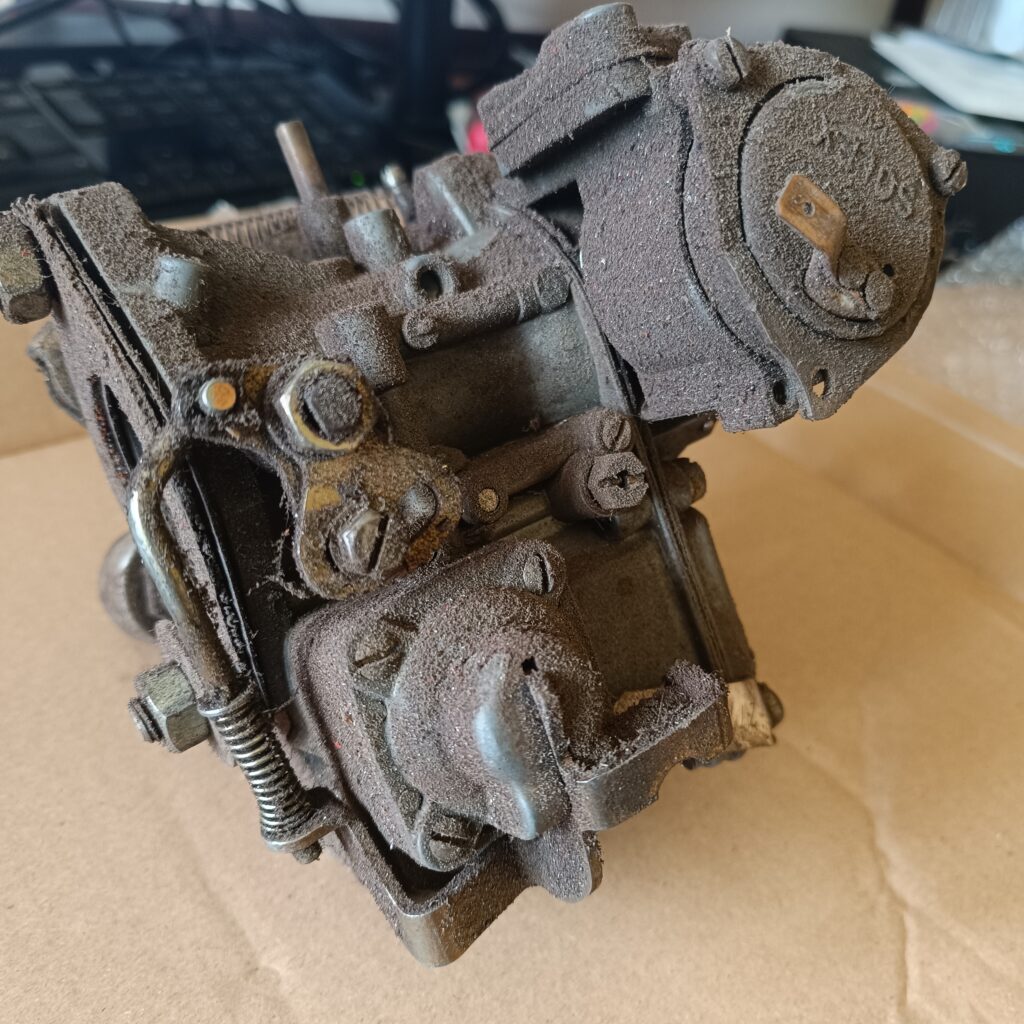
Remove original oil bath air cleaner or after-market air filter. Detach fuel hose and clamp / seal (I use a golf tee peg and cling film), vacuum hose of dashpot (where applicable), and vacuum hose. Disconnect automatic choke cable, bypass air cut-off valve cable (where applicable), and electro-magnetic pilot jet cable. Detach accelerator cable at throttle valve lever and ensure that you tie it off otherwise it pops into the cable channel and disappears. I use a clothes peg to hold where the cable disappears into the fan shroud. Remove two nuts on intake manifold and lift off the carburettor.

Disassembly

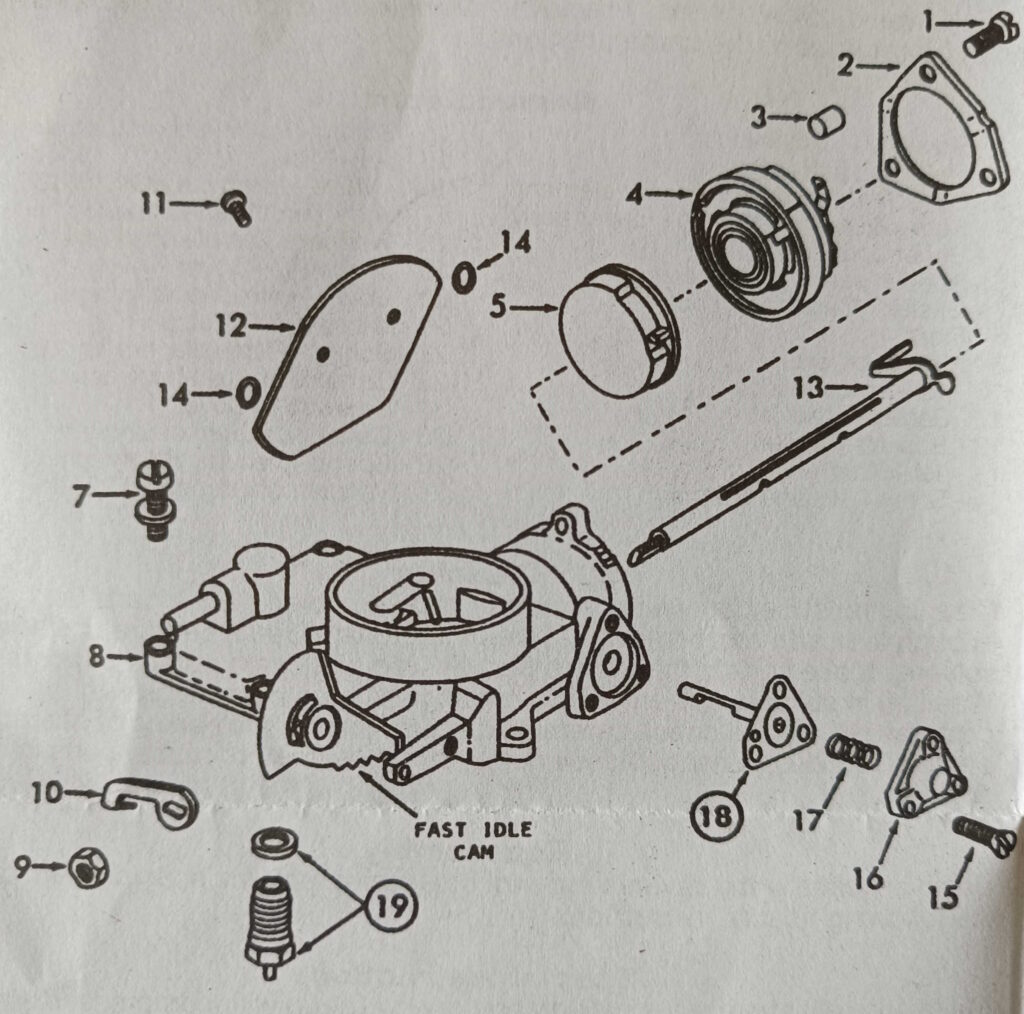
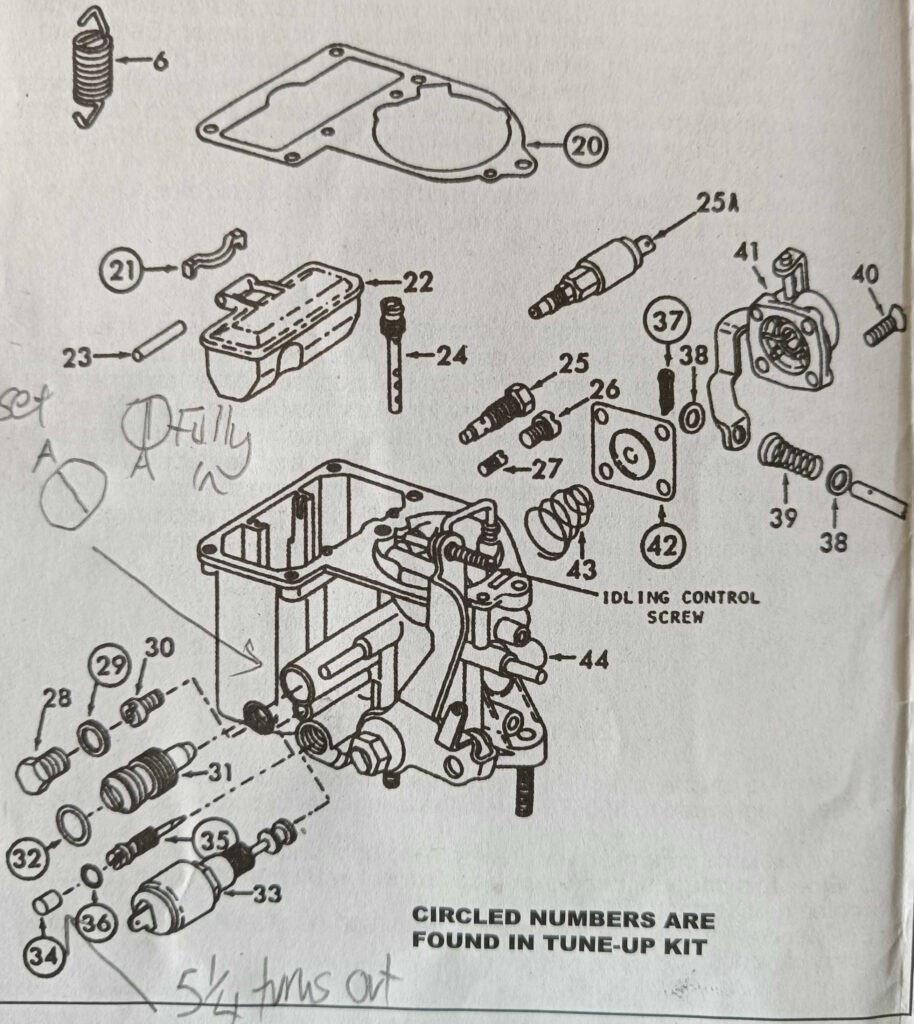
Use exploded view as a guide only.

Carb parts list

1 – Screw (3) – Retaining ring
2 – Retaining ring – Cover
3 Cover with spring and heater element
4 Screw & lock washer (5) – Upper body
5 upper body assy.
6 Needle, seat & gasket assy.
7 Gasket Carburettor
8 – Float
9 – Pin Float lever
10a- Jet Air correction
11 Carrier Main jet
12 Gasket — Carrier
13 Jet- Main
14 Screw Volume control
15 – Spring – Volume control screw
16 – Jet – Pilot
16A – Valve Idling cut0ff (30PICT -1 only)
17 – Nut – Throttle shaft lever
18 – Washer – Throttle shaft lever
19 – Screw (4) – Cover
20 – Cover – with lever & linkage
21 – Diaphragm – Pump
22 – Spring – Pump diaphragm
23 – Carburettor main body assy.
24 – Screw (3) – Cover
25 – Cover – Vacuum diaphragm
26 – Spring – Vacuum diaphragm
27 Vacuum diaphragm – Choke

Cleaning

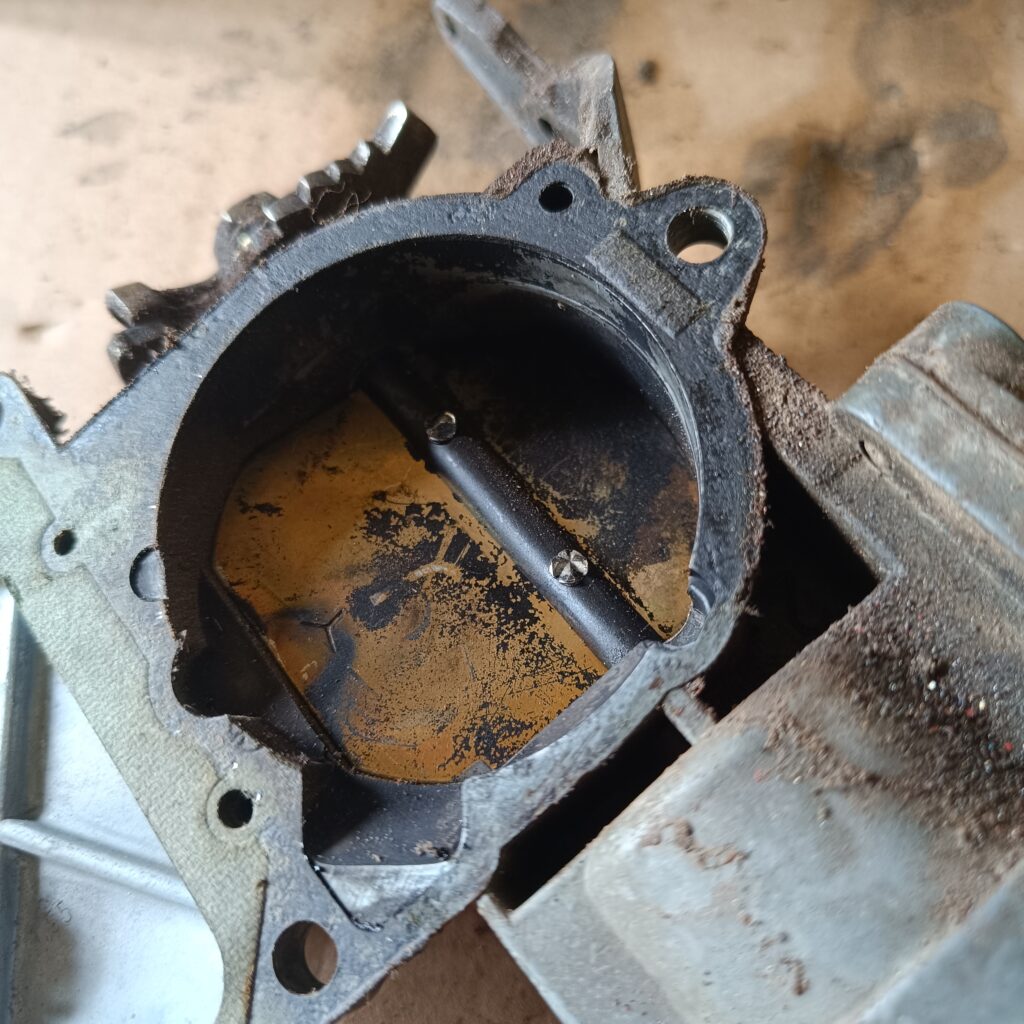
Cleaning must be done with carburettor disassembled, soak parts long enough to soften and remove all foreign material, Use a carburettor cleaning solvent. Make certain the throttle body is free of all hard carbon deposits, wash off in suitable solvent. Blow out all passages in castings with compressed air and check carefully to insure thorough cleaning of obscure areas. Caution: do not soak solenoids, switches, float, or rubber parts in solvents.

Instructions

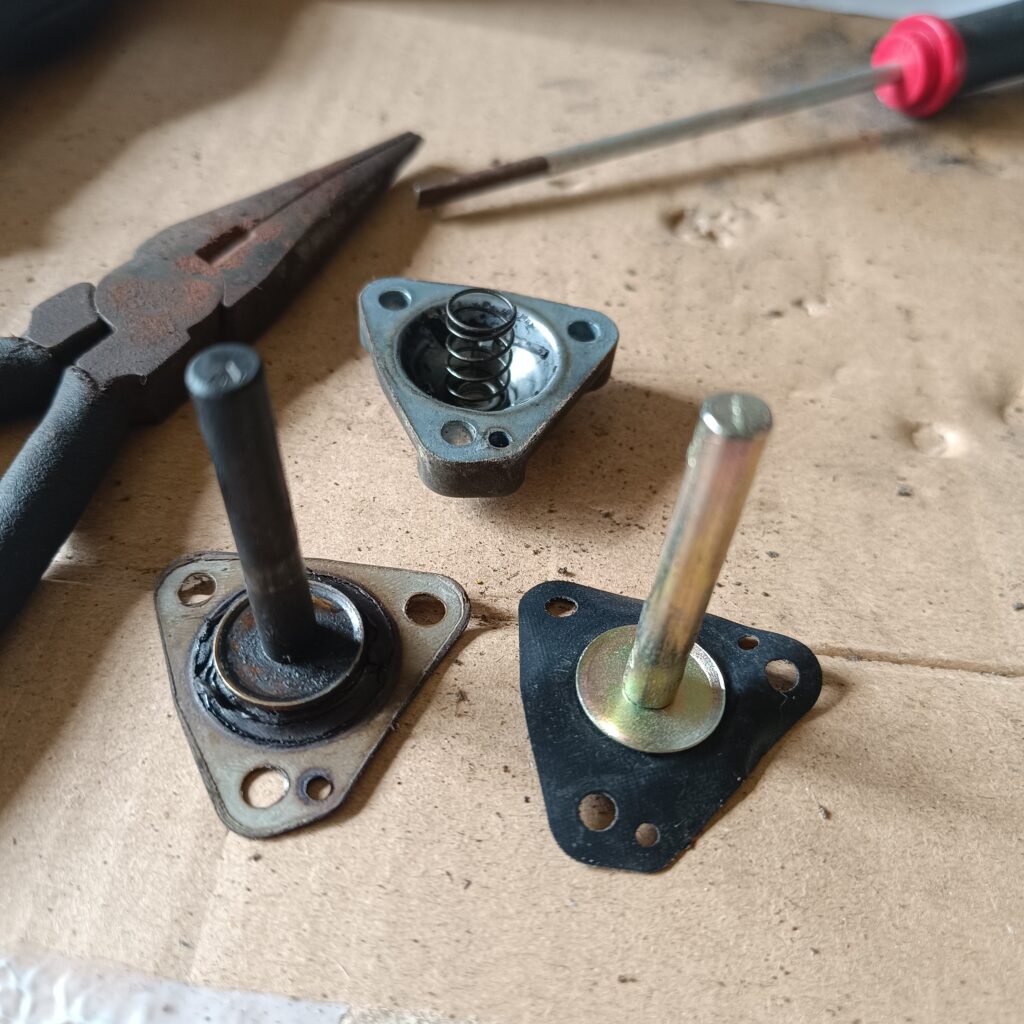
Make sure all jets are clean and open. Clean with compressed air, not wires or pipe cleaners. When installing the pump diaphragm and spring (22) make sure the larger end of spring is properly seated in the carburettor body cavity. Be sure to install the diaphragm (21) with plunger toward pump cover (20). Check for a worn spot (Depression) on the float lever where it contacts the fuel inlet needle valve, replace float assembly, if necessary, float assembly may be purchased at your local VW dealer, P/N 111-129-391A-Round Shaped Float. A proper needle seat gasket must be used for specific carburettor. Use the following chart to determine the correct gasket.

Carburettor model

28 PICT-I. -2 1.0 MM .040″

30 PICT-I 1.0 MM .040″

Check the thermostatic spring in housing (Item #3) for damage. If it is distorted or “kinked,” replace the assembly. Also, make sure the electrical heating element is not broken, This can be checked with an ohmmeter or connected to a correct voltage battery for a few minutes to see if it warms up.

(Be sure to ground the inside metal part of the housing to complete the circuit). When installing assembly with spring and heater element, carefully rotate assembly counterclockwise, being sure the hook-on coil end engages with the lever on choke shaft. Continue rotating approximately 1/8 – turn more until index marks align. Then tighten screws securely.

Installing

Install in reverse order of removing. Torque retaining nuts to 2.0 MKG. (14 Ft Lb.)

Idling Adjustment

28 PICT, -1, -2. 30 PICT -1, -2.
A. Warm up engine; check if the automatic choke is fully open.
B. Set idling speed to 850 RPM with the idling control screw (See exploded view).
C. Turn volume control screw (Item #14) to right until speed starts to drop.
D. From this position, turn volume control screw (Item #14) to the left until engine runs fastest.
E. If necessary, regulate the engine speed (800-900 RPM) again with the idling control screw.

Focus on Discounts – The VW Engine Company By Nick Gillott

With Poppy’s engine having a lot of end float (no, I don’t know what that means either), we decided that since we are planning to keep her for a good while longer, we will take the plunge and replace the engine. I do not have the tools or the skillset to rebuild an engine, and our regular mechanic has the skillset but does not do it, since he cannot afford to guarantee his work and the pricing would be far above his preferred engine shop.

Since his preferred engine builder is also one who offers a discount to club members, I decided to visit them in person to see their operation and help our members on what can be done. Read about Poppy’s engine later this year in your club magazine!

It was a drizzly day as I trekked around the M25 to a quiet part of the Kent countryside in Keston near Biggin Hill. The VW Engine Company has a big operation in a custom-built set of units accessed by security gates. Outside the main doors are about 10 camper vans shapes under cover, mostly customer vehicles, along with several full metal recycling bins filled with old cylinder heads, barrels, pistons and other parts that do not get reused.

Main reception is big and welcoming with a big rack of twenty and more finished long block engines in plastic bags ready to go. James and Patricia met me and offered me a very welcome cup of tea.

James is now a Director of the company that was set up by his Dad Keith and his Mum Patricia in 1979. Patricia is still working 2 days per week, and Head of Engineering Adrian Perkins joined in 1981 and is still there the other 3 days per week – the original members ensuring continuity, sharing the passion and commitment and keeping the young members on track, I suspect!

From main reception, we went into the first workshop but that is the end game and I asked to have the tour forwards not backwards, as it just makes more sense.

The first room is for customer engines inbound. As we went through, one air-cooled and one water cooled engine were being disassembled by two of the team, Louis and Jay. Then the stripped cases can be washed in the two big cleaning machines. Hundreds of jets wash them all (they can cope with more than a dozen engines at a time) with water and degreasant to remove as much surface muck as possible. The cases are then cleaned by hand with a manual wire brush to avoid getting dirt into the journals and galleries before being inspected and measured to confirm if the crankcase can be reused. Once the case has been reworked several times in its life, the key sections become too worn to be useful and around 30% of cases coming in now fail the test and go out to scrap. The crankcase, crankshaft, connecting rods, push rods, rocker assemblies, distributor drive try to get reused, everything else from the long block is recycled! Almost nothing in their operation ends up in landfill, which is great.

From there, we went into a largest and clearest room. Another two of the team, Sam and Roberto were working on the turnkey engines of 2 Bay window customer vehicles. You can drive over to their place in your pride and joy, have the team remove your engine, work on it, test it, install it again and you drive away! This is a very popular way of doing things and their sheer experience means that you not only get one of their great engines, but you also get their knowledge on putting the rest back on. A good proportion of “problems with engines from the VW engine company” are not down to the long block engine supplied but the way that the rest of the parts are installed by other people!

The team are offering additional services this year of engine servicing as well as rebuilding. Again, their experience means that those niggly issues with your engine can be addressed by people who live and breathe these machines. This is for Beetle engines, Splitscreens, Bay windows and T25s but petrol engines only. Everything from a 1300cc up to some huge 2.3 litre beasts if that is what you want.

Next over is the storage racks of cleaned, painted and tested crankcases, with around 20 on the rack ready to build up. This is also where they check the crankshafts, machining them if required and repair the edges of the cases if they have damage where they need to be bolted to other components.
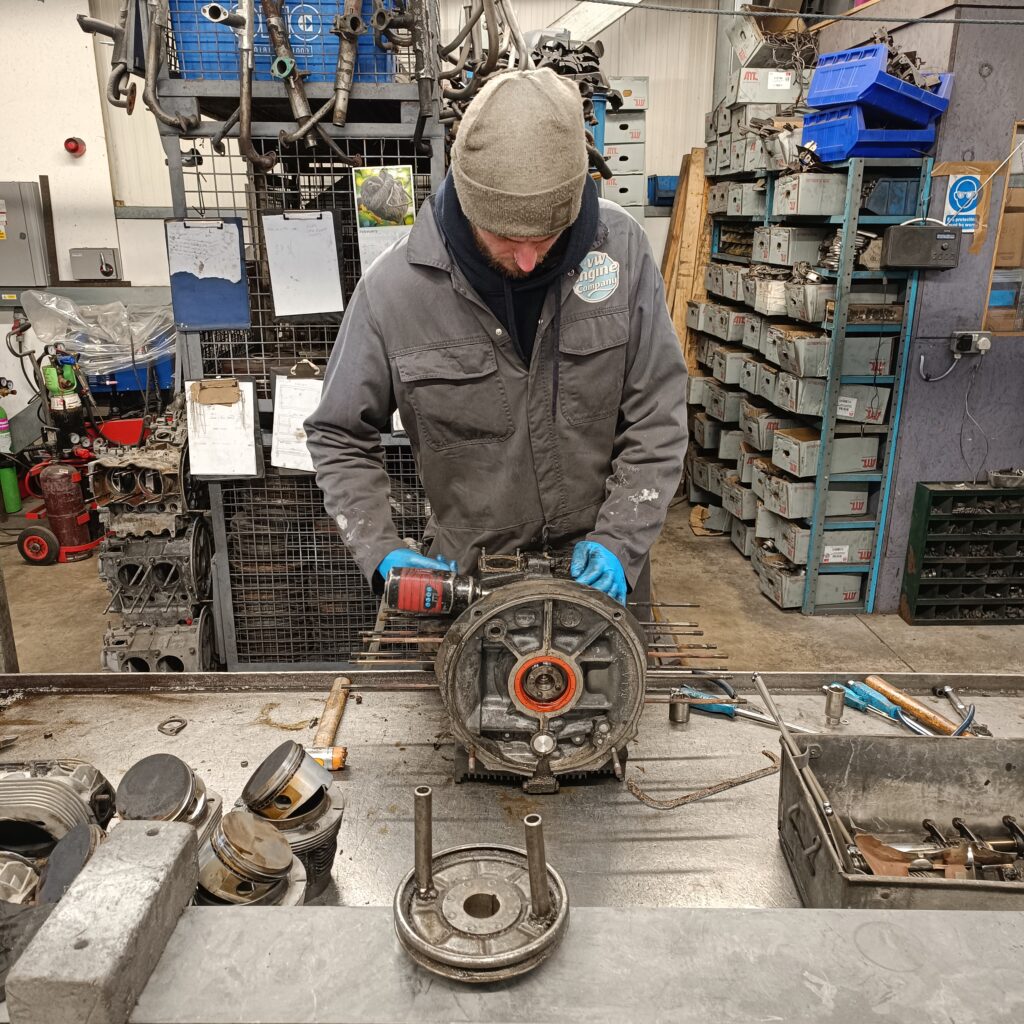
Once the case has been chosen, machined if required for larger heads and if ready, it goes to the engine build room. Sam who was doing customer engine work is normally in here building engines but today instead it was Michael, preparing engine heads and putting the final touches to another customer engine and cold testing yet another. The testing also allows them to measure oil pressure and record cylinder compression levels (James to confirm I got that right) in their high-tech A4 diary. You don’t need technology for everything, and it is much easier than having to start up a computer each time! To test the paper trail, we looked at Poppy’s engine, noted the engine number and looked it up in the book. The engine was built on Friday 27th October 2023 by Sam, and we can see the test results.

Back out to main reception, James then showed me the warehouse storeroom where there are over 150 engines all finished as long blocks, sitting on pallets, and bolted inside metal frames to keep them protected. These are ready for shipping and the number is very high at the moment as the season is about to start and they simply cannot keep up with spring demand otherwise!

With these pallets, you can order the long block and have it delivered to your house or your local mechanic. The engine can then be removed from your vehicle and stripped of the tinware, fan, alternator, fuel pump, distributor, oil cooler and so on. The new engines are supplied with a new oil cooler though. Then rebuild those parts onto the new arrival and fit back into the vehicle. Then the old block complete with rocker covers at each end can be bolted into the metal frame on the pallet and the VW engine company will arrange for the pallet to be shipped back to their HQ for rework. And do the process begins again. I was surprised to find that shipping the engine to you and the old one back to them comes to a total for both journeys of just £168! Given that they are inside the ULEZ zone at £12.50 for older vehicles and I used the Dartford crossing both ways, I spent a good chunk of that heading over there myself!

On the turnkey side, if you rock up with your vehicle, they can also offer extra bits – refinishing your tinware to get it looking good, a new 123 distributor, upgrade to electronic ignition if you want to retain the distributor, add an electronic fuel pump. Almost anything can be done there.

As you can tell, this is an impressive operation filled with passionate experts, helping to keep our vehicles running properly. This is not a budget operation, and the word-of-mouth recommendations are extremely strong.

Example prices to our club as we go to press are:

A 1641cc long block engine with a reconditioned crank case = £2,200+vat

A 1641cc long block engine with a new crank case = £2,700+vat

A 1776cc long block engine with a new crank case, big valve heads, mild road camshaft = £3,400+vat

These prices are based on an exchange process with your old engine. During this interim period a surcharge deposit is held of £400+vat. Once your old engine is returned this deposit can be refunded. In the event of your old engine not being “serviceable” they will contact you to explain, send pictures if necessary and a proportionate value of deposit may need to be retained which is understandable.

Knowing what I know now about their operation, I’d have had Eric the Viking’s engine done here. Poppy’s engine was swapped by our local, tame mechanic but in fact, driving Poppy over to Biggin Hill, the team could have done it all for me.

 James and I loaded Poppy’s shiny, new 1776cc engine into the boot of my car and I headed off to Aylesbury to see Poppy and deliver it to our mechanic ready for reinstallation. All engines come with a 12-month unlimited mileage warranty. Not that I expect to need that – these are built with the best quality parts, sourced from America, Brazil, Denmark amongst others to give longevity of your new engine to ensure that you get as much time with it as possible.

Instead of getting your local mechanic working on your engine that has not run correctly for many years, consider taking it to James and the team. Or take the vehicle and have them change the engine. Or they can just supply the main part of the engine for someone else to do the fun bits. Whatever you choose to do, don’t forget to mention your membership of the club to get the discount that varies depending on which engine you need.

Example prices for a turnkey solution where you take your vehicle over (club prices, not available to the public) are:

Turnkey Service £595+vat (transfer all of your engine’s bits from the old to the new engine)

Basic service parts (oil, fan belt, fuel filter, ancillary nuts and bolts etc) £70+vat

Engine removal and refitting £495+vat

Plus any potential ancillary replacements that may be required or that you may wish to be replaced at the same time.

Lead times depend on the time of year but would be typically 3 to 8 weeks’ notice, and your vehicle would need to be with them for about 2 weeks.

My thanks to James, Patricia and the team at the VW Engine Company for showing me around and helping me to understand in depth about the operation and what they can offer us.
Ask The Mechanic – Replacing the pushrod tubes by John “Undie” Underwood

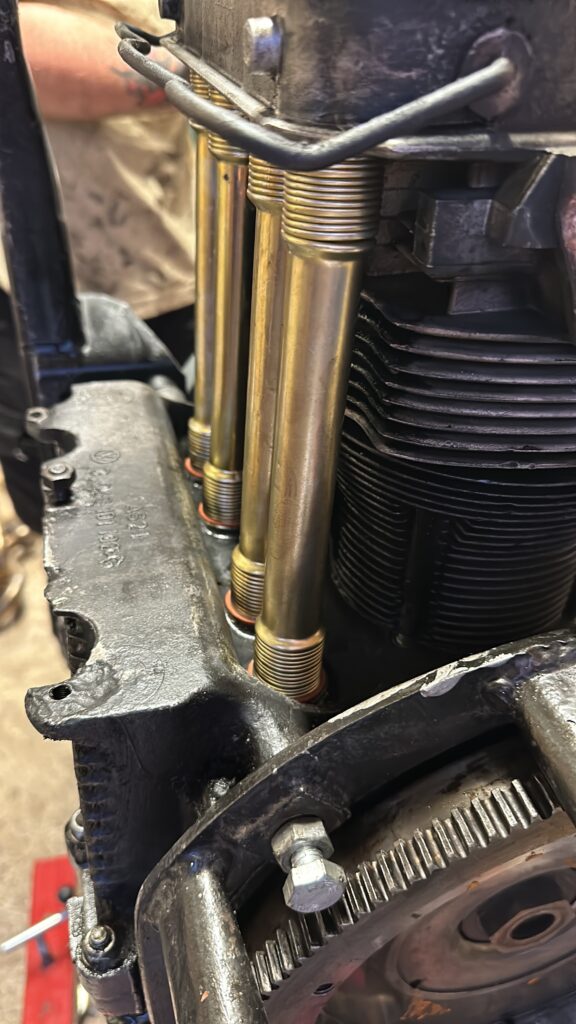
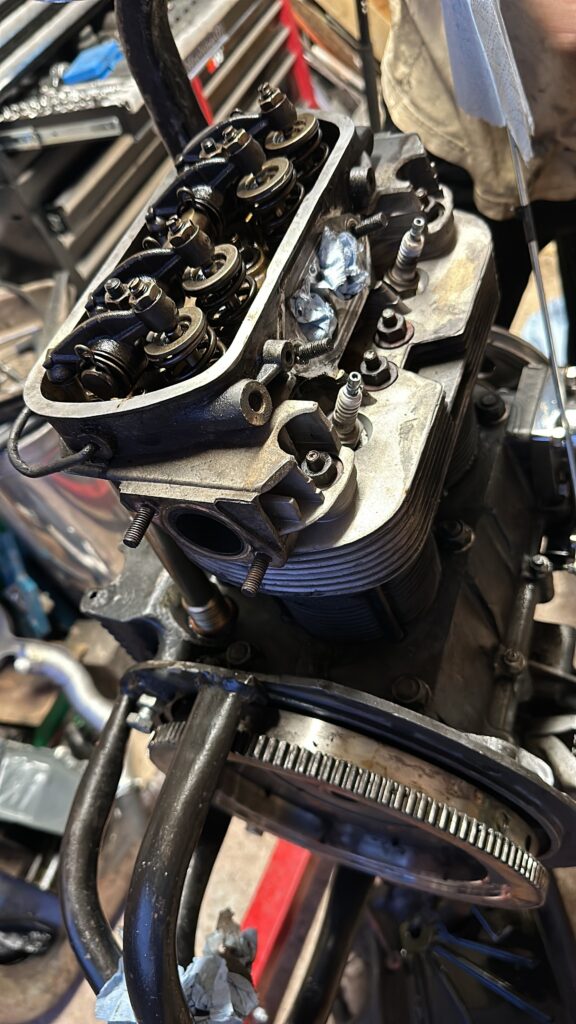
Hey guys here’s one that’s not for the faint hearted. Pushrod tube replacement. It’s something I have been putting off for ages and one that needed addressing as the oil leak was getting progressively worse. I’m very lucky to have a neighbour who loves to tinker and a brother-in-law (sun seeker Betti) to offer to help and advice. Or if I’m being honest show me how to do. Not knowing how this will go is always daunting but we got the engine out and mounted onto the stand. (Believe me without this it would have been nigh on impossible). Then this is where I realised that it wouldn’t be an easy or straight forward job, I had to remove the heat exchangers and manifolds and fan housing to give me adequate access to remove the rocker cover and the heads to get to the pushrods.

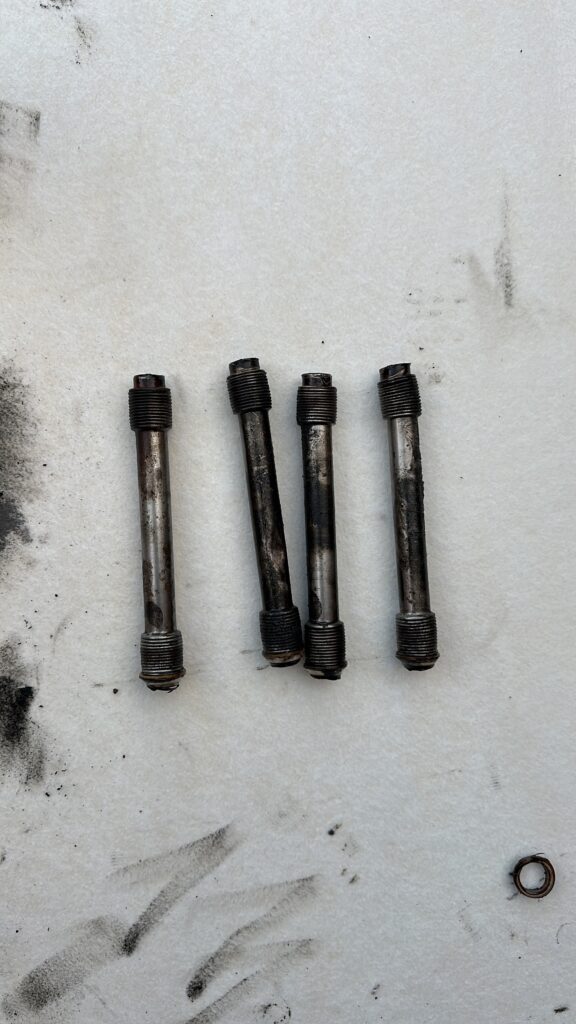
Once all this has been removed and tappets and pushrods removed and cleaned and put in an order ready to go back could we start the removal of the old pushrods. This was the state of the driver’s side.

Bent at the top and slightly kinked, no wonder there was an oil leak!
The new pushrods tones were fitted using some copper gasket seal and new seals and repeated on the other side and the pushrods and tappets replaced.

And all case fitting put back together ensuring the nuts were done to the correct torque and sequence, something I knew nothing of, so I am glad that my neighbour did ! This is very important as you don’t want to tighten down wrongly as the case won’t sit perfectly. Or the pushrods sit correctly into the slots. Now this has been done time to set the correct tappit distances, definitely a two person job as you have to understand the firing sequence in order to set these correctly, so one turning the engine to get the pushrods in the correct location ie Top dead centre on crank to give piston 1 and rotating 180’ to bottom dead centre on piston four and so on through the sequence while the other sets the distance and locks it in each time the crank rotates.

 
Like most things on our beloved vans, once you take one thing apart you realise something else needs addressing, and yes this was the case for me! Main seal to the clutch needed changing along with the bar that holds the gear box to the chassis needed to be fitted as it was completely missing.


Now everything is in place and securely sealed and torqued up the exhaust manifold fitted and engine back in. All this in three days and before Busfest! But yes there’s always a but! The journey up and back of about 70 miles proved to be a warmup as when we got back, I could sense the engine was not right, you get to know after a while of working and driving these vans, and yes jacked the van back up removed the wheels and the rocker covers and checked the tappet distances. They were miles out, so redone them back to the correct setting and resealed the rockers let it set in overnight checked the oil again and relax, all’s good in the engine and she sounds sweet.

Inspect A Gadget – Exhaust wrap

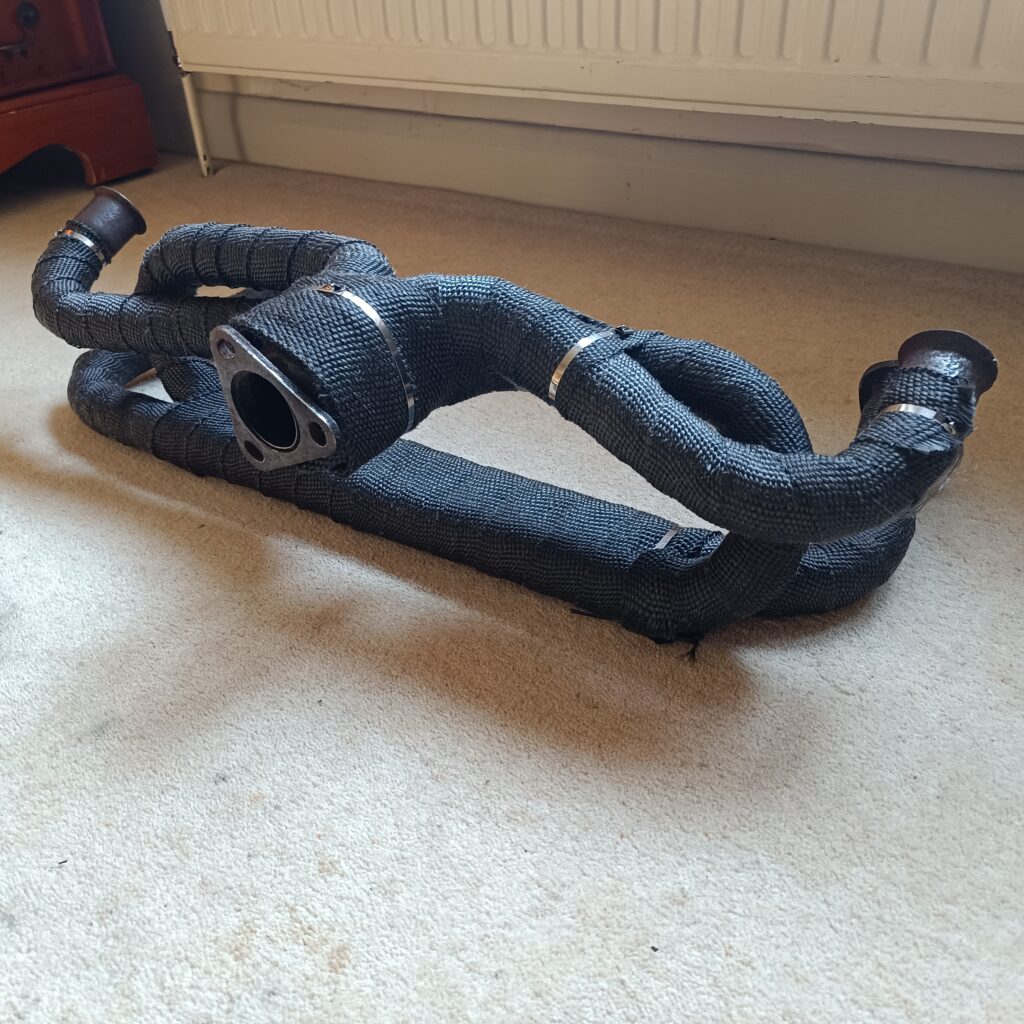
This issue’s gadget is “exhaust wrap” or “exhaust bandage”. Engines get hot – air cooled or water cooled, it doesn’t matter – there is heat being generated from the combustion of fuel and getting the heat away is a key part. With the exhaust being in close proximity to the engine and the by products coming out of the exhaust, it naturally gets hot and the radiating effect means that anything nearby is heating up.

The bandage wrap acts as an insulator, keeping the heat inside the exhaust, thereby keeping the heat away from around the engine. Even if it is only a small benefit, it is a benefit. It also looks nicer than a slightly rusty exhaust manifold.

The wrap is easily available from motor factors and online and costs between £10 and £20, there are a lot available and most comes with metal ties to make a neat job.

Removing the exhaust manifold is optional but was done on this one as the engine was out of the vehicle. Starting at any end, start wrapping the bandage around the manifold tightly trying not to get too many layers on any section. As you get to a suitable point, use one of the ties to stop it unravelling – the start will be kept in place as it is under the next row BUT it is easy at this point to tie that one off as well for completeness. You can wrap it as neatly as you wish, you may as well use all of the ties that come with it.

Some of them are glass fibre or have other heat retardant materials that can make your hands itch, so take suitable precautions.

It certainly looks nicer afterwards!

Inspect A Gadget – Portable projector by James Reeves

Some people like a TV in the camper van for those longer, darker evenings when there is no club marquee to sit and natter. Others like it for specific events such as Wimbledon (which we put on the club TV by the way).

Another option instead of the TV is to use a portable projector. James and Marina Reeves, part of our supportive management team introduced us at a recent event to the Anker Nebula capsule, miniature projector. Just 6 inches / 15 cm high, this little cylinder has a built in battery that lasts 1.5 hours in standard mode and up to 4 hours otherwise. At 200 ANSI lumens, it does really need a dark evening but can project an image from its tiny cylinder onto any flat surface – a 40 inch (1 metre) diagonal picture from 4 feet away (1.14m) up to a colossal 100 inch (2.5 metres) diagonal picture when the surface is 3 metres / 10 feet away. We tried it on a planked shed and it looked incredible.

You can stream anything from YouTube and Netflix, plug in a USB stick with movies on it, there is even a remote control!

The Anker Nebula retails around £320.